


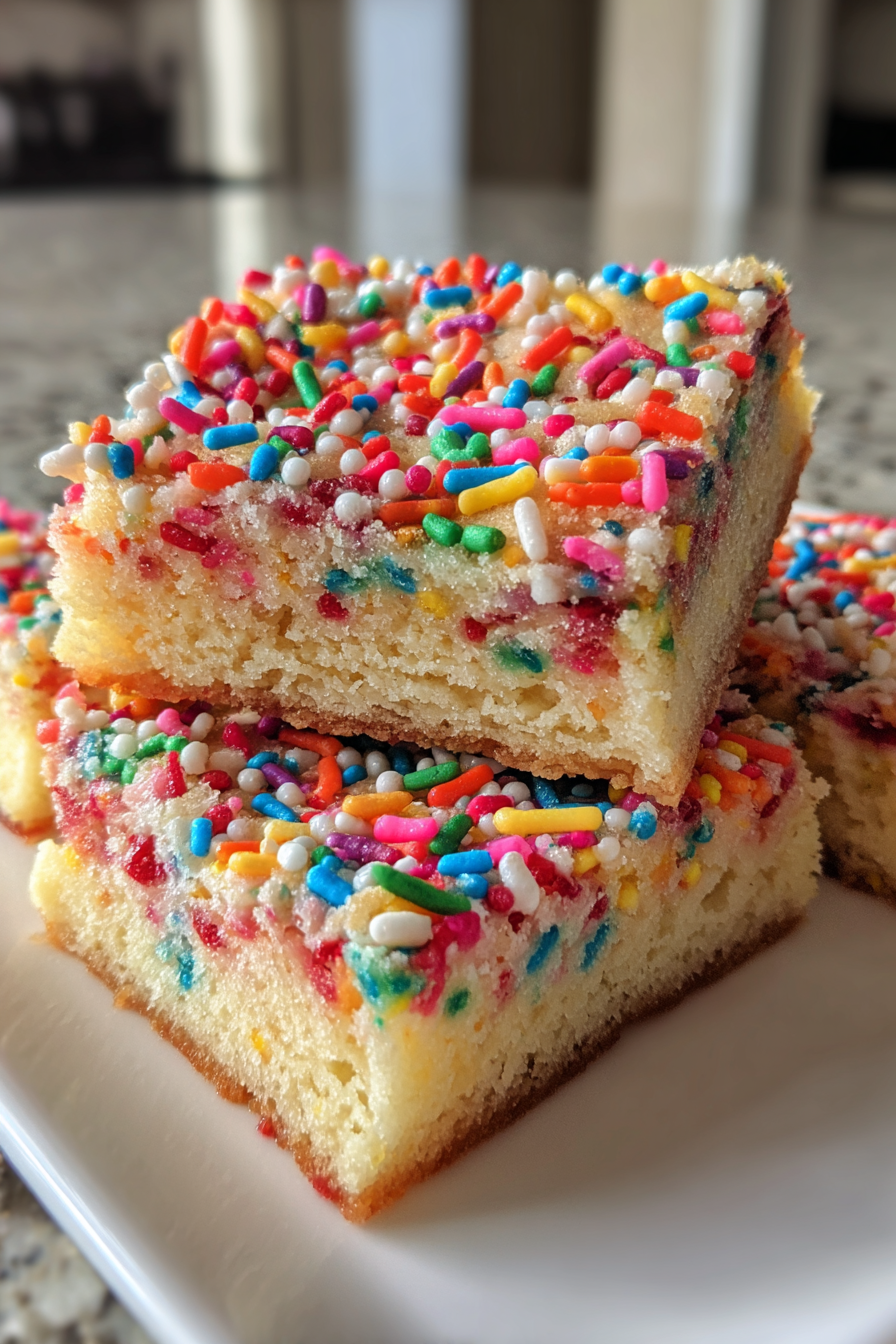
Birthday Cake Cookie Bars
There’s something magical about a sweet treat that brings joy to any occasion, and these Birthday Cake Cookie Bars are just that! Whether you’re celebrating a special day or simply looking for a delightful dessert to brighten your week, these bars are a quick solution for busy moms and professionals alike. With their vibrant sprinkles and creamy white chocolate chips, they’re sure to impress your loved ones. Plus, they’re easy to whip up, making them perfect for those last-minute celebrations or cozy family nights. Let’s dive into this delicious recipe that’s bound to become a favorite!
Why You’ll Love This Birthday Cake Cookie Bars
These Birthday Cake Cookie Bars are not just a treat; they’re a celebration in every bite! They’re incredibly easy to make, requiring minimal effort and time, which is perfect for busy days. The delightful combination of sweet sprinkles and creamy white chocolate creates a flavor explosion that both kids and adults will adore. Plus, they’re perfect for any occasion, making them a versatile addition to your dessert repertoire!
Ingredients for Birthday Cake Cookie Bars
To create these delightful Birthday Cake Cookie Bars, you’ll need a handful of simple ingredients that you might already have in your pantry. Here’s what you’ll need:
- Unsalted butter: This is the base of your cookie bars, providing richness and flavor. Make sure it’s softened for easy mixing.
- Granulated sugar: Adds sweetness and helps create a chewy texture.
- Brown sugar: Packed with moisture, it gives a deeper flavor and a hint of caramel.
- Eggs: They bind the ingredients together and add moisture, making the bars soft and chewy.
- Vanilla extract: A must-have for that warm, comforting flavor that enhances the sweetness.
- All-purpose flour: The main structure of your bars, providing the perfect base for all the deliciousness.
- Baking powder: This leavening agent helps the bars rise and become fluffy.
- Baking soda: Works alongside baking powder to ensure your bars are light and airy.
- Salt: Just a pinch enhances the flavors and balances the sweetness.
- Sprinkles: The star of the show! They add color and a festive touch, making these bars perfect for celebrations.
- White chocolate chips: These creamy morsels melt beautifully and add a sweet, rich flavor that pairs perfectly with the sprinkles.
Feel free to customize your bars with different types of chips or sprinkles to suit your taste! For exact measurements, check the recipe card at the bottom of the article, where you can also find a printable version.
How to Make Birthday Cake Cookie Bars
Step 1: Preheat and Prepare
Start by preheating your oven to 350°F (175°C). While it warms up, grab a 9×13 inch baking pan and grease it well. This step is crucial to ensure your Birthday Cake Cookie Bars don’t stick, making it easier to cut and serve later. A little butter or cooking spray works wonders!
Step 2: Cream the Butters and Sugars
In a large mixing bowl, combine the softened unsalted butter, granulated sugar, and brown sugar. Using a hand mixer or a sturdy spatula, cream them together until the mixture is smooth and fluffy. This process incorporates air, giving your cookie bars a delightful texture that’s both chewy and soft.
Step 3: Add Eggs and Vanilla
Next, add the two large eggs and the tablespoon of vanilla extract to your creamed mixture. Mix everything together until it’s well combined. The eggs will help bind the ingredients, while the vanilla adds that warm, inviting flavor that makes these bars irresistible!
Step 4: Combine Dry Ingredients
In a separate bowl, whisk together the all-purpose flour, baking powder, baking soda, and salt. This step ensures that your leavening agents are evenly distributed throughout the flour, which is key for achieving perfectly baked Birthday Cake Cookie Bars that rise beautifully in the oven.
Step 5: Mix Wet and Dry Ingredients
Gradually add the dry ingredients to the wet mixture, stirring gently until just combined. Be careful not to overmix; you want to keep that light texture. The dough should come together nicely, ready to be transformed into delicious cookie bars!
Step 6: Fold in Fun
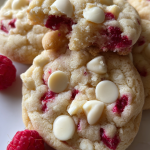
Now comes the fun part! Gently fold in the colorful sprinkles and white chocolate chips. This is where your Birthday Cake Cookie Bars get their festive flair. The sprinkles add a pop of color, while the chocolate chips bring a creamy sweetness that complements the bars perfectly.
Step 7: Spread and Bake
Spread the cookie dough evenly into your prepared baking pan. Use a spatula to smooth the top for an even bake. Pop it into the preheated oven and bake for 25-30 minutes. You’ll know they’re done when the edges are golden brown and a toothpick inserted in the center comes out clean.
Step 8: Cool and Cut
Once baked, remove the pan from the oven and let it cool for a bit. This cooling time is essential for the bars to set properly. After about 10-15 minutes, cut them into squares and serve. Enjoy the delightful taste of your homemade Birthday Cake Cookie Bars!
Tips for Success
- Use room temperature butter for easier creaming and a smoother texture.
- Don’t overmix the dough; mix until just combined for the best texture.
- Let the bars cool completely before cutting to avoid crumbling.
- Experiment with different types of sprinkles or chocolate chips for unique flavors.
- For a festive touch, consider adding a drizzle of frosting on top!
Equipment Needed
- 9×13 inch baking pan (a larger or smaller pan can be used, but adjust baking time accordingly)
- Mixing bowls (one large and one medium)
- Hand mixer or sturdy spatula (a whisk can work in a pinch)
- Measuring cups and spoons
- Spatula for spreading the dough
Variations
- Healthier Option: Substitute half of the all-purpose flour with whole wheat flour for added fiber and nutrients.
- Vegetarian Delight: These bars are already vegetarian-friendly, but you can make them vegan by using flax eggs and dairy-free chocolate chips.
- Gluten-Free: Use a gluten-free all-purpose flour blend to make these bars gluten-free without sacrificing taste.
- Spicy Twist: Add a pinch of cinnamon or nutmeg to the dry ingredients for a warm, spicy flavor that complements the sweetness.
- Extra Indulgent: Drizzle melted chocolate or cream cheese frosting on top for an extra layer of sweetness and decoration.
Serving Suggestions
- Pair with a scoop of vanilla ice cream for a delightful dessert experience.
- Serve alongside fresh fruit, like strawberries or raspberries, for a refreshing contrast.
- Drizzle with chocolate or caramel sauce for an extra indulgent touch.
- Present on a colorful platter with additional sprinkles for a festive look.
FAQs about Birthday Cake Cookie Bars
Can I make these Birthday Cake Cookie Bars ahead of time?
Absolutely! These bars can be made a day in advance. Just store them in an airtight container at room temperature. They’ll stay fresh and delicious, making them perfect for parties or gatherings.
How do I store leftover Birthday Cake Cookie Bars?
To keep your leftover bars fresh, store them in an airtight container at room temperature for up to a week. If you want to keep them longer, consider freezing them for up to three months.
Can I use different types of chocolate chips?
Yes! Feel free to swap out the white chocolate chips for milk chocolate, dark chocolate, or even peanut butter chips. This is a great way to customize your Birthday Cake Cookie Bars to suit your taste!
What can I do if my cookie bars are too crumbly?
If your bars turn out crumbly, it might be due to overbaking or not enough moisture. Make sure to follow the baking time closely and check for doneness with a toothpick. If they’re too dry, consider adding a bit more butter or an extra egg next time.
Can I add nuts to the Birthday Cake Cookie Bars?
Definitely! Chopped nuts like walnuts or pecans can add a delightful crunch and flavor. Just fold them in along with the sprinkles and chocolate chips for a tasty twist!
Summarizing the Joy of Birthday Cake Cookie Bars
These Birthday Cake Cookie Bars are more than just a dessert; they’re a celebration of joy, color, and sweetness that can brighten any day. With their soft, chewy texture and delightful bursts of flavor from the sprinkles and white chocolate, they’re sure to bring smiles to your family and friends. Whether you’re hosting a birthday party or simply treating yourself after a long day, these bars are a quick and easy way to spread happiness. So, gather your loved ones, bake a batch, and enjoy the sweet moments together!
PrintBirthday Cake Cookie Bars: Discover Your New Favorite Treat!
Delicious and festive Birthday Cake Cookie Bars that are perfect for any celebration.
- Prep Time: 15 minutes
- Cook Time: 30 minutes
- Total Time: 45 minutes
- Yield: 24 bars
- Category: Dessert
- Method: Baking
- Cuisine: American
- Diet: Vegetarian
Ingredients
- 1 cup unsalted butter, softened
- 1 cup granulated sugar
- 1 cup brown sugar, packed
- 2 large eggs
- 1 tablespoon vanilla extract
- 3 cups all-purpose flour
- 1 teaspoon baking powder
- 1 teaspoon baking soda
- 1/2 teaspoon salt
- 1 cup sprinkles
- 1 cup white chocolate chips
Instructions
- Preheat your oven to 350°F (175°C) and grease a 9×13 inch baking pan.
- In a large bowl, cream together the softened butter, granulated sugar, and brown sugar until smooth.
- Add the eggs and vanilla extract, mixing until well combined.
- In a separate bowl, whisk together the flour, baking powder, baking soda, and salt.
- Gradually add the dry ingredients to the wet ingredients, mixing until just combined.
- Fold in the sprinkles and white chocolate chips.
- Spread the cookie dough evenly into the prepared baking pan.
- Bake for 25-30 minutes or until the edges are golden brown and a toothpick inserted in the center comes out clean.
- Allow to cool before cutting into bars and serving.
Notes
- Store leftovers in an airtight container for up to a week.
- Feel free to customize with different types of chips or sprinkles.
- For a more festive look, top with frosting and additional sprinkles.