

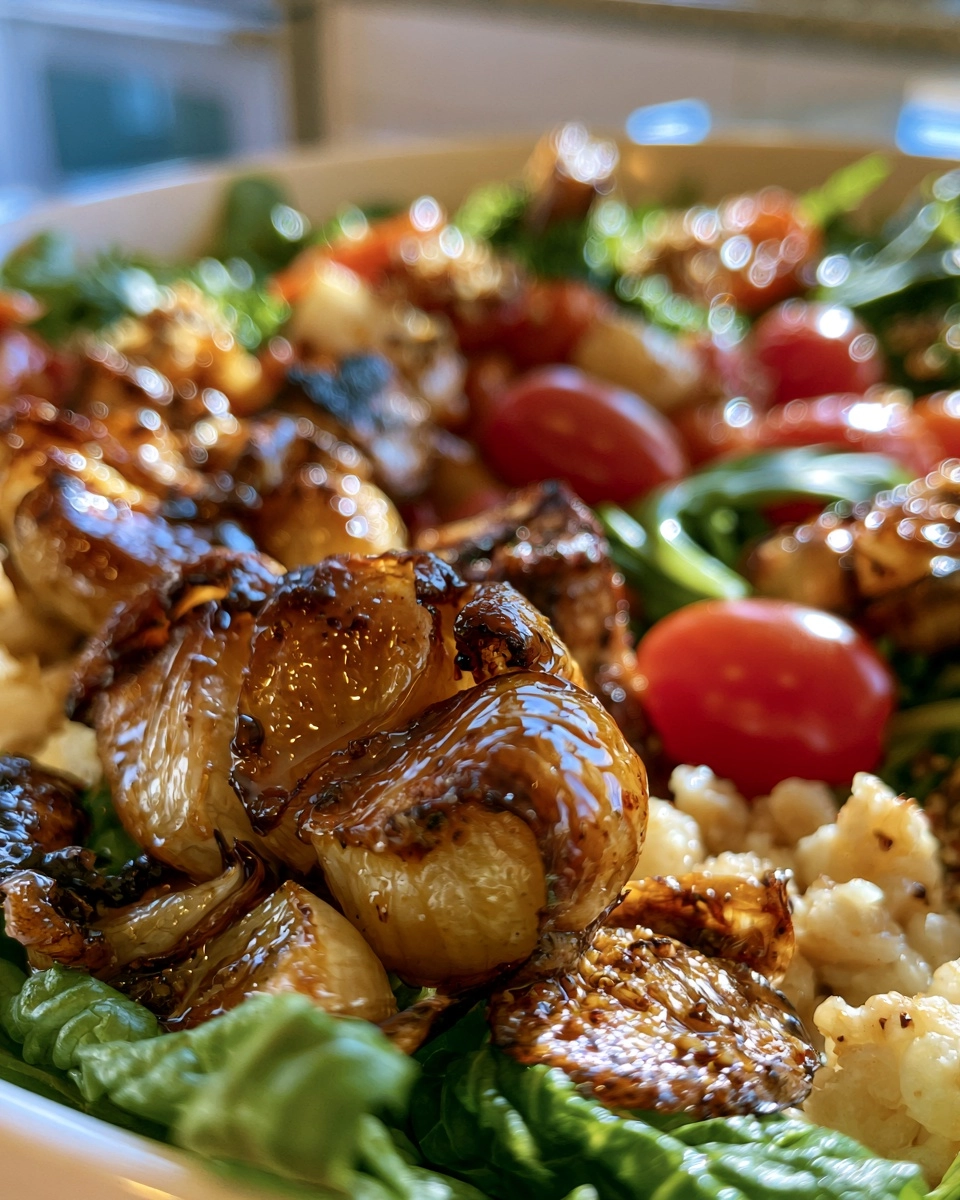
Roasted Garlic Burrito Bowls
Are you looking for a quick and delicious meal that the whole family will love? Look no further than these Roasted Garlic Burrito Bowls! Packed with wholesome ingredients and bursting with flavor, this dish is perfect for busy weeknights or casual gatherings with friends. The creamy roasted garlic adds a unique twist, making each bite a delightful experience. With a satisfying texture and a blend of savory and fresh flavors, these burrito bowls are not only easy to make but also a healthy option that everyone can enjoy. Trust me, you’ll want to keep this recipe on repeat!
Why You’ll Love This Roasted Garlic Burrito Bowls
These Roasted Garlic Burrito Bowls are a lifesaver for busy moms and professionals alike. They’re easy to make, requiring minimal prep and cooking time. The flavor is simply irresistible, with the roasted garlic adding a rich, creamy depth that elevates the dish. Plus, it’s family-friendly—kids and adults will both enjoy it! And if you’re looking to save time, these bowls are make-ahead friendly, perfect for meal prep or leftovers that taste just as good the next day.
Easy to Make
With just a few simple steps, you can whip up these burrito bowls in no time, making them perfect for any busy day.
Delicious Flavor
The combination of roasted garlic, fresh veggies, and zesty lime creates a flavor explosion that will have everyone coming back for seconds.
Family-Friendly
This dish is a hit with both kids and adults, making it ideal for family dinners or gatherings with friends.
Make-Ahead Friendly
Prepare these bowls in advance for quick meals throughout the week, ensuring you always have a healthy option on hand.
Ingredients for Roasted Garlic Burrito Bowls
Main Ingredients
- Cooked brown rice: A hearty base that adds fiber and nutrients.
- Black beans: Packed with protein and a great source of plant-based nutrition.
- Corn: Sweet and crunchy, it adds a pop of color and flavor.
- Diced tomatoes: Fresh and juicy, they bring brightness to the dish.
- Avocado: Creamy and rich, it enhances the overall texture and taste.
- Roasted garlic: The star of the show, it adds a deep, savory flavor.
- Chopped cilantro: Fresh and aromatic, it elevates the dish with its unique taste.
- Lime juice: A splash of acidity that brightens all the flavors.
- Salt and pepper: Essential seasonings to enhance the overall taste.
Optional Add-Ins
- Shredded cheese: For a creamy, indulgent touch.
- Sour cream or Greek yogurt: Adds a tangy creaminess.
- Jalapeños: For those who like a spicy kick.
- Chopped bell peppers: For extra crunch and color.
- Chopped green onions: A fresh garnish that adds a mild onion flavor.
Ingredient Notes
- Substitutions: You can use quinoa instead of brown rice for a gluten-free option.
- Recommended brands: Look for low-sodium canned beans and organic tomatoes for the best flavor.
- Fresh vs frozen: Fresh corn is delightful, but frozen corn works just as well and is convenient.
Kitchen Equipment
- Oven: Essential for roasting garlic; a toaster oven can work too.
- Aluminum foil: For wrapping garlic; parchment paper is a good alternative.
- Large mixing bowl: Any large bowl will do for combining ingredients.
- Measuring cups: For accurate ingredient portions; a kitchen scale is also helpful.
- Knife and cutting board: For chopping veggies and slicing avocado.
How to Make Roasted Garlic Burrito Bowls
Step 1: Prepare the Ingredients
Start by gathering all your ingredients. Cook the brown rice according to package instructions if you haven’t done so already. While the rice is cooking, wrap the garlic cloves in aluminum foil. Preheat your oven to 400°F (200°C) so it’s ready for roasting. If you’re using fresh corn, you can cut it off the cob now. Chop the tomatoes, cilantro, and slice the avocado. Having everything prepped makes the next steps a breeze!
Step 2: Mix or Assemble
In a large mixing bowl, combine the cooked brown rice, black beans, corn, diced tomatoes, and the roasted garlic (which you’ll prepare in the next step). Squeeze the lime juice over the mixture and sprinkle with salt and pepper. Stir everything together gently until well combined. The colors and textures will start to come together beautifully!
Step 3: Cook or Bake
Now, let’s roast that garlic! Place the wrapped garlic in the preheated oven and roast for about 30-35 minutes. You’ll know it’s done when the cloves are soft and fragrant. Once roasted, let it cool slightly before unwrapping. Squeeze the soft garlic out of the skins and into your rice mixture. Give it another good stir to incorporate the garlic flavor throughout.
Step 4: Finish and Garnish
After mixing in the roasted garlic, it’s time to plate! Scoop the burrito bowl mixture into serving bowls. Top each bowl with sliced avocado and a sprinkle of chopped cilantro for a fresh touch. If you’re feeling indulgent, add some shredded cheese or a dollop of sour cream on top. The creamy avocado and bright cilantro will make your dish pop!
Step 5: Serve
Your Roasted Garlic Burrito Bowls are ready to enjoy! Serve them warm, and don’t forget to squeeze a little extra lime juice over the top for that zesty kick. These bowls are perfect for a family dinner or a casual gathering with friends. Enjoy every flavorful bite!
Expert Tips for Success
- Use Fresh Ingredients: Fresh produce and quality ingredients make a noticeable difference in flavor.
- Don’t Overcook: Keep an eye on the garlic while roasting; it should be soft but not burnt.
- Measure Accurately: Use measuring cups for rice and beans to ensure balanced flavors.
- Follow Timing Carefully: Stick to the recommended cooking times for the best results.
- Common Pro Tips: Experiment with different toppings to customize your burrito bowls!
Recipe Variations for Roasted Garlic Burrito Bowls
Healthier Version
- Swap brown rice for cauliflower rice to reduce carbs and calories.
- Use low-fat Greek yogurt instead of sour cream for a lighter topping.
- Add more veggies like spinach or zucchini for extra nutrients.
Vegetarian Version
- This recipe is already vegetarian! Just ensure any optional toppings like cheese are vegetarian-friendly.
- Consider adding grilled vegetables for a smoky flavor.
Gluten-Free Version
- Use quinoa instead of brown rice for a gluten-free grain option.
- Ensure all canned ingredients, like beans and corn, are labeled gluten-free.
Spicy Version
- Add diced jalapeños or a splash of hot sauce to the mixture for heat.
- Incorporate chipotle peppers in adobo sauce for a smoky, spicy kick.
Extra Indulgent Version
- Top with shredded cheese, sour cream, and guacamole for a rich finish.
- Mix in some chorizo or seasoned ground beef for added protein and flavor.
What to Serve With Roasted Garlic Burrito Bowls
Side Dishes
- Mexican street corn salad for a sweet and tangy complement.
- Simple green salad with a light vinaigrette to balance the flavors.
Sauces and Toppings
- Fresh salsa or pico de gallo for a zesty kick.
- Guacamole for an extra creamy texture.
Drinks
- Refreshing iced tea or lemonade to cool down the palate.
- A light Mexican beer or a margarita for a festive touch.
Desserts
- Churros with chocolate sauce for a sweet finish.
- Flan or tres leches cake for a traditional treat.
Storage Instructions
Refrigerator
- Store leftovers in an airtight container in the refrigerator for up to 3 days.
- Make sure to let the burrito bowls cool completely before sealing to prevent condensation.
Freezer
- For longer storage, freeze the burrito bowl mixture in a freezer-safe container for up to 3 months.
- Consider portioning them into individual servings for easy reheating later.
Reheating
- To reheat, thaw overnight in the refrigerator if frozen, then microwave until heated through.
- Alternatively, reheat in a skillet over medium heat, stirring occasionally until warm.
- Add a splash of water or broth to keep the mixture moist while reheating.
Common Mistakes to Avoid
- Not roasting the garlic long enough: Ensure the garlic is soft and fragrant for the best flavor.
- Overcooking the rice: Follow package instructions carefully to avoid mushy rice.
- Skipping the lime juice: This adds essential brightness; don’t leave it out!
- Using canned beans without rinsing: Rinse them to remove excess sodium and improve flavor.
FAQs about Roasted Garlic Burrito Bowls
Can I make this ahead of time?
Absolutely! These Roasted Garlic Burrito Bowls are perfect for meal prep. You can prepare the ingredients and store them separately in the fridge. Just mix everything together when you’re ready to serve. The flavors will meld beautifully, making it even tastier!
Can I use different grains instead of brown rice?
Yes, you can! Quinoa, farro, or even cauliflower rice are great alternatives. Each option brings its own unique flavor and texture, so feel free to experiment based on your preferences or dietary needs.
How can I make these burrito bowls spicier?
If you love heat, add diced jalapeños or a splash of your favorite hot sauce to the mix. You can also incorporate chipotle peppers in adobo sauce for a smoky, spicy kick that will elevate the flavor profile!
Are these burrito bowls suitable for a vegan diet?
Yes! This recipe is naturally vegetarian and can easily be made vegan by omitting any dairy toppings like cheese or sour cream. You can substitute with vegan alternatives or simply enjoy them as is!
What can I do with leftovers?
Leftovers can be stored in an airtight container in the refrigerator for up to 3 days. You can enjoy them cold, or reheat them in the microwave or on the stovetop. Just add a splash of water to keep them moist while reheating!
Recipe Card for Roasted Garlic Burrito Bowls
| Prep Time | 10 minutes |
|---|---|
| Cook Time | 35 minutes |
| Total Time | 45 minutes |
| Servings | 4 servings |
| Calories | 450 per serving |
Ingredients
- 2 cups cooked brown rice
- 1 cup black beans, drained and rinsed
- 1 cup corn, frozen or fresh
- 1 cup diced tomatoes
- 1 avocado, sliced
- 1/2 cup roasted garlic
- 1/4 cup chopped cilantro
- 1 lime, juiced
- Salt and pepper to taste
Instructions
- Preheat the oven to 400°F (200°C).
- Wrap garlic cloves in aluminum foil and roast in the oven for 30-35 minutes until soft.
- In a large bowl, combine cooked brown rice, black beans, corn, diced tomatoes, and roasted garlic.
- Add lime juice, salt, and pepper to the mixture and stir well.
- Serve the mixture in bowls and top with sliced avocado and chopped cilantro.
Notes
- Feel free to add your favorite toppings such as cheese or sour cream.
- This recipe can be made vegan by omitting any dairy products.
- Store leftovers in an airtight container in the refrigerator for up to 3 days.
Enjoy Your Roasted Garlic Burrito Bowls!
There you have it—your very own Roasted Garlic Burrito Bowls that are not only delicious but also a breeze to make! This recipe brings together wholesome ingredients and vibrant flavors, making it a delightful meal for any occasion. Whether you’re serving it for a family dinner or meal prepping for the week, these bowls are sure to impress. I’d love to hear how your burrito bowls turn out! Please leave a review or comment below, sharing your thoughts or any variations you tried. Happy cooking!
PrintRoasted Garlic Burrito Bowls: A Flavor Explosion Awaits!

Roasted Garlic Burrito Bowls are a delicious and healthy meal option packed with flavor and nutrients, perfect for any time of the day.
- Prep Time: 10 minutes
- Cook Time: 35 minutes
- Total Time: 45 minutes
- Yield: 4 servings
- Category: Main Course
- Method: Baking and Mixing
- Cuisine: Mexican
- Diet: Vegetarian
Ingredients
- 2 cups cooked brown rice
- 1 cup black beans, drained and rinsed
- 1 cup corn, frozen or fresh
- 1 cup diced tomatoes
- 1 avocado, sliced
- 1/2 cup roasted garlic
- 1/4 cup chopped cilantro
- 1 lime, juiced
- Salt and pepper to taste
Instructions
- Preheat the oven to 400°F (200°C).
- Wrap garlic cloves in aluminum foil and roast in the oven for 30-35 minutes until soft.
- In a large bowl, combine cooked brown rice, black beans, corn, diced tomatoes, and roasted garlic.
- Add lime juice, salt, and pepper to the mixture and stir well.
- Serve the mixture in bowls and top with sliced avocado and chopped cilantro.
Notes
- Feel free to add your favorite toppings such as cheese or sour cream.
- This recipe can be made vegan by omitting any dairy products.
- Store leftovers in an airtight container in the refrigerator for up to 3 days.