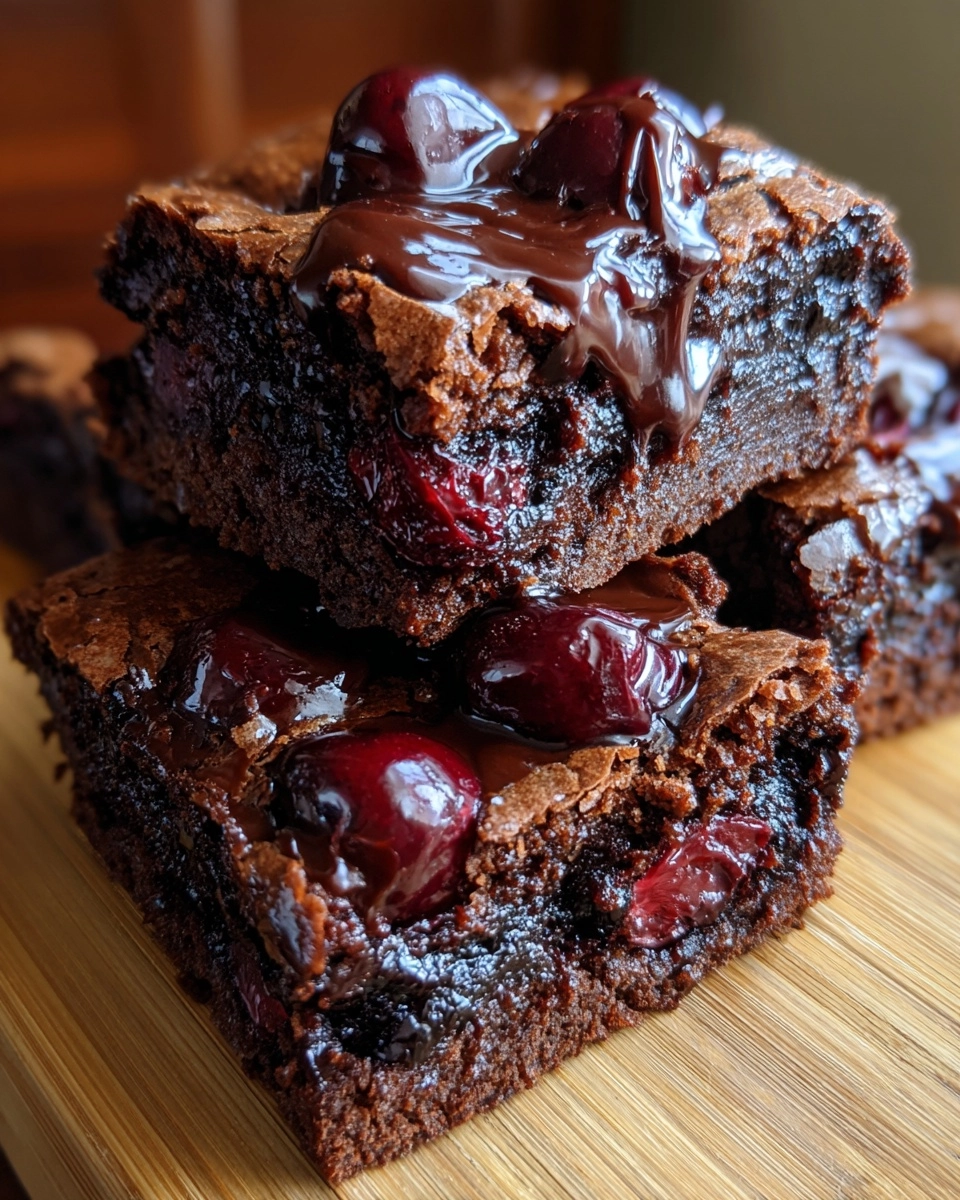
Dark Cherry Brownie Bars — Rich, Fudgy & Totally Addictive
As a busy mom, I know how precious time can be, especially when it comes to whipping up something delicious. That’s why I’m excited to share my recipe for Dark Cherry Brownie Bars — rich, fudgy, and totally addictive! These bars are not just a treat; they’re a quick solution for those hectic days when you want to impress your loved ones without spending hours in the kitchen. With their luscious chocolate flavor and the delightful burst of dark cherries, these brownie bars are sure to become a family favorite. Trust me, you won’t be able to resist!
Why You’ll Love This Dark Cherry Brownie Bars
These Dark Cherry Brownie Bars are a dream come true for busy lives. They come together in just 45 minutes, making them perfect for last-minute gatherings or a sweet treat after dinner. The rich, fudgy texture paired with the tartness of dark cherries creates a flavor explosion that will leave everyone asking for seconds. Plus, they’re easy to make, so you can enjoy baking without the stress!
Ingredients for Dark Cherry Brownie Bars
Gathering the right ingredients is the first step to creating these delightful Dark Cherry Brownie Bars. Here’s what you’ll need:
- Unsalted Butter: This adds richness and moisture to the brownies. You can substitute with coconut oil for a dairy-free option.
- Granulated Sugar: Sweetens the bars and helps achieve that fudgy texture. Brown sugar can be used for a deeper flavor.
- Large Eggs: They bind the ingredients together and provide structure. For a vegan alternative, try flax eggs.
- Vanilla Extract: A splash of this enhances the overall flavor. Pure vanilla is best, but imitation works too.
- All-Purpose Flour: This gives the brownies their body. You can use gluten-free flour if needed.
- Unsweetened Cocoa Powder: The star of the show! It provides that rich chocolate flavor. Dutch-processed cocoa can be a great substitute.
- Salt: Just a pinch enhances the sweetness and balances flavors. Sea salt adds a nice touch.
- Dark Cherries: Fresh or frozen, these add a burst of tartness. Dried cherries can work in a pinch, but they’ll change the texture.
- Dark Chocolate Chips: For extra chocolatey goodness! You can swap these for milk chocolate chips if you prefer a sweeter taste.
For exact measurements, check the bottom of the article where you can find everything listed for easy printing. Happy baking!
How to Make Dark Cherry Brownie Bars
Step 1: Preheat and Prepare
Start by preheating your oven to 350°F (175°C). This ensures even baking. While the oven warms up, grease a 9×13 inch baking pan with butter or cooking spray. This step is crucial to prevent those delicious brownie bars from sticking!
Step 2: Melt the Butter
In a saucepan, melt the unsalted butter over low heat. Stir occasionally until it’s completely melted. This step is important because melted butter helps create that rich, fudgy texture we all crave in brownie bars. Plus, it makes mixing easier!
Step 3: Combine Wet Ingredients
Once the butter has melted, remove it from heat. Stir in the granulated sugar, large eggs, and vanilla extract. Mix until everything is well combined. This mixture is the heart of your Dark Cherry Brownie Bars, adding sweetness and flavor!
Step 4: Mix Dry Ingredients
In a separate bowl, whisk together the all-purpose flour, unsweetened cocoa powder, and salt. This step ensures that the dry ingredients are evenly distributed. It’s essential for achieving that perfect fudgy consistency in your brownies!
Step 5: Combine Wet and Dry Mixtures
Gradually add the dry ingredients to the wet mixture. Stir gently until just combined. Be careful not to overmix! Overmixing can lead to tough brownies, and we want them to be soft and fudgy, not chewy.
Step 6: Fold in Cherries and Chocolate Chips
Now, it’s time to fold in the dark cherries and chocolate chips. Use a spatula to gently incorporate them into the batter. This technique helps maintain the airy texture while ensuring every bite is packed with chocolatey goodness and fruity bursts!
Step 7: Bake the Brownies
Pour the batter into your prepared baking pan and spread it evenly. Bake for 25-30 minutes. To check for doneness, insert a toothpick in the center. It should come out with a few moist crumbs, indicating that your brownies are perfectly fudgy!
Step 8: Cool and Cut
Once baked, remove the pan from the oven and let it cool completely. This cooling process is key to achieving clean cuts. Once cool, slice into bars and serve. You’ll be amazed at how quickly they disappear!
Tips for Success
- Use room temperature eggs for better mixing.
- Don’t skip the cooling step; it helps with cutting clean bars.
- For extra flavor, sprinkle sea salt on top before baking.
- Store leftover bars in an airtight container to keep them fresh.
- Experiment with different nuts or dried fruits for added texture.
Equipment Needed
- 9×13 inch Baking Pan: A standard size for brownies. You can use a glass or metal pan.
- Mixing Bowls: A set of various sizes is handy. You can use any large bowl you have.
- Spatula: Essential for folding in ingredients. A wooden spoon works too!
- Whisk: Great for mixing dry ingredients. A fork can do the job in a pinch.
- Measuring Cups and Spoons: For accurate ingredient measurements. If you don’t have them, use a standard coffee mug.
Variations
- Nutty Delight: Add 1/2 cup of chopped walnuts or pecans for a crunchy texture that complements the fudginess.
- Minty Fresh: Incorporate 1 teaspoon of peppermint extract for a refreshing twist that pairs beautifully with chocolate.
- Spicy Kick: Mix in a pinch of cayenne pepper or chili powder for a surprising heat that enhances the chocolate flavor.
- Gluten-Free Option: Substitute all-purpose flour with a gluten-free blend to make these brownie bars suitable for gluten-sensitive friends.
- Vegan Version: Replace eggs with flax eggs and use dairy-free chocolate chips for a delicious vegan treat.
Serving Suggestions
- Serve warm with a scoop of vanilla ice cream for a decadent dessert.
- Pair with a dollop of whipped cream and a sprinkle of cocoa powder for an elegant touch.
- Enjoy with a cup of coffee or a glass of red wine to enhance the chocolate flavors.
- For a festive presentation, dust with powdered sugar and garnish with fresh cherries.
FAQs about Dark Cherry Brownie Bars
Can I use frozen cherries in this recipe?
Absolutely! Frozen dark cherries work perfectly in these brownie bars. Just make sure to thaw and drain them before adding to the batter to avoid excess moisture.
How do I store leftover Dark Cherry Brownie Bars?
Store your brownie bars in an airtight container at room temperature for up to a week. If you want to keep them fresh longer, you can refrigerate them for up to two weeks.
Can I make these brownie bars ahead of time?
Yes! You can bake the Dark Cherry Brownie Bars a day in advance. Just let them cool completely, then cover and store them. They’ll taste just as delicious the next day!
What can I substitute for eggs in this recipe?
If you need an egg substitute, try using flax eggs. Mix 1 tablespoon of ground flaxseed with 2.5 tablespoons of water for each egg. Let it sit for a few minutes until it thickens.
Can I add nuts to the Dark Cherry Brownie Bars?
Definitely! Chopped walnuts or pecans can add a delightful crunch. Just fold them in along with the cherries and chocolate chips for a tasty twist.
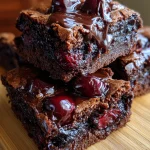
Summarizing the Joy of Dark Cherry Brownie Bars
There’s something truly magical about baking a batch of Dark Cherry Brownie Bars. The rich, fudgy texture combined with the tartness of dark cherries creates a symphony of flavors that dances on your palate. Each bite is a reminder of the joy that comes from sharing homemade treats with family and friends. Whether it’s a cozy night in or a festive gathering, these brownie bars bring smiles and satisfaction. Plus, the ease of making them means you can whip up this delightful dessert anytime, turning ordinary moments into sweet memories. Trust me, they’ll become a cherished favorite!
PrintDark Cherry Brownie Bars: Indulge in Rich, Fudgy Bliss!
Indulge in these rich and fudgy dark cherry brownie bars that are totally addictive and perfect for any chocolate lover.
- Prep Time: 15 minutes
- Cook Time: 30 minutes
- Total Time: 45 minutes
- Yield: 12 servings
- Category: Dessert
- Method: Baking
- Cuisine: American
- Diet: Vegetarian
Ingredients
- 1 cup unsalted butter
- 2 cups granulated sugar
- 4 large eggs
- 1 teaspoon vanilla extract
- 1 cup all-purpose flour
- 1 cup unsweetened cocoa powder
- 1/2 teaspoon salt
- 1 cup dark cherries, pitted and chopped
- 1/2 cup dark chocolate chips
Instructions
- Preheat the oven to 350°F (175°C) and grease a 9×13 inch baking pan.
- In a saucepan, melt the butter over low heat.
- Remove from heat and stir in the sugar, eggs, and vanilla until well combined.
- In a separate bowl, whisk together the flour, cocoa powder, and salt.
- Gradually add the dry ingredients to the wet mixture, stirring until just combined.
- Fold in the dark cherries and chocolate chips.
- Pour the batter into the prepared baking pan and spread evenly.
- Bake for 25-30 minutes or until a toothpick inserted in the center comes out with a few moist crumbs.
- Allow to cool before cutting into bars.
Notes
- For an extra chocolatey flavor, add more chocolate chips.
- These bars can be stored in an airtight container for up to a week.
- Serve with whipped cream or ice cream for an indulgent dessert.