


Banana Pudding Cheesecake Cups
Are you looking for a delightful dessert that’s as easy to make as it is delicious? Look no further than these Banana Pudding Cheesecake Cups! This recipe combines the creamy goodness of cheesecake with the nostalgic flavors of banana pudding, all served in individual cups. Perfect for busy moms and professionals, these cups are a quick solution for a sweet craving or a charming treat to impress your loved ones at gatherings. With a luscious texture and a burst of banana flavor, they’re sure to become a family favorite!
Why You’ll Love This Banana Pudding Cheesecake Cups
These Banana Pudding Cheesecake Cups are not just a treat; they’re a lifesaver for busy days! With simple steps and no baking required, you can whip them up in no time. The creamy, dreamy layers of cheesecake and banana pudding create a flavor explosion that everyone will adore. Plus, they’re perfect for gatherings, making you the star of any dessert table without the stress!
Ingredients for Banana Pudding Cheesecake Cups
To create these delightful Banana Pudding Cheesecake Cups, you’ll need a few key ingredients that come together to form a creamy, dreamy dessert. Here’s what you’ll need:
- Cream Cheese: The base of your cheesecake layer, providing that rich and creamy texture.
- Sugar: Sweetens the cream cheese mixture, balancing the flavors perfectly.
- Vanilla Extract: Adds a warm, aromatic flavor that enhances the overall taste.
- Heavy Cream: Whipped to perfection, it lightens the cheesecake mixture and adds a luscious mouthfeel.
- Ripe Bananas: Fresh bananas bring natural sweetness and a fruity flavor that’s essential to this dessert.
- Instant Banana Pudding Mix: This is the secret ingredient that gives the pudding layer its classic banana flavor and creamy consistency.
- Milk: Used to prepare the pudding mix, it helps achieve the right texture.
- Crushed Vanilla Wafers: These provide a crunchy layer that contrasts beautifully with the creamy filling.
- Whipped Cream: For topping, it adds a light and fluffy finish to your cups.
Feel free to get creative! You can substitute the vanilla wafers with gluten-free options if needed, or use flavored wafers for a twist. For a richer flavor, opt for very ripe bananas. If you’re looking for exact quantities, they’re available at the bottom of the article for easy printing!
How to Make Banana Pudding Cheesecake Cups
Making these Banana Pudding Cheesecake Cups is a breeze! Follow these simple steps to create a dessert that will wow your family and friends. Let’s dive in!
Step 1: Prepare the Cream Cheese Mixture
Start by taking your softened cream cheese and sugar. In a mixing bowl, beat them together until the mixture is smooth and creamy. This step is crucial as it sets the foundation for your cheesecake layer. Make sure there are no lumps; a smooth texture is key!
Step 2: Whip the Heavy Cream
In a separate bowl, pour in the heavy cream. Using a hand mixer or a stand mixer, whip the cream until stiff peaks form. This means when you lift the beaters, the cream holds its shape. This fluffy whipped cream will add lightness to your cheesecake mixture, making it irresistible!
Step 3: Combine the Mixtures
Now, gently fold the whipped cream into the cream cheese mixture. Use a spatula and be careful not to deflate the whipped cream. This folding technique keeps the mixture airy and light, which is what you want for a perfect cheesecake layer.
Step 4: Prepare the Banana Pudding
In another bowl, prepare the instant banana pudding mix according to the package instructions, using the milk. Stir until it thickens. This pudding layer is where the classic banana flavor shines through, so make sure it’s well mixed and creamy!
Step 5: Layer the Ingredients
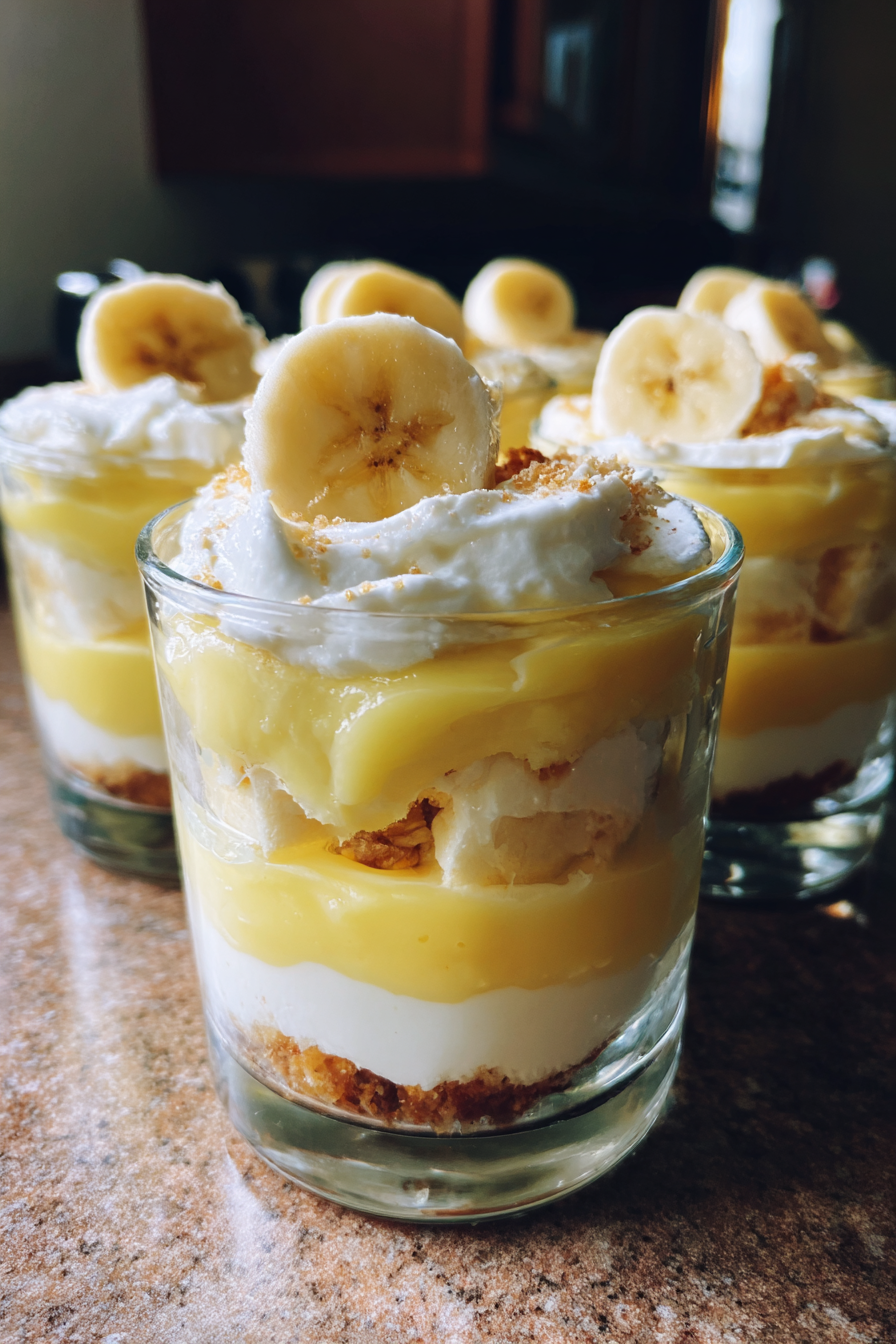
Now comes the fun part! Grab your individual cups and start layering. Begin with a layer of crushed vanilla wafers at the bottom, followed by a layer of banana slices. Next, add a layer of the banana pudding, and then top it off with the cheesecake mixture. Repeat these layers until the cups are filled, finishing with the cheesecake layer on top.
Step 6: Chill and Serve
Once your cups are assembled, it’s time to chill them in the refrigerator for at least 2 hours. This allows the flavors to meld beautifully and the layers to set. When you’re ready to serve, top each cup with a dollop of whipped cream and a few extra banana slices for that perfect finishing touch!
Tips for Success
- Use room temperature cream cheese for easier mixing and a smoother texture.
- Don’t overwhip the heavy cream; stop when stiff peaks form to maintain lightness.
- Layer the ingredients gently to keep the beautiful layers intact.
- Chill the cups for at least 2 hours to allow flavors to develop and set properly.
Equipment Needed
- Mixing bowls: Use any size you have on hand.
- Hand mixer or stand mixer: A whisk can work too, but it’ll take longer.
- Spatula: For folding and layering.
- Individual cups or glasses: Mason jars or small bowls are great alternatives.
- Measuring cups and spoons: Essential for accuracy.
Variations
- Healthier Option: Substitute Greek yogurt for cream cheese to reduce calories and add protein.
- Vegetarian Delight: Ensure all ingredients, especially the pudding mix, are vegetarian-friendly.
- Gluten-Free: Use gluten-free vanilla wafers or crushed nuts for the base layer.
- Extra Indulgent: Drizzle caramel or chocolate sauce between layers for a decadent twist.
- Nutty Flavor: Add chopped walnuts or pecans for a crunchy texture and nutty flavor.
Serving Suggestions
- Pair with a light fruit salad for a refreshing contrast.
- Serve alongside a scoop of vanilla ice cream for extra indulgence.
- Complement with a cup of coffee or iced tea for a delightful afternoon treat.
- Garnish with mint leaves for a pop of color and freshness.
FAQs about Banana Pudding Cheesecake Cups
Can I make these Banana Pudding Cheesecake Cups ahead of time?
Absolutely! These cups can be made a day in advance, making them a perfect option for busy schedules. Just be sure to store them in the refrigerator until you’re ready to serve.
How long do Banana Pudding Cheesecake Cups last in the fridge?
These delightful cups can last up to 3 days in the refrigerator. Just keep them covered to maintain freshness and prevent any odors from affecting the flavor.
Can I use fresh bananas instead of instant pudding mix?
While fresh bananas add great flavor, the instant pudding mix is essential for achieving that classic banana pudding texture. However, you can mash ripe bananas and mix them into the pudding for an extra banana kick!
What can I substitute for cream cheese?
If you’re looking for a lighter option, you can substitute Greek yogurt for cream cheese. It will change the flavor slightly but still provide a creamy texture.
Can I freeze Banana Pudding Cheesecake Cups?
Freezing is not recommended for these cups, as the texture of the whipped cream and bananas may change. It’s best to enjoy them fresh for the best taste and texture!
Summarizing the Joy of Banana Pudding Cheesecake Cups
There’s something truly special about these Banana Pudding Cheesecake Cups. They bring together the comforting flavors of childhood with a sophisticated twist, making them perfect for any occasion. Whether you’re hosting a family gathering or simply treating yourself after a long day, these cups deliver joy in every bite. The creamy layers, the crunch of vanilla wafers, and the sweetness of ripe bananas create a delightful harmony that’s hard to resist. I encourage you to try this recipe and share the love—your family and friends will thank you for it!
PrintBanana Pudding Cheesecake Cups: A Delicious Dessert Delight!
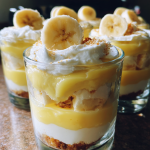
Banana Pudding Cheesecake Cups are a delightful dessert that combines the creamy texture of cheesecake with the classic flavors of banana pudding, all served in individual cups for a perfect treat.
- Prep Time: 20 minutes
- Cook Time: 0 minutes
- Total Time: 2 hours 20 minutes
- Yield: 4 servings
- Category: Dessert
- Method: No-Bake
- Cuisine: American
- Diet: Vegetarian
Ingredients
- 1 cup cream cheese, softened
- 1/2 cup sugar
- 1 teaspoon vanilla extract
- 1 cup heavy cream
- 2 ripe bananas, sliced
- 1 package instant banana pudding mix
- 2 cups milk
- 1 cup crushed vanilla wafers
- Whipped cream for topping
Instructions
- In a mixing bowl, beat the cream cheese and sugar until smooth.
- Add the vanilla extract and mix until combined.
- In a separate bowl, whip the heavy cream until stiff peaks form.
- Gently fold the whipped cream into the cream cheese mixture.
- In another bowl, prepare the banana pudding mix with milk according to package instructions.
- Layer the crushed vanilla wafers, banana slices, pudding, and cheesecake mixture in individual cups.
- Repeat the layers until the cups are filled.
- Top with whipped cream and additional banana slices if desired.
- Chill in the refrigerator for at least 2 hours before serving.
Notes
- For a richer flavor, use ripe bananas.
- These cups can be made a day in advance for convenience.
- Feel free to substitute with gluten-free wafers for a gluten-free option.