


No-Bake Oreo Cheesecake Bars
Are you looking for a delightful dessert that requires minimal effort but delivers maximum flavor? Look no further than these No-Bake Oreo Cheesecake Bars! Perfect for busy moms and professionals, this recipe is a quick solution for those days when you want to impress your family or friends without spending hours in the kitchen. With a creamy filling and a crunchy Oreo crust, these bars are sure to be a hit at any gathering. Plus, they’re easy to make, so you can whip them up in no time and enjoy the sweet rewards!
Why You’ll Love This No-Bake Oreo Cheesecake Bars
These No-Bake Oreo Cheesecake Bars are a dream come true for anyone who loves dessert but is short on time. With just a handful of ingredients and no baking required, you can create a delicious treat that everyone will adore. The creamy cheesecake filling paired with the crunchy Oreo crust is a flavor combination that’s hard to resist. Plus, they’re perfect for any occasion, from family gatherings to casual get-togethers!
Ingredients for No-Bake Oreo Cheesecake Bars
To create these delightful No-Bake Oreo Cheesecake Bars, you’ll need a few simple ingredients that you might already have in your pantry. Here’s what you’ll need:
- Oreo cookies: The star of the show! These provide the perfect crunchy base and flavor.
- Unsalted butter: This helps bind the crushed Oreos together for a sturdy crust.
- Cream cheese: The creamy filling that gives these bars their rich texture. Make sure it’s softened for easy mixing.
- Powdered sugar: Adds sweetness and helps achieve that smooth consistency in the filling.
- Vanilla extract: A splash of this enhances the overall flavor of the cheesecake.
- Whipped cream: Lightens up the filling and adds a fluffy texture that balances the richness.
- Additional Oreo cookies: For topping, these add a delightful crunch and make the bars look extra tempting.
For those looking to switch things up, consider using double stuffed Oreos for an even richer flavor. If you’re in a pinch, store-bought whipped topping can be a great substitute for homemade whipped cream. Remember, all ingredient quantities are listed at the bottom of the article for easy printing!
How to Make No-Bake Oreo Cheesecake Bars
Step 1: Prepare the Crust
Start by crushing the Oreo cookies into fine crumbs. You can do this by placing them in a zip-top bag and using a rolling pin or by pulsing them in a food processor. Once you have your crumbs, transfer them to a mixing bowl and pour in the melted unsalted butter. Mix until the crumbs are evenly coated and resemble wet sand. This will create a deliciously crunchy base for your cheesecake bars.
Step 2: Make the Cream Cheese Mixture
In a separate bowl, beat the softened cream cheese with an electric mixer until it’s smooth and creamy. This step is crucial for achieving that velvety texture. Gradually add the powdered sugar and vanilla extract, mixing until well combined. The sweetness of the sugar balances the tanginess of the cream cheese, creating a delightful filling. Finally, gently fold in the whipped cream until fully incorporated. This will give your cheesecake a light and airy feel.
Step 3: Assemble the Bars
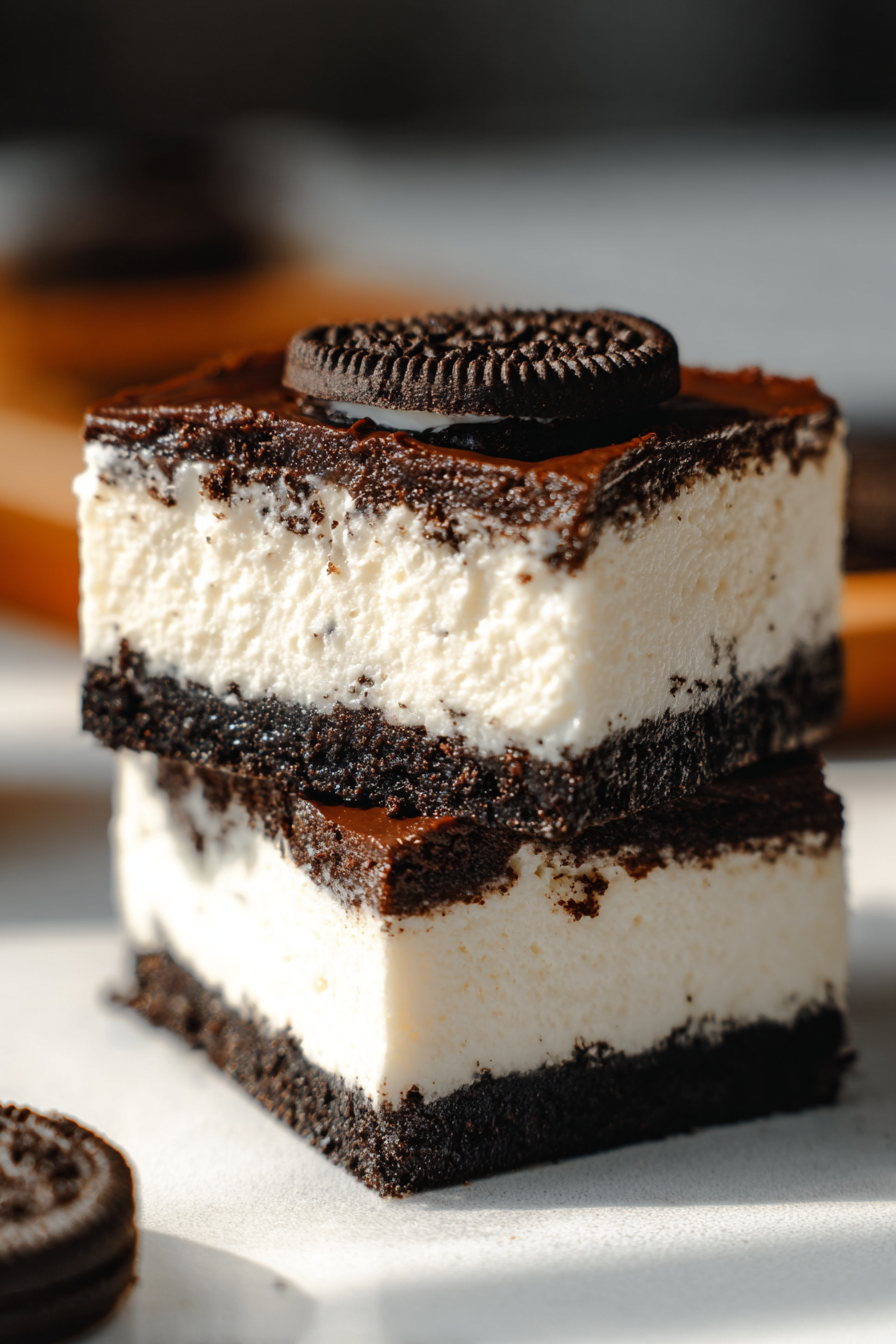
Now it’s time to bring everything together! Take your prepared crust and press it firmly into the bottom of a greased 9×9 inch pan. Make sure it’s even and compact to hold the filling. Next, spread the cream cheese mixture over the crust, smoothing it out with a spatula. For an extra touch, sprinkle additional crushed Oreo cookies on top. This not only adds flavor but also makes your bars look irresistible!
Step 4: Chill and Serve
Cover the pan with plastic wrap and place it in the refrigerator. Allow the bars to chill for at least 4 hours, or until they are set. This step is essential for the flavors to meld and for the bars to hold their shape when cut. Once they’re ready, slice them into squares and serve chilled. Enjoy the creamy, dreamy goodness of your No-Bake Oreo Cheesecake Bars!
Tips for Success
- Use room temperature cream cheese for easier mixing and a smoother filling.
- Don’t skip chilling time; it’s crucial for the bars to set properly.
- Press the crust firmly to ensure it holds together when cut.
- For a fun twist, try adding a layer of chocolate ganache on top before chilling.
Equipment Needed
- 9×9 inch baking pan (or any similar-sized dish)
- Mixing bowls (two medium-sized)
- Electric mixer (or a whisk for manual mixing)
- Spatula (for spreading the filling)
- Zip-top bag or food processor (for crushing Oreos)
Variations
- Healthier Option: Substitute low-fat cream cheese and use sugar-free Oreos to reduce calories.
- Vegetarian Delight: Ensure all ingredients are vegetarian-friendly, which they typically are in this recipe.
- Gluten-Free Version: Use gluten-free Oreo cookies to make this dessert suitable for gluten-sensitive individuals.
- Extra Indulgent: Drizzle melted chocolate or caramel sauce over the top before serving for a decadent twist.
- Fruit-Infused: Add a layer of fresh berries or a fruit compote on top of the cream cheese mixture for a refreshing flavor contrast.
Serving Suggestions
- Pair with fresh berries like strawberries or raspberries for a pop of color and flavor.
- Serve alongside a scoop of vanilla ice cream for an extra indulgent treat.
- Drizzle with chocolate or caramel sauce for a beautiful presentation.
- Offer a side of whipped cream for those who love extra creaminess.
FAQs about No-Bake Oreo Cheesecake Bars
Can I make this ahead of time?
Absolutely! These No-Bake Oreo Cheesecake Bars are perfect for making ahead. Just prepare them a day in advance and let them chill overnight. This allows the flavors to meld beautifully, making them even more delicious!
How long do these bars last in the refrigerator?
These cheesecake bars can be stored in the refrigerator for up to a week. Just make sure to keep them covered to maintain their freshness and prevent them from absorbing any odors from the fridge.
Can I freeze No-Bake Oreo Cheesecake Bars?
Yes, you can freeze these bars! Just cut them into squares, wrap them tightly in plastic wrap, and place them in an airtight container. They can be frozen for up to three months. Thaw them in the refrigerator before serving for the best texture.
What can I use instead of cream cheese?
If you’re looking for a substitute, you can use mascarpone cheese for a similar creamy texture. For a lighter option, consider using Greek yogurt, but keep in mind that it will alter the flavor slightly.
Can I add other flavors to the cheesecake mixture?
Definitely! Feel free to experiment by adding different extracts like almond or mint for a unique twist. You can also mix in some chocolate chips or crushed candy bars for added texture and flavor!
Summarizing the Joy of No-Bake Oreo Cheesecake Bars
There’s something truly magical about these No-Bake Oreo Cheesecake Bars. They bring together the rich, creamy goodness of cheesecake with the nostalgic crunch of Oreos, creating a dessert that’s both comforting and indulgent. Whether you’re celebrating a special occasion or simply treating yourself after a long day, these bars are sure to bring smiles all around. Plus, their effortless preparation means you can spend less time in the kitchen and more time enjoying the sweet moments with your loved ones. So go ahead, whip up a batch, and savor the joy they bring!
PrintNo-Bake Oreo Cheesecake Bars for Effortless Delight!
Delicious and easy-to-make No-Bake Oreo Cheesecake Bars that are perfect for any occasion.
- Prep Time: 20 minutes
- Cook Time: 0 minutes
- Total Time: 4 hours 20 minutes
- Yield: 16 bars
- Category: Dessert
- Method: No-Bake
- Cuisine: American
- Diet: Vegetarian
Ingredients
- 24 Oreo cookies, crushed
- 1/2 cup unsalted butter, melted
- 16 oz cream cheese, softened
- 1 cup powdered sugar
- 1 tsp vanilla extract
- 1 cup whipped cream
- Additional Oreo cookies for topping
Instructions
- In a bowl, combine crushed Oreo cookies and melted butter until well mixed.
- Press the mixture into the bottom of a greased 9×9 inch pan to form the crust.
- In another bowl, beat the cream cheese until smooth.
- Add powdered sugar and vanilla extract to the cream cheese and mix until combined.
- Fold in the whipped cream gently until fully incorporated.
- Spread the cream cheese mixture over the crust evenly.
- Top with additional crushed Oreo cookies.
- Refrigerate for at least 4 hours or until set.
- Cut into bars and serve chilled.
Notes
- For a richer flavor, use double stuffed Oreos.
- Make sure the cream cheese is at room temperature for easier mixing.
- These bars can be stored in the refrigerator for up to a week.