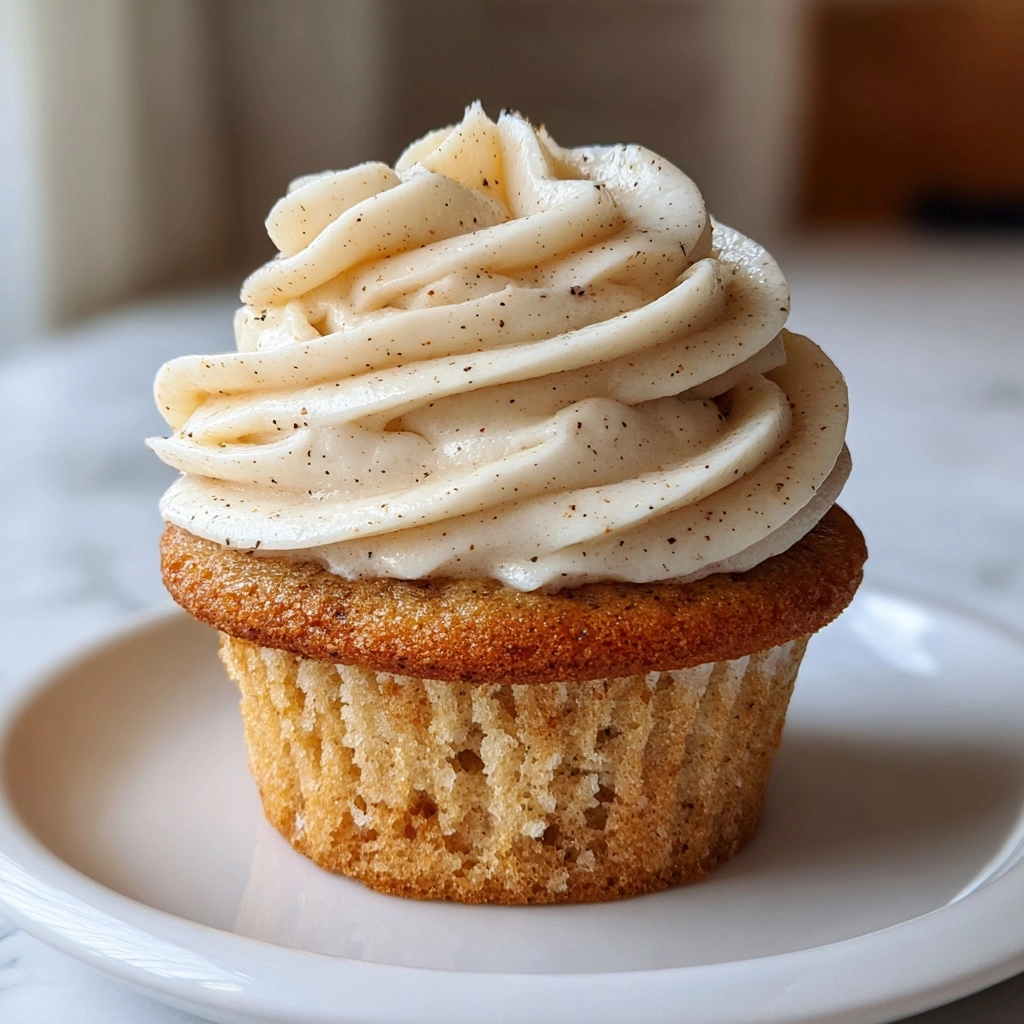
Vanilla Bean Cupcakes
There’s something magical about the aroma of freshly baked Vanilla Bean Cupcakes wafting through the house. It’s like a warm hug on a busy day, isn’t it? These delightful treats are not just a quick solution for dessert; they’re a way to bring a smile to your loved ones’ faces. Whether it’s a birthday, a family gathering, or just a sweet craving, these cupcakes are perfect for any occasion. Trust me, once you take a bite, you’ll understand why they’re a favorite in my kitchen!
Why You’ll Love This Vanilla Bean Cupcakes
These Vanilla Bean Cupcakes are a dream come true for busy moms and professionals alike. They’re incredibly easy to whip up, taking just 35 minutes from start to finish. The taste? Oh, it’s pure bliss! Moist, fluffy, and bursting with rich vanilla flavor, they’re sure to impress. Plus, you can customize them with your favorite toppings, making them perfect for any occasion. Who wouldn’t love that?
Ingredients for Vanilla Bean Cupcakes
Let’s gather our ingredients for these delightful Vanilla Bean Cupcakes! Each one plays a vital role in creating that perfect bite. Here’s what you’ll need:
- All-purpose flour: This is the backbone of our cupcakes, giving them structure and fluffiness.
- Granulated sugar: Sweetness is key! It helps create that lovely moist texture.
- Unsalted butter: Softened butter adds richness and flavor, making every bite melt in your mouth.
- Large eggs: Eggs provide moisture and help bind everything together, giving the cupcakes their lift.
- Milk: A splash of milk keeps the batter smooth and adds to the overall tenderness.
- Vanilla bean paste: This is where the magic happens! It infuses the cupcakes with a deep, aromatic vanilla flavor.
- Baking powder: This leavening agent ensures our cupcakes rise beautifully, creating that light texture.
- Salt: Just a pinch enhances all the flavors, balancing the sweetness perfectly.
For those who want to get creative, feel free to add sprinkles or chocolate chips for a fun twist! You can find the exact measurements for these ingredients at the bottom of the article, ready for printing. Happy baking!
How to Make Vanilla Bean Cupcakes
Now that we have our ingredients ready, let’s dive into the fun part—making these delightful Vanilla Bean Cupcakes! Follow these simple steps, and you’ll be on your way to baking perfection.
Step 1: Preheat the Oven
First things first, preheat your oven to 350°F (175°C). This step is crucial for even baking. While the oven warms up, line your cupcake pan with liners. This will make it easy to remove the cupcakes later and keep them looking pretty!
Step 2: Cream Butter and Sugar
In a large bowl, cream together the softened butter and granulated sugar until it’s light and fluffy. This process is essential for creating a tender texture. The air you incorporate will help the cupcakes rise beautifully, giving them that perfect fluffiness we all love.
Step 3: Add Eggs and Vanilla Bean Paste
Next, add the eggs one at a time, mixing well after each addition. Then, stir in the vanilla bean paste. Eggs provide moisture and structure, while the vanilla bean paste infuses a rich flavor that elevates these cupcakes to a whole new level!
Step 4: Combine Dry Ingredients
In a separate bowl, whisk together the all-purpose flour, baking powder, and salt. This step ensures that the leavening agent is evenly distributed. It’s important for achieving that light and airy texture we’re aiming for in our Vanilla Bean Cupcakes.
Step 5: Mix Wet and Dry Ingredients
Now, gradually add the dry ingredients to the wet mixture, alternating with the milk. Mix until just combined. Be careful not to overmix! Overmixing can lead to dense cupcakes, and we want them to be light and fluffy.
Step 6: Fill Cupcake Liners
Using a scoop or spoon, fill each cupcake liner about two-thirds full with batter. This allows room for the cupcakes to rise without overflowing. It’s a simple step, but it makes a big difference in how they bake!
Step 7: Bake the Cupcakes
Place the cupcake pan in the preheated oven and bake for 18-20 minutes. Keep an eye on them! You’ll know they’re done when a toothpick inserted into the center comes out clean. This is the moment of truth!
Step 8: Cool and Frost
Once baked, allow the cupcakes to cool completely in the pan for a few minutes before transferring them to a wire rack. Cooling is essential before frosting; otherwise, the frosting will melt. Once cooled, let your creativity shine with your favorite frosting!
Tips for Success
- Use room temperature ingredients for better mixing and texture.
- Don’t skip the creaming step; it’s key for fluffy cupcakes.
- Measure flour correctly—spoon it into the cup and level it off.
- Keep an eye on baking time; ovens can vary.
- Let cupcakes cool completely before frosting for the best results.
Equipment Needed
- Cupcake pan: A standard 12-cup pan works perfectly. If you don’t have one, use a muffin tin.
- Mixing bowls: A large bowl for mixing and a smaller one for dry ingredients.
- Electric mixer: A hand mixer is great, but a whisk will do if you’re feeling strong!
- Measuring cups and spoons: Essential for accuracy in baking.
- Cooling rack: Helps cool cupcakes evenly; a plate can work in a pinch.
Variations
- Chocolate Chip Vanilla Bean Cupcakes: Add a handful of chocolate chips to the batter for a delightful twist.
- Gluten-Free Option: Substitute all-purpose flour with a gluten-free blend for a delicious alternative.
- Coconut Vanilla Bean Cupcakes: Mix in shredded coconut for a tropical flair that pairs beautifully with vanilla.
- Fruit-Infused Cupcakes: Fold in fresh berries or diced peaches for a burst of flavor and color.
- Vegan Vanilla Bean Cupcakes: Replace eggs with flax eggs and use plant-based milk and butter for a vegan-friendly treat.
Serving Suggestions
- Pair your Vanilla Bean Cupcakes with a scoop of vanilla ice cream for a delightful dessert duo.
- Serve with a side of fresh berries to add a pop of color and flavor.
- For a festive touch, dust with powdered sugar or top with colorful sprinkles.
- Enjoy with a cup of coffee or tea for a cozy afternoon treat.
FAQs about Vanilla Bean Cupcakes
As a passionate home cook, I often get questions about my beloved Vanilla Bean Cupcakes. Here are some of the most common queries I hear, along with my answers to help you on your baking journey!
Can I use vanilla extract instead of vanilla bean paste?
Absolutely! While vanilla bean paste gives a richer flavor and those lovely specks of vanilla, pure vanilla extract works just fine. Just use a little more to achieve a similar taste.
How do I store leftover cupcakes?
Store your Vanilla Bean Cupcakes in an airtight container at room temperature for up to three days. If you want to keep them longer, pop them in the fridge for up to a week. Just remember to let them come to room temperature before enjoying!
Can I freeze these cupcakes?
Yes, you can! Freeze the cupcakes without frosting for up to three months. Just wrap them tightly in plastic wrap and place them in a freezer bag. When you’re ready to enjoy, thaw them at room temperature and frost as desired.
What can I use instead of eggs for a vegan version?
For a vegan twist, you can replace each egg with one tablespoon of flaxseed meal mixed with three tablespoons of water. Let it sit for a few minutes until it thickens. It works like a charm!
Can I make mini cupcakes with this recipe?
Definitely! Just adjust the baking time to about 12-15 minutes. Keep an eye on them, and you’ll have adorable mini Vanilla Bean Cupcakes in no time!
Summarizing the Joy of Baking Vanilla Bean Cupcakes
Baking Vanilla Bean Cupcakes is more than just a recipe; it’s an experience filled with joy and creativity. The process brings the family together, filling the kitchen with laughter and sweet aromas. Each cupcake is a little masterpiece, waiting to be decorated and enjoyed. Whether you’re celebrating a special occasion or simply indulging in a sweet treat, these cupcakes are sure to create lasting memories. Plus, the smiles on your loved ones’ faces when they take that first bite? That’s the true magic of baking. So, roll up your sleeves and let the fun begin!
PrintVanilla Bean Cupcakes: Discover the Secret to Perfection!
Deliciously moist and fluffy vanilla bean cupcakes topped with creamy vanilla frosting, perfect for any occasion.
- Prep Time: 15 minutes
- Cook Time: 20 minutes
- Total Time: 35 minutes
- Yield: 12 cupcakes
- Category: Dessert
- Method: Baking
- Cuisine: American
- Diet: Vegetarian
Ingredients
- 1 1/2 cups all-purpose flour
- 1 cup granulated sugar
- 1/2 cup unsalted butter, softened
- 2 large eggs
- 1/2 cup milk
- 1 tablespoon vanilla bean paste
- 1 1/2 teaspoons baking powder
- 1/4 teaspoon salt
Instructions
- Preheat the oven to 350°F (175°C) and line a cupcake pan with liners.
- In a large bowl, cream together the softened butter and sugar until light and fluffy.
- Add the eggs one at a time, mixing well after each addition.
- Stir in the vanilla bean paste.
- In a separate bowl, whisk together the flour, baking powder, and salt.
- Gradually add the dry ingredients to the wet mixture, alternating with the milk, and mix until just combined.
- Fill each cupcake liner about 2/3 full with batter.
- Bake for 18-20 minutes or until a toothpick inserted into the center comes out clean.
- Allow to cool completely before frosting.
Notes
- For a richer flavor, use high-quality vanilla bean paste.
- These cupcakes can be stored in an airtight container for up to 3 days.
- Feel free to add sprinkles or other toppings for decoration.