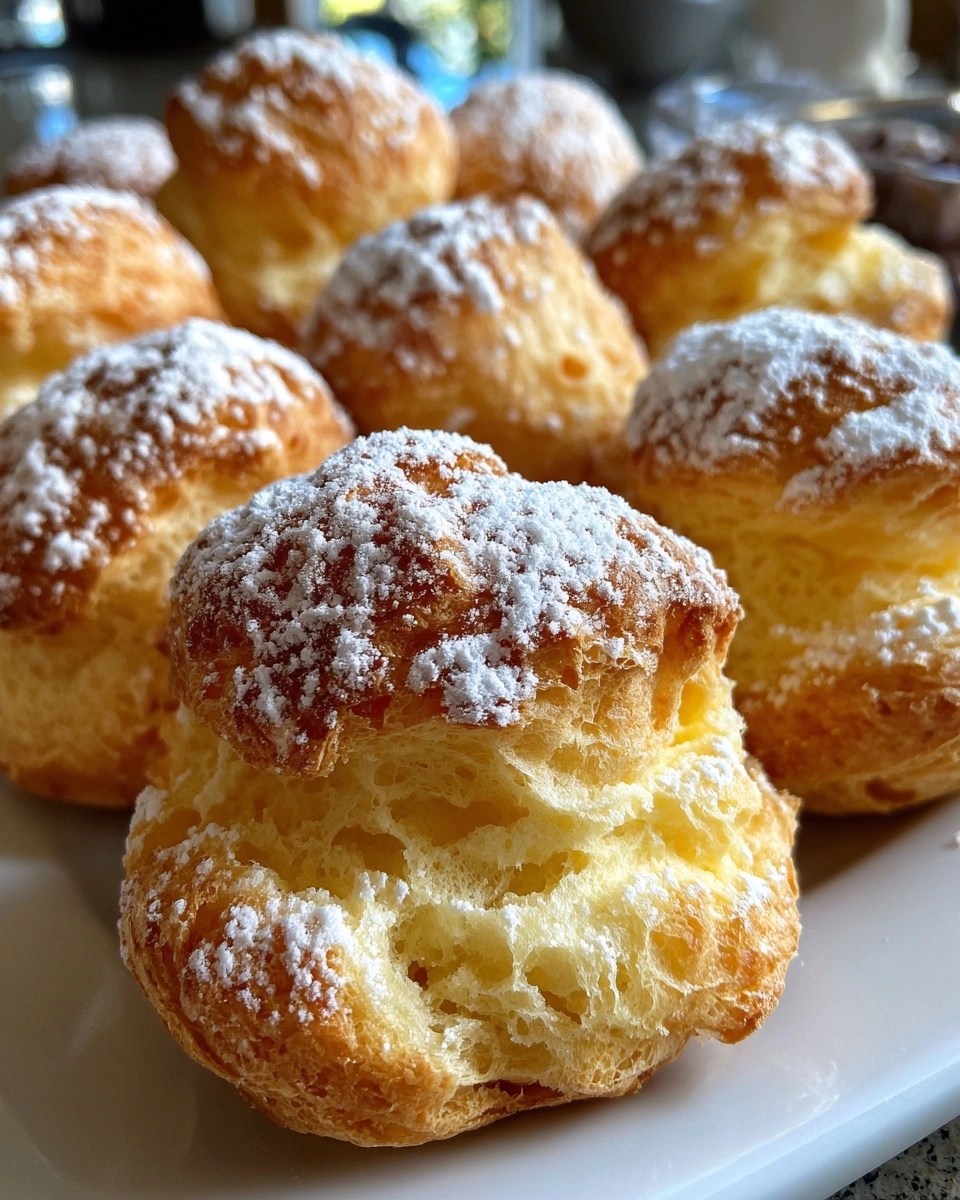
Nuns’ Puffs – Delightful Airy Pastries Recipe
Welcome to the world of Nuns’ Puffs – delightful airy pastries that are sure to bring a smile to your face! As a busy mom, I know how precious time can be, and this recipe is a quick solution for those hectic days when you want to impress your loved ones without spending hours in the kitchen. These light and fluffy pastries are perfect for brunch, a cozy family gathering, or even a simple afternoon treat. Trust me, once you try making these, they’ll become a staple in your home!
Why You’ll Love This Nuns’ Puffs
Nuns’ Puffs are not just pastries; they’re a delightful experience! They come together quickly, making them perfect for busy days. The light, airy texture is simply irresistible, and you can customize them to suit your taste. Whether you enjoy them savory with cheese or sweet with a sprinkle of sugar, these pastries are sure to impress. Plus, they’re a hit with both kids and adults alike!
Ingredients for Nuns’ Puffs
Let’s gather the ingredients for these delightful airy pastries! Each component plays a vital role in creating that perfect puff. Here’s what you’ll need:
- Water: The base for our dough, it helps create steam, which is essential for puffing up the pastries.
- Unsalted Butter: Adds richness and flavor. Using unsalted allows you to control the saltiness of the final product.
- All-Purpose Flour: The backbone of the recipe, it provides structure and helps the pastries rise beautifully.
- Large Eggs: These are crucial for binding the ingredients together and giving the puffs their airy texture.
- Grated Cheese (optional): A delicious addition for those who love a savory twist. Feel free to experiment with your favorite cheese!
- Salt: Just a pinch enhances the flavors of the other ingredients, making each bite more delicious.
- Ground Nutmeg (optional): This warm spice adds a hint of sweetness and depth. It’s perfect for those who enjoy a touch of warmth in their pastries.
For exact measurements, check the bottom of the article where you can find everything listed for easy printing. Happy baking!
How to Make Nuns’ Puffs
Step 1: Preheat the Oven
First things first, preheat your oven to 400°F (200°C). This step is crucial because it ensures that your Nuns’ Puffs rise beautifully. A hot oven creates steam, which is essential for that delightful airy texture. Trust me, you don’t want to skip this part!
Step 2: Boil Water and Butter
In a saucepan, bring the water and butter to a rolling boil. This step is vital as it melts the butter and creates a hot liquid base for your dough. The boiling mixture will help the flour absorb moisture, leading to those fluffy pastries we all love!
Step 3: Mix in Flour and Seasonings
Once boiling, stir in the flour, salt, and nutmeg. Mix vigorously until the dough forms a ball and pulls away from the sides of the pan. This is where the magic begins! The flour needs to cook slightly to develop the right texture for your Nuns’ Puffs.
Step 4: Cool and Add Eggs
Remove the saucepan from heat and let the mixture cool for about 5 minutes. This cooling period is important! It prevents the eggs from cooking when added. Add the eggs one at a time, mixing well after each addition to ensure a smooth, airy batter.
Step 5: Fold in Cheese
If you’re feeling adventurous, fold in the grated cheese at this stage. This optional ingredient adds a savory twist to your Nuns’ Puffs. The cheese melts beautifully during baking, creating pockets of flavor that will have everyone coming back for more!
Step 6: Drop onto Baking Sheet
Using a spoon, drop generous spoonfuls of the mixture onto a baking sheet lined with parchment paper. Make sure to leave space between each puff, as they will expand while baking. This little tip ensures they don’t stick together and can puff up nicely!
Step 7: Bake to Perfection
Bake your Nuns’ Puffs for 20-25 minutes or until they are golden brown and puffed up. You’ll know they’re done when they look like little clouds of deliciousness! Let them cool slightly before serving, and enjoy the delightful airy pastries you’ve created!
Tips for Success
- Make sure your butter is fully melted before adding flour for the best texture.
- Don’t rush the cooling process; it’s key to achieving that airy puff.
- Use a cookie scoop for even-sized puffs that bake uniformly.
- Experiment with different cheeses or spices to find your favorite flavor combination.
- Keep an eye on them while baking; every oven is a little different!
Equipment Needed
- Medium saucepan: A sturdy pot for boiling water and butter. A small stockpot works too!
- Wooden spoon: Perfect for mixing the dough. A silicone spatula can also do the trick.
- Baking sheet: A flat tray for baking. If you don’t have one, a large oven-safe dish will work.
- Parchment paper: For easy cleanup. Aluminum foil can be a substitute, but it may stick more.
- Cookie scoop or spoon: For dropping the dough. A regular spoon is just fine if you don’t have a scoop!
Variations
- Sweet Nuns’ Puffs: Add a tablespoon of sugar to the dough for a sweeter treat. Dust with powdered sugar before serving for an elegant touch.
- Herbed Nuns’ Puffs: Mix in fresh or dried herbs like rosemary or thyme for a fragrant twist that pairs beautifully with cheese.
- Spicy Nuns’ Puffs: Incorporate a pinch of cayenne pepper or red pepper flakes for a kick that will surprise your taste buds!
- Gluten-Free Option: Substitute all-purpose flour with a gluten-free flour blend to accommodate dietary needs while still enjoying these delightful pastries.
- Vegetable-Loaded Nuns’ Puffs: Fold in finely chopped spinach, bell peppers, or sun-dried tomatoes for added nutrition and flavor.
Serving Suggestions
- Pair Nuns’ Puffs with a fresh garden salad for a light lunch or brunch option.
- Serve them alongside a warm bowl of soup for a comforting dinner.
- For a delightful presentation, arrange them on a tiered cake stand.
- Enjoy with a cup of tea or coffee for a cozy afternoon treat.
- Drizzle with a bit of honey or serve with a fruit compote for added sweetness.
FAQs about Nuns’ Puffs
Can I make Nuns’ Puffs ahead of time? Absolutely! You can prepare the dough in advance and store it in the fridge for up to 24 hours. Just remember to let it come to room temperature before baking for the best results.
What can I do if my Nuns’ Puffs don’t rise? If your pastries don’t puff up, it could be due to undercooking the flour mixture or not preheating the oven properly. Make sure to follow the steps closely for that delightful airy texture!
Can I freeze Nuns’ Puffs? Yes, you can freeze them! Once baked and cooled, place them in an airtight container. They can be reheated in the oven for a quick treat later on.
What are some good cheese options for savory Nuns’ Puffs? Cheddar, Gruyère, or even feta work wonderfully! Each cheese brings its unique flavor, so feel free to experiment with your favorites.
How do I store leftover Nuns’ Puffs? Store any leftovers in an airtight container at room temperature for up to two days. For longer storage, refrigerate them, but they’re best enjoyed fresh!
Summarizing the Joy of Nuns’ Puffs
Making Nuns’ Puffs is more than just baking; it’s about creating moments of joy in your kitchen. The delightful airy pastries bring a sense of accomplishment and warmth, perfect for sharing with family and friends. Each bite is a reminder of the simple pleasures in life, whether enjoyed at a festive gathering or a quiet afternoon at home. Plus, the versatility of this recipe means you can tailor it to your taste, making it a true crowd-pleaser. So roll up your sleeves, embrace the process, and let these charming pastries fill your home with love and laughter!
PrintNuns’ Puffs – Discover the Secret to Airy Pastries!

Nuns’ Puffs are delightful airy pastries that are light and fluffy, perfect for any occasion.
- Prep Time: 15 minutes
- Cook Time: 25 minutes
- Total Time: 40 minutes
- Yield: 24 pastries
- Category: Dessert
- Method: Baking
- Cuisine: French
- Diet: Vegetarian
Ingredients
- 1 cup water
- 1/2 cup unsalted butter
- 1 cup all-purpose flour
- 4 large eggs
- 1/2 cup grated cheese (optional)
- 1/4 teaspoon salt
- 1/4 teaspoon ground nutmeg (optional)
Instructions
- Preheat your oven to 400°F (200°C).
- In a saucepan, bring water and butter to a boil.
- Stir in flour, salt, and nutmeg until the mixture forms a ball.
- Remove from heat and let it cool slightly.
- Add eggs one at a time, mixing well after each addition.
- If using, fold in the grated cheese.
- Drop spoonfuls of the mixture onto a baking sheet lined with parchment paper.
- Bake for 20-25 minutes or until golden brown and puffed up.
- Let cool slightly before serving.
Notes
- For a sweeter version, you can add sugar to the dough.
- These pastries can be served warm or at room temperature.
- Experiment with different cheeses for varied flavors.