No-Knead Gluten-Free Bread
As a busy mom, I know how precious time can be, especially when it comes to preparing meals. That’s why I’m excited to share my No-Knead Gluten-Free Bread recipe with you! This bread is not only simple to make, but it also requires no kneading at all. Imagine waking up to the warm aroma of freshly baked bread without spending hours in the kitchen. Whether you’re looking to impress your loved ones or just want a quick solution for a busy day, this recipe is here to save the day. Let’s dive into the deliciousness!
Why You’ll Love This No-Knead Gluten-Free Bread
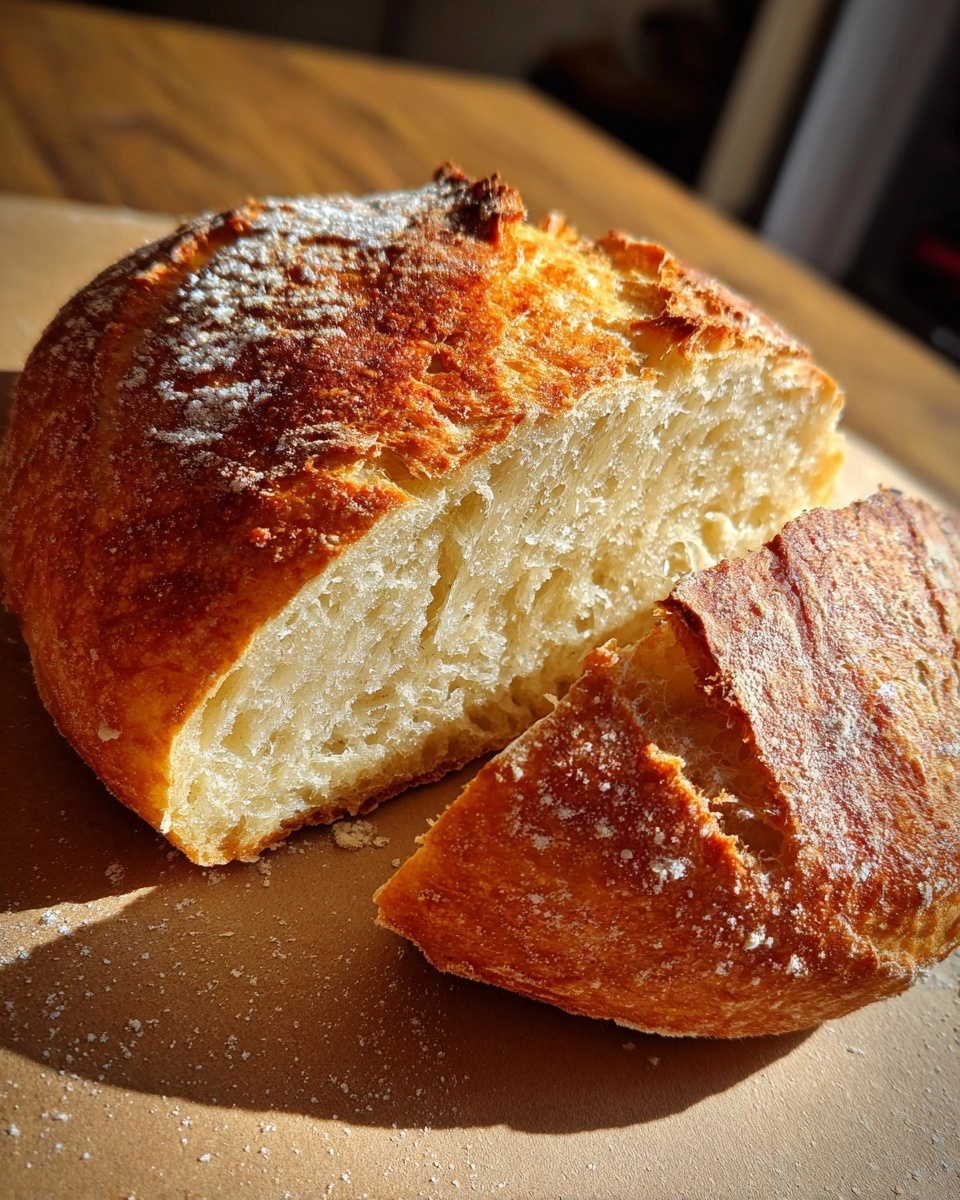
This No-Knead Gluten-Free Bread is a game changer for anyone juggling a busy schedule. It’s incredibly easy to whip up, requiring minimal effort and just a few ingredients. The taste? Oh, it’s heavenly! With a crispy crust and a soft, fluffy interior, it’s perfect for sandwiches or simply slathered with butter. Plus, the long resting time means you can set it and forget it, making it a stress-free baking experience!
Ingredients for No-Knead Gluten-Free Bread
Gathering the right ingredients is the first step to creating your No-Knead Gluten-Free Bread masterpiece. Here’s what you’ll need:
- Gluten-Free All-Purpose Flour: This is the star of the show! Look for a blend that includes xanthan gum for better texture.
- Salt: A must for flavor! It enhances the taste and balances the sweetness of the bread.
- Baking Powder: This helps the bread rise, giving it that lovely fluffy texture we all crave.
- Baking Soda: A little extra lift! It works with the vinegar to create a perfect rise.
- Warm Water: This activates the yeast and helps the dough come together. Make sure it’s not too hot!
- Apple Cider Vinegar: This adds a subtle tang and helps with the bread’s structure. Plus, it’s a great natural preservative!
- Olive Oil: For moisture and flavor! It gives the bread a lovely richness.
Feel free to experiment with different gluten-free flour blends or add herbs and spices for a unique twist. You can find the exact measurements for each ingredient at the bottom of the article, ready for printing!
How to Make No-Knead Gluten-Free Bread
Now that you have your ingredients ready, let’s get to the fun part—making your No-Knead Gluten-Free Bread! Follow these simple steps, and you’ll be on your way to enjoying warm, homemade bread in no time.
Step 1: Mix Dry Ingredients
In a large bowl, combine the gluten-free all-purpose flour, salt, baking powder, and baking soda. Whisk them together until they’re well blended. This step is crucial for ensuring an even rise and flavor throughout your bread.
Step 2: Combine Wet Ingredients
In a separate bowl, mix the warm water, apple cider vinegar, and olive oil. Make sure the water is warm but not hot, as this can affect the yeast’s activity. Stir until everything is well combined.
Step 3: Stir the Dough
Now, pour the wet mixture into the bowl with the dry ingredients. Using a wooden spoon or spatula, stir until everything is well combined. The dough will be sticky, and that’s perfectly okay! It’s what gives the bread its delightful texture.
Step 4: Let It Rest
Cover the bowl with a clean kitchen towel and let it rest at room temperature for 12-18 hours. This long resting time allows the flavors to develop and the dough to rise beautifully. You can even prepare it the night before and bake it the next day!
Step 5: Preheat the Oven
About 30 minutes before you’re ready to bake, preheat your oven to 450°F (230°C). Place a Dutch oven inside to heat up. This step is essential for creating that crispy crust we all love.
Step 6: Transfer Dough to Dutch Oven
Once the dough has risen, carefully remove the hot Dutch oven from the oven. Using a spatula, transfer the sticky dough into the pot. Don’t worry about shaping it; it will spread out as it bakes.
Step 7: Bake the Bread
Cover the Dutch oven with its lid and bake for 30 minutes. This helps trap steam, which is key for a soft interior. After 30 minutes, remove the lid and bake for an additional 15-20 minutes until the bread is golden brown and crusty.
Step 8: Cool and Slice
Once baked, carefully remove the bread from the Dutch oven and let it cool on a wire rack. This cooling step is important; it allows the bread to finish cooking and makes slicing easier. Once cool, slice and enjoy your delicious No-Knead Gluten-Free Bread!
Tips for Success
- Use a kitchen scale for precise measurements, especially with gluten-free flour.
- Let the dough rest in a warm spot to encourage rising.
- Experiment with different gluten-free flour blends for unique flavors.
- Don’t skip the preheating step; it’s crucial for a crispy crust.
- Store leftover bread in an airtight container to keep it fresh longer.
Equipment Needed
- Large Mixing Bowl: Any bowl will do, but a glass or stainless steel one is ideal.
- Wooden Spoon or Spatula: Use a sturdy spoon for mixing; a spatula works well too.
- Kitchen Towel: A clean towel to cover the bowl while the dough rests.
- Dutch Oven: If you don’t have one, a heavy oven-safe pot with a lid will work.
- Wire Rack: For cooling the bread; a plate can be a good substitute.
Variations of No-Knead Gluten-Free Bread
- Herb-Infused Bread: Add dried herbs like rosemary, thyme, or oregano to the dry ingredients for a fragrant twist.
- Cheesy Delight: Mix in shredded cheese, such as cheddar or mozzarella, for a savory, cheesy bread that pairs perfectly with soups.
- Sweet Cinnamon Bread: Incorporate cinnamon and a touch of sugar to create a delightful sweet bread, perfect for breakfast.
- Seeded Bread: Top the dough with a mix of seeds like sesame, sunflower, or poppy seeds before baking for added crunch and nutrition.
- Nutty Variation: Fold in chopped nuts like walnuts or pecans for a hearty texture and flavor boost.
Serving Suggestions for No-Knead Gluten-Free Bread
- With Soup: Serve warm slices alongside your favorite soup for a comforting meal.
- As Toast: Top with avocado, poached eggs, or your favorite jam for a delightful breakfast.
- For Sandwiches: Use it as a base for hearty sandwiches filled with fresh veggies and proteins.
- Presentation: Slice and arrange on a wooden board with olive oil and balsamic vinegar for dipping.
- Pair with Wine: Enjoy a glass of white wine for a sophisticated touch during dinner.
FAQs about No-Knead Gluten-Free Bread
As you embark on your No-Knead Gluten-Free Bread journey, you might have a few questions. Here are some common queries I’ve encountered, along with helpful answers to guide you along the way.
Can I use regular flour instead of gluten-free flour?
No, this recipe is specifically designed for gluten-free flour. Regular flour contains gluten, which is essential for traditional bread but not suitable for gluten-free baking.
How do I store leftover No-Knead Gluten-Free Bread?
Store your leftover bread in an airtight container at room temperature for up to three days. For longer storage, slice and freeze it. Just pop it in the toaster when you’re ready to enjoy!
Can I add other ingredients to the dough?
Absolutely! Feel free to mix in herbs, cheese, or nuts to customize your No-Knead Gluten-Free Bread. Just remember to keep the overall moisture content in mind.
What if my dough doesn’t rise?
If your dough doesn’t rise, it could be due to the water being too hot or cold. Make sure it’s warm, around 110°F (43°C). Also, check the freshness of your baking powder and baking soda.
Is this bread suitable for freezing?
Yes! This No-Knead Gluten-Free Bread freezes beautifully. Just slice it before freezing for easy access to individual pieces whenever you crave a slice of homemade goodness.
Summarizing the Joy of No-Knead Gluten-Free Bread
There’s something truly magical about baking your own bread, especially when it’s a No-Knead Gluten-Free Bread. The joy of pulling a golden loaf from the oven, with its crispy crust and soft interior, is unmatched. It’s not just about the taste; it’s about the love and care you put into it. This recipe allows you to create something special without the fuss. Whether you’re sharing it with family or savoring a slice alone, each bite is a reminder that homemade goodness can fit into even the busiest of lives. Enjoy the journey of baking!
PrintNo-Knead Gluten-Free Bread Made Easy for Everyone!
A simple and delicious recipe for making gluten-free bread without the need for kneading.
- Prep Time: 15 minutes
- Cook Time: 45 minutes
- Total Time: 12-18 hours (including resting time)
- Yield: 1 loaf
- Category: Bread
- Method: Baking
- Cuisine: American
- Diet: Gluten Free
Ingredients
- 2 cups gluten-free all-purpose flour
- 1 1/2 teaspoons salt
- 1 teaspoon baking powder
- 1/4 teaspoon baking soda
- 1 1/2 cups warm water
- 1 tablespoon apple cider vinegar
- 1 tablespoon olive oil
Instructions
- In a large bowl, mix together the gluten-free flour, salt, baking powder, and baking soda.
- Add the warm water, apple cider vinegar, and olive oil to the dry ingredients.
- Stir until well combined; the dough will be sticky.
- Cover the bowl with a clean kitchen towel and let it rest for 12-18 hours at room temperature.
- Preheat your oven to 450°F (230°C) and place a Dutch oven inside to heat up.
- Once the dough has risen, carefully remove the hot Dutch oven and transfer the dough into it.
- Cover with the lid and bake for 30 minutes.
- Remove the lid and bake for an additional 15-20 minutes until the bread is golden brown.
- Let the bread cool on a wire rack before slicing.
Notes
- For best results, use a gluten-free flour blend that contains xanthan gum.
- Store leftover bread in an airtight container to maintain freshness.
- This bread can be frozen for longer storage.