Halloween Midnight Moon Fudge
As the leaves turn and the air gets crisp, I find myself dreaming of Halloween treats. This Halloween Midnight Moon Fudge is a delightful way to celebrate the spooky season! It’s rich, chocolatey, and oh-so-easy to whip up, making it perfect for busy moms like us. Whether you’re hosting a Halloween party or just want to surprise your family with a sweet treat, this fudge is sure to impress. Plus, it’s a fun activity to do with the kids, creating memories while indulging in something delicious. Let’s dive into this spooky delight!
Why You’ll Love This Halloween Midnight Moon Fudge
This Halloween Midnight Moon Fudge is a game-changer for busy days. It comes together in just 15 minutes, leaving you with more time to enjoy the festivities. The rich chocolate flavor is irresistible, and the spooky appearance makes it a hit with kids and adults alike. Plus, it’s a no-bake treat, so you can skip the oven and keep your kitchen cool. What’s not to love?
Ingredients for Halloween Midnight Moon Fudge
Gathering the right ingredients is the first step to creating this spooky delight. Here’s what you’ll need:
- Semi-sweet chocolate chips: These are the heart of your fudge, providing that rich, chocolatey flavor we all crave.
- Sweetened condensed milk: This creamy ingredient adds sweetness and helps bind everything together, making your fudge smooth and luscious.
- Unsweetened cocoa powder: A little bit of cocoa enhances the chocolate flavor, giving it depth and richness.
- Vanilla extract: Just a teaspoon adds a warm, inviting aroma that complements the chocolate beautifully.
- Salt: A pinch of salt balances the sweetness and enhances the overall flavor of the fudge.
- White chocolate chips: These are for the topping, adding a lovely contrast to the dark fudge and a touch of sweetness.
- Black food coloring (optional): If you want to amp up the spooky factor, a few drops can turn your white chocolate into a hauntingly beautiful topping.
- Halloween-themed sprinkles: These fun decorations are the finishing touch, making your fudge festive and fun!
For exact measurements, check the bottom of the article where you can find everything listed for easy printing. Feel free to get creative with your ingredients! You can swap in different types of chocolate or sprinkles based on your Halloween theme. The possibilities are endless!
How to Make Halloween Midnight Moon Fudge
Now that we have our ingredients ready, let’s dive into the fun part—making this Halloween Midnight Moon Fudge! Follow these simple steps, and you’ll have a spooky treat in no time.
Step 1: Prepare Your Baking Dish
Start by lining an 8×8 inch baking dish with parchment paper. This makes it super easy to lift the fudge out later. Just cut a piece of parchment that hangs over the edges a bit. This way, you can pull it out like a little fudge gift when it’s set!
Step 2: Melt the Chocolate Mixture
In a saucepan, combine the semi-sweet chocolate chips and sweetened condensed milk. Set the heat to low and stir gently. You want to melt the chocolate slowly until it’s smooth and creamy. This is where the magic begins, and the aroma will have you dreaming of chocolate!
Step 3: Mix in Cocoa and Flavorings
Once your chocolate is melted, remove it from the heat. Now, it’s time to add the unsweetened cocoa powder, vanilla extract, and salt. Stir until everything is well combined. This step deepens the chocolate flavor, making it even more irresistible!
Step 4: Spread the Chocolate Base
Pour the chocolate mixture into your prepared baking dish. Use a spatula to spread it evenly. Make sure it’s nice and smooth on top. This will be the rich base of your fudge, so take your time to get it just right!
Step 5: Prepare the White Chocolate Topping
In a separate bowl, melt the white chocolate chips. You can do this in the microwave in short bursts, stirring in between. If you want to add that spooky touch, mix in a few drops of black food coloring. This will create a hauntingly beautiful topping!
Step 6: Create the Marbled Effect
Drizzle the melted white chocolate over the chocolate fudge base. Use a toothpick or a skewer to swirl the two together gently. This creates a marbled effect that’s not only fun but also adds to the spooky aesthetic of your Halloween Midnight Moon Fudge!
Step 7: Add Festive Sprinkles
Now for the fun part! Sprinkle your Halloween-themed decorations on top of the fudge. This adds a festive touch and makes it look extra special. Let your creativity shine—use ghosts, bats, or any spooky sprinkles you have on hand!
Step 8: Chill and Cut
Place the baking dish in the refrigerator for at least 2 hours, or until the fudge is set. Once it’s firm, lift it out using the parchment paper. Cut it into squares, and voila! You have your Halloween Midnight Moon Fudge ready to share (or keep all to yourself!).
Tips for Success
- Make sure to stir the chocolate mixture constantly to prevent burning.
- For a creamier fudge, consider adding a tablespoon of butter to the chocolate mixture.
- Use a sharp knife to cut the fudge for clean edges.
- Experiment with different sprinkles to match your Halloween theme.
- Store any leftovers in an airtight container in the fridge for up to two weeks.
Equipment Needed
- 8×8 inch baking dish: A square dish is ideal, but you can use any similar-sized dish.
- Parchment paper: If you don’t have this, aluminum foil works as a substitute.
- Medium saucepan: A heavy-bottomed pot helps prevent burning.
- Spatula: A rubber spatula is great for mixing and spreading.
- Microwave-safe bowl: For melting white chocolate, any heat-safe bowl will do.
Variations of Halloween Midnight Moon Fudge
- Nutty Delight: Add chopped nuts like walnuts or pecans for a crunchy texture that complements the smooth fudge.
- Peanut Butter Swirl: Mix in a few tablespoons of creamy peanut butter into the chocolate mixture for a delicious twist.
- Vegan Option: Substitute the sweetened condensed milk with coconut milk and use dairy-free chocolate chips for a vegan-friendly treat.
- Minty Fresh: Add a few drops of peppermint extract to the chocolate mixture for a refreshing mint flavor.
- Spicy Kick: Incorporate a pinch of cayenne pepper or chili powder for a surprising spicy twist that pairs well with chocolate.
Serving Suggestions for Halloween Midnight Moon Fudge
- Pair with a warm cup of spiced apple cider for a cozy fall treat.
- Serve alongside vanilla ice cream for a delightful contrast in flavors.
- Present on a spooky-themed platter with decorative Halloween accents.
- Wrap individual squares in colorful cellophane for fun party favors.
- Enjoy with a glass of milk or a pumpkin spice latte for a festive touch.
FAQs about Halloween Midnight Moon Fudge
Can I make Halloween Midnight Moon Fudge ahead of time?
Absolutely! This fudge can be made a few days in advance. Just store it in an airtight container in the refrigerator. It actually tastes even better after a day or two as the flavors meld together!
What can I use instead of sweetened condensed milk?
If you’re looking for a substitute, you can use coconut milk mixed with a bit of sugar. This will give you a similar creamy texture and sweetness, perfect for your Halloween Midnight Moon Fudge.
How do I store leftover fudge?
Store any leftover fudge in an airtight container in the refrigerator. It will stay fresh for up to two weeks. Just make sure to keep it sealed to maintain its deliciousness!
Can I freeze Halloween Midnight Moon Fudge?
Yes, you can freeze it! Just cut it into squares and place them in a single layer in a freezer-safe container. It can last up to three months in the freezer. Just thaw it in the fridge before serving.
What if I don’t have black food coloring?
No worries! If you don’t have black food coloring, you can skip it. The white chocolate will still look lovely drizzled over the fudge. You can also use dark chocolate for a more intense color contrast!
Summarizing the Joy of Halloween Midnight Moon Fudge
Making Halloween Midnight Moon Fudge is more than just whipping up a treat; it’s about creating memories with your loved ones. The rich chocolate flavor combined with the festive sprinkles brings smiles to faces, young and old. As you gather around to enjoy this spooky delight, you’ll find laughter and joy filling the air. This fudge is a sweet reminder that even in our busy lives, there’s always time for a little magic in the kitchen. So, grab your ingredients, and let’s make this Halloween unforgettable with a batch of delicious fudge!
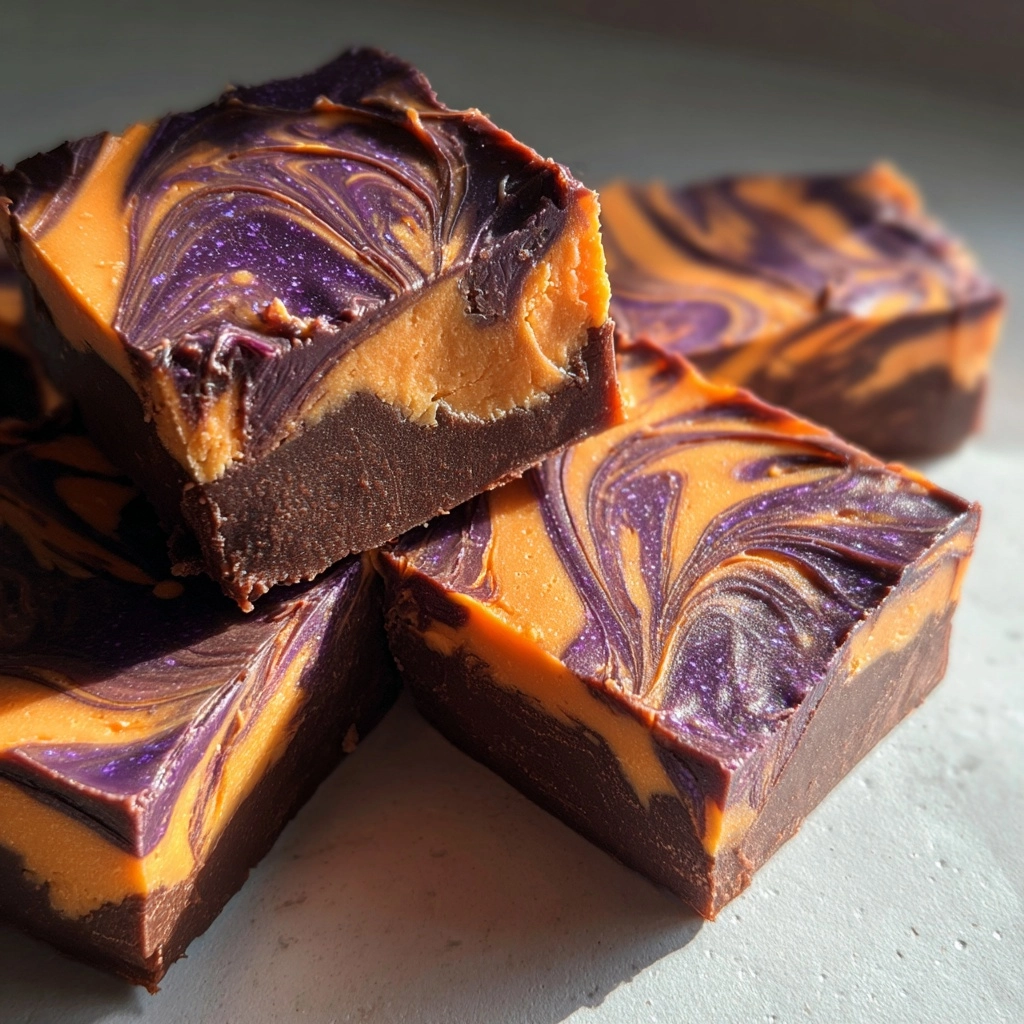
PrintHalloween Midnight Moon Fudge: Treat Yourself to Spooky Delights!

A deliciously spooky fudge perfect for Halloween celebrations, featuring a rich chocolate base and a hauntingly beautiful appearance.
- Prep Time: 15 minutes
- Cook Time: 10 minutes
- Total Time: 2 hours 25 minutes
- Yield: 16 squares
- Category: Dessert
- Method: Stovetop
- Cuisine: American
- Diet: Vegetarian
Ingredients
- 2 cups semi-sweet chocolate chips
- 1 can (14 oz) sweetened condensed milk
- 1/2 cup unsweetened cocoa powder
- 1 teaspoon vanilla extract
- 1/4 teaspoon salt
- 1 cup white chocolate chips
- Black food coloring (optional)
- Halloween-themed sprinkles
Instructions
- Line an 8×8 inch baking dish with parchment paper.
- In a saucepan over low heat, combine the semi-sweet chocolate chips and sweetened condensed milk, stirring until melted and smooth.
- Remove from heat and stir in cocoa powder, vanilla extract, and salt until well combined.
- Pour the chocolate mixture into the prepared baking dish and spread evenly.
- In a separate bowl, melt the white chocolate chips and mix in black food coloring if desired.
- Drizzle the white chocolate mixture over the chocolate fudge and use a toothpick to create a marbled effect.
- Sprinkle Halloween-themed sprinkles on top.
- Refrigerate for at least 2 hours or until set.
- Cut into squares and serve.
Notes
- Store fudge in an airtight container in the refrigerator for up to 2 weeks.
- Feel free to customize the sprinkles based on your Halloween theme.
- For a creamier texture, add a tablespoon of butter to the chocolate mixture.