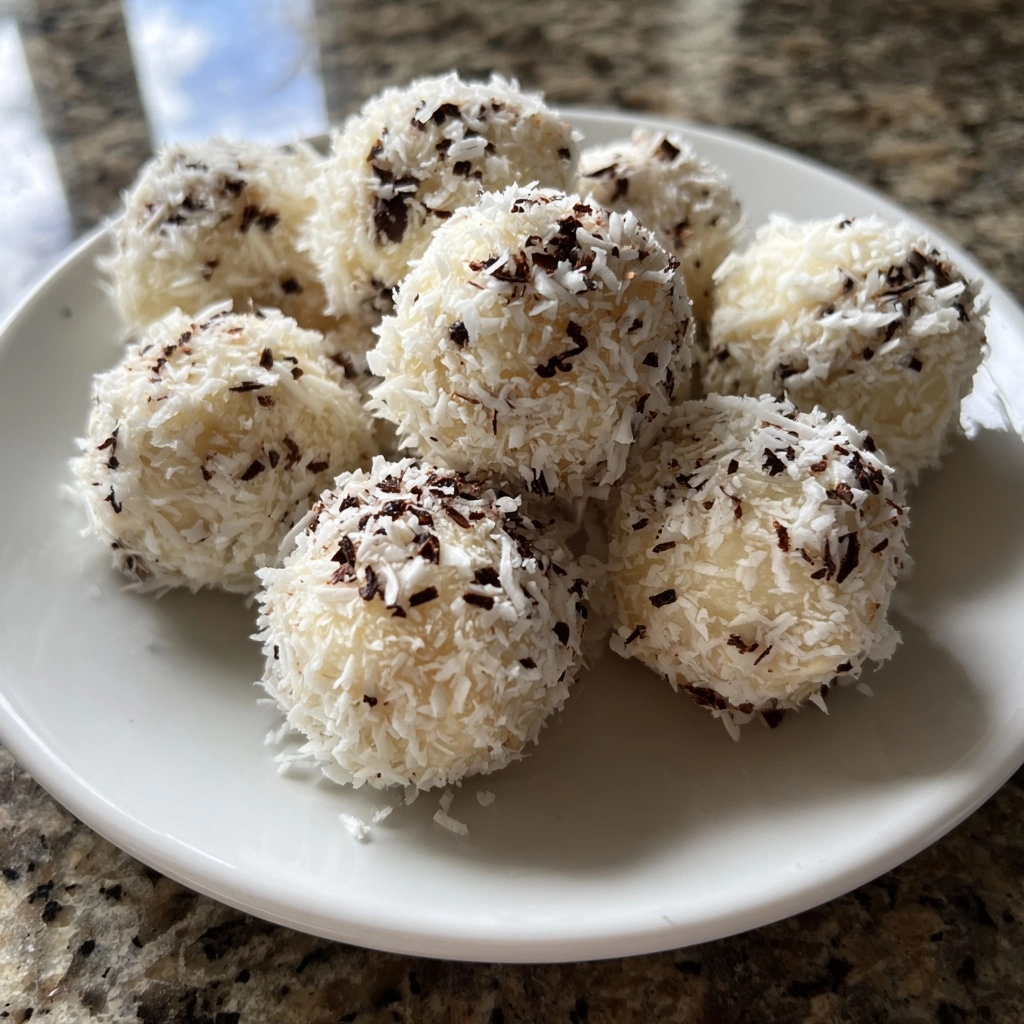
Halloween Coconut Kiss of Death Bites
As the leaves turn and the air gets crisp, I find myself dreaming of delightful treats that capture the spirit of Halloween. These Halloween Coconut Kiss of Death Bites are just the ticket! They’re not only easy to whip up, but they also bring a fun, spooky twist to your dessert table. Perfect for busy moms like us, these bites are a quick solution for satisfying sweet cravings without spending hours in the kitchen. Plus, they’re sure to impress your loved ones with their charming appearance and delicious flavor. Let’s dive into this festive recipe!
Why You’ll Love This Halloween Coconut Kiss of Death Bites
These Halloween Coconut Kiss of Death Bites are a dream come true for busy schedules. They come together in just 32 minutes, making them a perfect last-minute treat for any Halloween gathering. The combination of sweet coconut and rich chocolate is simply irresistible. Plus, they’re a hit with kids and adults alike, ensuring smiles all around. Who wouldn’t love a spooky dessert that’s both quick and delicious?
Ingredients for Halloween Coconut Kiss of Death Bites
Gathering the right ingredients is half the fun! Here’s what you’ll need to create these delightful Halloween Coconut Kiss of Death Bites:
- Shredded Coconut: This is the star of the show! It adds a chewy texture and tropical sweetness.
- Sweetened Condensed Milk: This creamy ingredient binds everything together and adds a rich sweetness. For a vegan twist, consider using coconut cream.
- Vanilla Extract: A splash of this aromatic extract enhances the overall flavor, making each bite even more delightful.
- Chocolate Chips: These are for dipping! Choose semi-sweet or dark chocolate for a rich contrast to the coconut.
- Powdered Sugar: This adds a touch of sweetness and helps create a lovely coating when mixed with cocoa powder.
- Cocoa Powder: This gives a chocolatey flavor and a beautiful dusting to the bites, making them look extra spooky.
- Edible Eyes: These fun decorations bring your Halloween Coconut Kiss of Death Bites to life! They’re perfect for adding a playful touch.
For exact measurements, check the bottom of the article where you can find everything listed for easy printing. Feel free to get creative with your ingredients! You can add food coloring to the coconut mixture for a more festive look or swap in your favorite chocolate for dipping. The possibilities are endless!
How to Make Halloween Coconut Kiss of Death Bites
Step 1: Preheat the Oven
Preheating your oven is crucial for even baking. It ensures that your Halloween Coconut Kiss of Death Bites cook uniformly, giving them that perfect golden edge. Set your oven to 350°F (175°C) and let it warm up while you prepare the mixture. This step is key to achieving that delightful texture!
Step 2: Mix the Ingredients
In a mixing bowl, combine the shredded coconut, sweetened condensed milk, and vanilla extract. Stir until everything is well blended. The mixture should be sticky and hold together nicely. This is where the magic begins, as the flavors meld together to create a deliciously sweet base for your bites!
Step 3: Form the Bites
Now it’s time to shape the mixture into bite-sized balls. Use your hands to roll the mixture into small, uniform balls, about the size of a tablespoon. This helps them bake evenly. If your hands get sticky, a little water can help! Make sure they’re compact for the best results.
Step 4: Bake the Bites
Place the formed bites on a baking sheet lined with parchment paper. Bake them for 10-12 minutes, or until the edges turn golden brown. Keep an eye on them! You want that perfect balance of chewy and crispy. The aroma will fill your kitchen, making it hard to wait!
Step 5: Cool the Bites
Once baked, let the bites cool completely on the baking sheet. Cooling is essential before dipping them in chocolate. If they’re warm, the chocolate will melt too quickly, making a mess. Patience is key here, and trust me, it’s worth the wait for that perfect finish!
Step 6: Melt the Chocolate
In a microwave-safe bowl, melt the chocolate chips in short bursts, stirring in between. This prevents burning and ensures a smooth consistency. You want it silky and ready for dipping. If you prefer, you can use a double boiler for a more controlled melting process!
Step 7: Dip and Decorate
Once the bites are cool, dip each one into the melted chocolate, coating them thoroughly. Then, roll them in a mixture of powdered sugar and cocoa powder for that spooky touch. Finally, add edible eyes on top while the chocolate is still wet. They’ll look delightfully creepy!
Step 8: Set and Serve
After decorating, place the bites back on the baking sheet and let the chocolate set. This usually takes about 15-20 minutes. Once set, they’re ready to serve! Arrange them on a festive platter for a spooky presentation that will wow your guests!
Tips for Success
- Use fresh shredded coconut for the best flavor and texture.
- Don’t skip the cooling step; it prevents chocolate from melting too quickly.
- Experiment with different chocolate types for unique flavors.
- For a fun twist, add a pinch of sea salt to the chocolate.
- Store leftovers in an airtight container to keep them fresh.
Equipment Needed
- Baking Sheet: A standard baking sheet works perfectly. If you don’t have one, a large oven-safe dish will do.
- Parchment Paper: This helps prevent sticking. If unavailable, lightly greasing the baking sheet is a good alternative.
- Mixing Bowl: Any large bowl will suffice for mixing your ingredients.
- Microwave-Safe Bowl: For melting chocolate, a glass bowl is ideal. A small saucepan can also work.
Variations
- Nutty Delight: Add chopped nuts like almonds or walnuts for a crunchy texture that complements the coconut.
- Spooky Colors: Mix in a few drops of food coloring to the coconut mixture for a vibrant Halloween look.
- Gluten-Free Option: Ensure all ingredients are certified gluten-free, especially the chocolate chips.
- Fruit Fusion: Incorporate dried fruits like cranberries or raisins for a chewy surprise in every bite.
- Minty Twist: Add a few drops of peppermint extract to the chocolate for a refreshing flavor contrast.
Serving Suggestions
- Pair these Halloween Coconut Kiss of Death Bites with a spooky punch or hot apple cider for a festive drink.
- Serve them on a black or orange platter to enhance the Halloween theme.
- For a fun touch, add some fake spider webs or plastic spiders around the bites.
- Include a side of fresh fruit for a refreshing contrast to the sweetness.
FAQs about Halloween Coconut Kiss of Death Bites
Can I make these Halloween Coconut Kiss of Death Bites ahead of time?
Absolutely! These bites can be made a day or two in advance. Just store them in an airtight container to keep them fresh. They’ll be just as delicious when it’s time to serve!
What can I use instead of sweetened condensed milk?
If you’re looking for a dairy-free option, coconut cream works wonderfully as a substitute. It will still give you that creamy texture and sweetness without the dairy.
How do I store leftover bites?
Store any leftover Halloween Coconut Kiss of Death Bites in an airtight container at room temperature for up to a week. If you want them to last longer, you can refrigerate them!
Can I freeze these bites?
Yes, you can freeze them! Just make sure they’re in a single layer on a baking sheet until frozen, then transfer them to a freezer-safe container. They’ll keep for about a month.
What’s the best way to serve these bites at a party?
For a fun presentation, arrange the bites on a spooky-themed platter. You can even add some decorative elements like fake spiders or cobwebs to enhance the Halloween vibe!
Summarizing the Joy of Halloween Coconut Kiss of Death Bites
Creating these Halloween Coconut Kiss of Death Bites is more than just baking; it’s about bringing joy and laughter to your home. The delightful combination of coconut and chocolate creates a treat that’s both spooky and scrumptious. Watching your loved ones’ faces light up as they enjoy these bites is truly priceless. Plus, the ease of making them means you can spend more time enjoying the festivities and less time in the kitchen. So, gather your family, get creative, and let these charming treats add a sprinkle of magic to your Halloween celebrations!
PrintHalloween Coconut Kiss of Death Bites: Delightfully Spooky Treats!
These Halloween Coconut Kiss of Death Bites are delightfully spooky treats that combine the sweetness of coconut with a fun, festive twist, perfect for Halloween celebrations.
- Prep Time: 20 minutes
- Cook Time: 12 minutes
- Total Time: 32 minutes
- Yield: 24 bites
- Category: Dessert
- Method: Baking
- Cuisine: American
- Diet: Vegetarian
Ingredients
- 2 cups shredded coconut
- 1 cup sweetened condensed milk
- 1 teaspoon vanilla extract
- 1/2 cup chocolate chips
- 1/4 cup powdered sugar
- 1/4 cup cocoa powder
- Edible eyes for decoration
Instructions
- Preheat your oven to 350°F (175°C).
- In a mixing bowl, combine shredded coconut, sweetened condensed milk, and vanilla extract until well mixed.
- Form the mixture into small bite-sized balls and place them on a baking sheet lined with parchment paper.
- Bake for 10-12 minutes or until the edges are golden brown.
- Let the bites cool completely.
- Melt the chocolate chips in a microwave-safe bowl, stirring until smooth.
- Dip the cooled coconut bites into the melted chocolate, then roll them in a mixture of powdered sugar and cocoa powder.
- Place the bites back on the baking sheet and add edible eyes for decoration.
- Allow the chocolate to set before serving.
Notes
- Store in an airtight container for up to a week.
- For a vegan version, use coconut cream instead of sweetened condensed milk.
- Feel free to add food coloring to the coconut mixture for a more festive look.