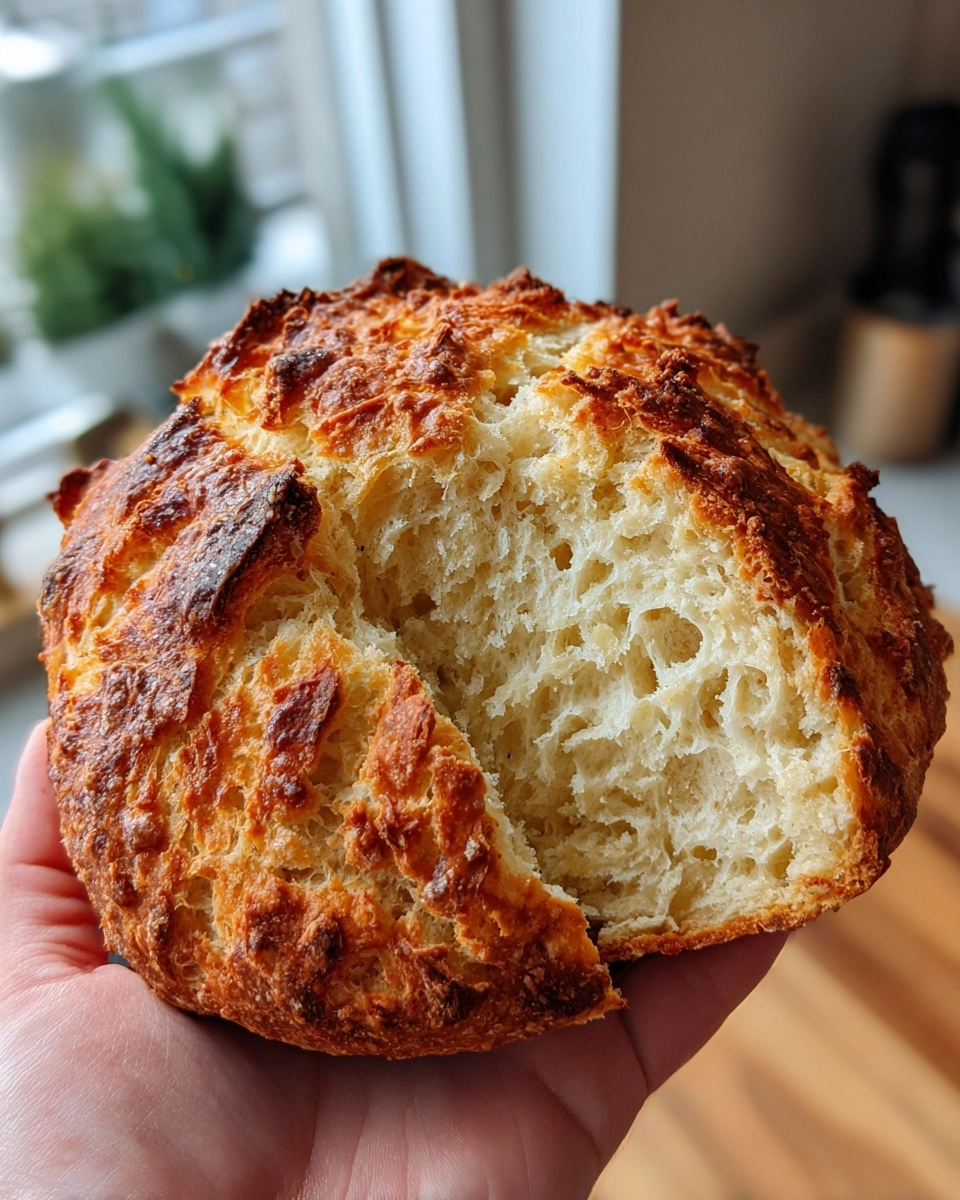
Dutch Oven Irish Soda Bread
There’s something magical about the aroma of freshly baked bread wafting through the house, isn’t there? This Dutch Oven Irish Soda Bread is not just a recipe; it’s a warm hug on a busy day. With just a handful of ingredients, you can whip up a delicious loaf that will impress your loved ones. Whether you’re a seasoned baker or just starting out, this recipe is perfect for anyone looking for a quick and satisfying solution. Trust me, once you taste that crispy crust and soft, tender inside, you’ll be hooked!
Why You’ll Love This Dutch Oven Irish Soda Bread
This Dutch Oven Irish Soda Bread is a game-changer for busy moms and professionals alike. It’s incredibly easy to make, requiring minimal effort and time. In just an hour, you can have a warm, crusty loaf ready to enjoy. The taste? Oh, it’s simply divine! With its rich flavor and delightful texture, it’s sure to become a family favorite. Plus, it’s a fantastic way to bring everyone together around the table.
Ingredients for Dutch Oven Irish Soda Bread
Gathering the right ingredients is the first step to creating your delicious Dutch Oven Irish Soda Bread. Here’s what you’ll need:
- All-purpose flour: The backbone of your bread, providing structure and a lovely texture.
- Baking soda: This is your leavening agent, giving the bread its rise and lightness.
- Salt: A crucial ingredient that enhances flavor and balances the sweetness of the bread.
- Buttermilk: This adds moisture and a slight tang, making the bread tender and flavorful. If you don’t have buttermilk, you can substitute it with regular milk mixed with a splash of vinegar or lemon juice.
For those who like to experiment, consider adding raisins or caraway seeds for a delightful twist. These optional ingredients can elevate your bread to new heights!
Remember, the exact quantities for each ingredient are listed at the bottom of the article, ready for you to print out and take to the kitchen.
How to Make Dutch Oven Irish Soda Bread
Step 1: Preheat Your Dutch Oven
Preheating your Dutch oven is crucial for achieving that perfect crust. When the pot is hot, it creates a steamy environment that helps the bread rise beautifully. Set your oven to 450°F (230°C) and let the Dutch oven heat up while you prepare the dough. Trust me, this step is worth it!
Step 2: Mix Dry Ingredients
In a large bowl, combine the all-purpose flour, baking soda, and salt. Whisk them together until they’re well blended. This ensures that the baking soda is evenly distributed, which is key for a uniform rise. A good mix here sets the stage for a delightful loaf!
Step 3: Add Buttermilk
Now, make a well in the center of your dry ingredients and pour in the buttermilk. This ingredient is the secret to a tender crumb and adds a lovely tang. Gently stir until a shaggy dough forms. Don’t overmix; you want to keep that light texture!
Step 4: Knead the Dough
Lightly flour your work surface and turn out the dough. Knead it gently for about a minute. You’re looking for a smooth, slightly sticky texture. Avoid over-kneading, as this can make the bread tough. Just enough to bring it together is perfect!
Step 5: Shape the Loaf
Shape the dough into a round loaf, about 1.5 inches thick. The shape is important for even baking and a beautiful presentation. Place it directly into your preheated Dutch oven. This is where the magic happens, so make sure it’s nice and round!
Step 6: Score the Top
Using a sharp knife, cut a cross on the top of the loaf. This isn’t just for looks; it helps the bread expand while baking. Plus, it gives that rustic charm we all love. Don’t skip this step; it’s part of the tradition!
Step 7: Bake the Bread
Cover the Dutch oven with its lid and bake for 30 minutes. After that, remove the lid and bake for an additional 15 minutes. You’ll know it’s done when the crust is golden brown and sounds hollow when tapped. Your kitchen will smell heavenly!
Step 8: Cool and Slice
Once baked, transfer the loaf to a wire rack to cool. This step is essential; slicing too soon can make the bread gummy. Let it cool for at least 15 minutes before cutting into it. Patience is key, but the wait is so worth it!
Tips for Success
- Use room temperature buttermilk for better mixing and texture.
- Don’t over-knead the dough; a gentle touch keeps it light.
- For a crustier loaf, place a small dish of water in the oven while baking.
- Experiment with add-ins like herbs or cheese for unique flavors.
- Store leftover bread in a bread bag to maintain freshness.
Equipment Needed
- Dutch oven: Essential for even baking. If you don’t have one, a heavy pot with a lid works too.
- Mixing bowl: Any large bowl will do for combining ingredients.
- Whisk: Perfect for mixing dry ingredients; a fork can work in a pinch.
- Sharp knife: Needed for scoring the loaf; a serrated knife is ideal.
- Wire rack: Great for cooling; a plate can substitute if needed.
Variations
- Herb-Infused: Add fresh or dried herbs like rosemary or thyme for a fragrant twist.
- Cheesy Delight: Mix in shredded cheese, such as cheddar or feta, for a savory flavor boost.
- Sweet Raisins: Toss in a cup of raisins or currants for a touch of sweetness that pairs beautifully with butter.
- Gluten-Free Option: Substitute all-purpose flour with a gluten-free blend for a delicious alternative.
- Whole Wheat Variation: Use whole wheat flour for a heartier loaf packed with fiber and nutrients.
Serving Suggestions
- Serve warm with a pat of butter and a drizzle of honey for a delightful treat.
- Pair with a hearty soup, like Irish potato or vegetable, for a comforting meal.
- Enjoy alongside a fresh salad for a light lunch option.
- For drinks, consider a cup of tea or a pint of stout to complement the flavors.
- Presentation tip: Slice the bread and arrange it on a rustic wooden board for a charming display.
FAQs about Dutch Oven Irish Soda Bread
Can I use regular milk instead of buttermilk?
Absolutely! If you don’t have buttermilk on hand, you can mix regular milk with a splash of vinegar or lemon juice. Let it sit for about 5 minutes to create a similar tangy flavor.
How do I know when the bread is done baking?
The best way to check is by tapping the bottom of the loaf. If it sounds hollow, it’s ready! Also, look for a beautiful golden-brown crust.
Can I make this bread ahead of time?
Yes! You can bake the bread and store it in a bread bag for a couple of days. Just remember to let it cool completely before storing to keep it fresh.
What can I do with leftover bread?
Leftover Dutch Oven Irish Soda Bread is perfect for making toast or croutons. You can also use it to make delicious sandwiches or serve it with soups and stews.
Can I freeze the bread?
Definitely! Wrap the cooled loaf tightly in plastic wrap and then in aluminum foil. It can be frozen for up to three months. Just thaw it at room temperature when you’re ready to enjoy it again!
Summarizing the Joy of Baking Dutch Oven Irish Soda Bread
Baking Dutch Oven Irish Soda Bread is more than just a recipe; it’s an experience that fills your home with warmth and love. The simple act of mixing ingredients transforms into a delightful journey, bringing family and friends together. Each slice offers a taste of tradition, reminding us of cozy gatherings and shared moments. As you savor the crispy crust and tender interior, you’ll find joy in the process and the delicious results. So, roll up your sleeves, embrace the mess, and let the magic of baking create memories that last a lifetime!
PrintDutch Oven Irish Soda Bread: Bake Perfect Loaves Today!
A simple and delicious recipe for baking traditional Irish soda bread using a Dutch oven.
- Prep Time: 15 minutes
- Cook Time: 45 minutes
- Total Time: 1 hour
- Yield: 1 loaf
- Category: Bread
- Method: Baking
- Cuisine: Irish
- Diet: Vegetarian
Ingredients
- 4 cups all-purpose flour
- 1 teaspoon baking soda
- 1 teaspoon salt
- 1 3/4 cups buttermilk
Instructions
- Preheat your Dutch oven to 450°F (230°C).
- In a large bowl, mix together the flour, baking soda, and salt.
- Make a well in the center and pour in the buttermilk.
- Stir until a dough forms, then knead gently on a floured surface.
- Shape the dough into a round loaf and place it in the preheated Dutch oven.
- Cut a cross on the top of the loaf with a sharp knife.
- Cover with the lid and bake for 30 minutes.
- Remove the lid and bake for an additional 15 minutes until golden brown.
- Let cool on a wire rack before slicing.
Notes
- For a richer flavor, you can add raisins or caraway seeds.
- Ensure the buttermilk is at room temperature for best results.
- Store leftovers in a bread bag to keep them fresh.