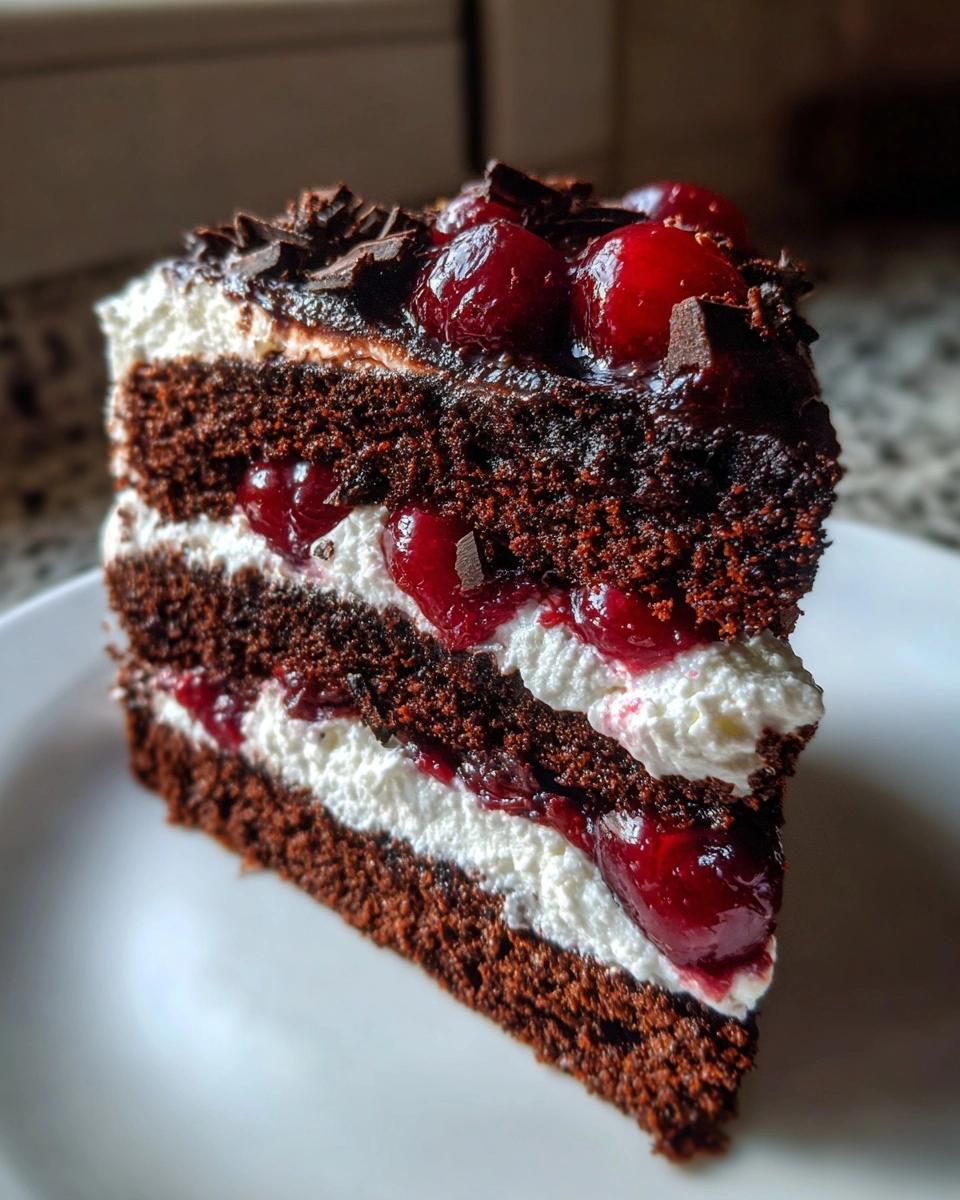
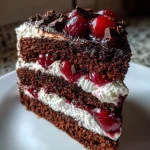
Black Forest Cake
Ah, the delightful Black Forest Cake! This rich and decadent chocolate cake layered with whipped cream and cherries is a true showstopper. I remember the first time I made it; my family couldn’t believe I had whipped up such a masterpiece in my own kitchen. It’s perfect for any celebration, whether it’s a birthday, anniversary, or just a sweet treat after a long week. If you’re a busy mom or professional like me, this recipe is a quick solution to impress your loved ones without spending hours in the kitchen. Trust me, they’ll be asking for seconds!
Why You’ll Love This Black Forest Cake
This Black Forest Cake is not just a dessert; it’s a celebration on a plate! You’ll love how easy it is to whip up, even on your busiest days. The rich chocolate flavor combined with the lightness of whipped cream and the tartness of cherries creates a symphony of taste that dances on your palate. Plus, it’s a crowd-pleaser, making it perfect for gatherings or a cozy family night. Who wouldn’t want a slice of happiness?
Ingredients for Black Forest Cake
Gathering the right ingredients is the first step to creating your delicious Black Forest Cake. Here’s what you’ll need:
- All-purpose flour: This is the backbone of your cake, giving it structure and a tender crumb.
- Granulated sugar: Sweetness is key! It balances the rich chocolate flavor and helps the cake rise.
- Unsweetened cocoa powder: For that deep, chocolatey goodness. Dark cocoa can intensify the flavor.
- Baking powder and baking soda: These leavening agents help your cake rise to fluffy perfection.
- Salt: A pinch enhances all the flavors, making the chocolate taste even richer.
- Large eggs: They bind the ingredients together and add moisture, creating a lovely texture.
- Whole milk: This adds richness and moisture to the cake, making it oh-so-delicious.
- Vegetable oil: Keeps the cake moist and tender. You can substitute with melted butter for a richer flavor.
- Vanilla extract: A splash of vanilla adds warmth and depth to the cake’s flavor.
- Boiling water: This may sound odd, but it helps to bloom the cocoa powder, enhancing the chocolate flavor.
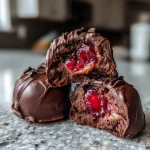
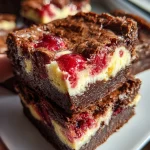
- Morello cherries: These tart cherries are the star of the show, adding a burst of flavor and color.
- Heavy whipping cream: Essential for that luscious whipped topping that makes this cake so special.
- Powdered sugar: Sweetens the whipped cream and helps it hold its shape.
- Chocolate shavings: A delightful garnish that adds a touch of elegance and extra chocolatey goodness.
For exact measurements, check the bottom of the article where you can find everything you need for printing. Happy baking!
How to Make Black Forest Cake
Step 1: Preheat and Prepare
Let’s get started! First, preheat your oven to 350°F (175°C). This step is crucial for baking the perfect Black Forest Cake. While the oven warms up, grab two 9-inch round cake pans. Grease them with butter or cooking spray, then dust them with flour. This will help the cakes release easily after baking. Trust me, there’s nothing worse than a cake that sticks to the pan! Once your pans are ready, you’re all set to move on to the next step.
Step 2: Mix Dry Ingredients
In a large mixing bowl, combine your dry ingredients. Start with the all-purpose flour, granulated sugar, unsweetened cocoa powder, baking powder, baking soda, and salt. Whisk them together until they’re well blended. This is where the magic begins! The cocoa powder will give your cake that rich chocolate flavor, while the baking powder and soda will help it rise beautifully. Make sure there are no lumps; a smooth mixture is key to a fluffy cake!
Step 3: Combine Wet Ingredients
Now it’s time to add the wet ingredients. Crack in the large eggs, pour in the whole milk, vegetable oil, and vanilla extract. Using a hand mixer or a whisk, mix everything together until it’s well combined. The batter should be smooth and creamy. This is where the cake starts to come to life! Don’t be afraid to get a little elbow grease in there; a good mix ensures all those flavors meld together beautifully.
Step 4: Add Boiling Water
Here’s a little secret: add the boiling water to your batter. It may sound strange, but this step is essential for a moist cake. Carefully stir in the boiling water until the batter is smooth. The heat helps bloom the cocoa powder, enhancing that deep chocolate flavor we all love. Your batter will be quite thin, but that’s perfectly normal! It’s all part of the process to achieve that luscious texture.
Step 5: Bake the Cakes
Pour the batter evenly into your prepared cake pans. Make sure to spread it out evenly for uniform baking. Pop them into your preheated oven and bake for 30-35 minutes. You’ll know they’re done when a toothpick inserted in the center comes out clean. The aroma of chocolate will fill your kitchen, making it hard to resist sneaking a taste! Once baked, it’s time to let them cool.
Step 6: Cool the Cakes
After baking, let the cakes cool in the pans for about 10 minutes. This allows them to set a bit. Then, carefully remove them from the pans and transfer them to wire racks to cool completely. Cooling is crucial; if you frost them too soon, the whipped cream will melt. Patience is key here! While they cool, you can start dreaming about the delicious layers to come.
Step 7: Prepare the Whipped Cream
Now, let’s whip up some heavenly whipped cream! In a chilled mixing bowl, combine the heavy whipping cream and powdered sugar. Using a hand mixer, whip the cream until stiff peaks form. This means the cream should hold its shape when you lift the beaters. Chilling the bowl and beaters beforehand helps achieve this. The whipped cream is what makes this Black Forest Cake so special, so take your time to get it just right!
Step 8: Assemble the Cake
It’s assembly time! Take one layer of cake and place it on a serving plate. Spread a generous layer of whipped cream on top, then add a layer of drained Morello cherries. Repeat this process with the next two layers. Finally, place the last layer on top. Don’t worry if it gets a little messy; that’s part of the charm! The layers of cream and cherries will create a beautiful contrast against the dark chocolate cake.
Step 9: Frost and Garnish
To finish off your masterpiece, frost the top and sides of the cake with the remaining whipped cream. Use a spatula to create swirls and peaks for a lovely presentation. Now, for the final touch, sprinkle chocolate shavings on top and add a few extra cherries for decoration. Your Black Forest Cake is now ready to shine! It’s a true labor of love that will surely impress everyone at the table.
Tips for Success
- Always measure your ingredients accurately for the best results.
- Chill your mixing bowl and beaters before whipping cream for a fluffier texture.
- Let the cakes cool completely before frosting to prevent melting.
- Use high-quality cocoa powder for a richer chocolate flavor.
- Don’t rush the assembly; take your time to layer beautifully!
Equipment Needed
- Two 9-inch round cake pans (or use one 9×13-inch pan for a single-layer cake).
- Mixing bowls (a large one for dry ingredients and a medium one for wet).
- Hand mixer or whisk (a whisk gives a good workout!).
- Measuring cups and spoons for accuracy.
- Wire racks for cooling the cakes.
Variations
- Gluten-Free: Substitute all-purpose flour with a gluten-free flour blend to make this cake gluten-free. Just ensure the blend contains xanthan gum for structure.
- Dairy-Free: Use almond milk or coconut milk in place of whole milk and opt for a dairy-free whipped topping to cater to dairy sensitivities.
- Fruit Variations: Swap out Morello cherries for raspberries or strawberries for a different fruity twist. Each fruit brings its own unique flavor!
- Chocolate Lovers: For an extra chocolate kick, add chocolate chips to the batter or use chocolate ganache instead of whipped cream for frosting.
- Alcohol-Infused: Brush the cake layers with cherry liqueur or rum for an adult version that adds depth and richness to the flavor.
Serving Suggestions
- Pair your Black Forest Cake with a scoop of vanilla ice cream for a delightful contrast.
- Serve with a dollop of extra whipped cream on the side for those who love a creamy touch.
- Complement with a cup of rich coffee or a glass of sweet dessert wine.
- For presentation, dust the plate with cocoa powder or powdered sugar for an elegant touch.
FAQs about Black Forest Cake
As you embark on your Black Forest Cake journey, you might have a few questions. Here are some common queries I’ve encountered, along with helpful answers to guide you along the way.
Can I make Black Forest Cake ahead of time?
Absolutely! You can bake the cakes a day in advance. Just store them in an airtight container at room temperature. Assemble the cake with whipped cream and cherries on the day you plan to serve it for the best texture.
What can I use instead of Morello cherries?
If Morello cherries aren’t available, you can use fresh cherries, raspberries, or even strawberries. Each fruit brings a unique flavor, so feel free to experiment!
How do I store leftover Black Forest Cake?
Store any leftovers in the refrigerator, covered with plastic wrap or in an airtight container. It should stay fresh for up to three days. Just be aware that the whipped cream may soften over time.
Can I freeze Black Forest Cake?
Yes, you can freeze the cake! However, it’s best to freeze the layers without the whipped cream. Wrap each layer tightly in plastic wrap and then in aluminum foil. When you’re ready to enjoy, thaw them in the fridge overnight and assemble with whipped cream and cherries.
What’s the best way to serve Black Forest Cake?
For a delightful presentation, slice the cake and serve it with a dollop of whipped cream and a few extra cherries on top. Pair it with coffee or dessert wine for a truly indulgent experience!
Summarizing the Joy of Black Forest Cake
There’s something magical about a slice of Black Forest Cake. It’s not just a dessert; it’s a celebration of flavors and memories. Each layer tells a story, from the rich chocolate to the sweet cherries and fluffy whipped cream. I love how this cake brings people together, whether it’s for a birthday, holiday, or just a cozy family gathering. The smiles on my loved ones’ faces as they take that first bite are priceless. So, roll up your sleeves and create your own Black Forest Cake adventure. Trust me, the joy it brings is worth every moment spent in the kitchen!
PrintBlack Forest Cake: The Delightful Recipe You Need!
A rich and decadent chocolate cake layered with whipped cream and cherries, perfect for any celebration.
- Prep Time: 30 minutes
- Cook Time: 35 minutes
- Total Time: 1 hour 5 minutes
- Yield: 12 servings
- Category: Dessert
- Method: Baking
- Cuisine: German
- Diet: Vegetarian
Ingredients
- 2 cups all-purpose flour
- 2 cups granulated sugar
- 3/4 cup unsweetened cocoa powder
- 1 1/2 teaspoons baking powder
- 1 1/2 teaspoons baking soda
- 1 teaspoon salt
- 2 large eggs
- 1 cup whole milk
- 1/2 cup vegetable oil
- 2 teaspoons vanilla extract
- 1 cup boiling water
- 1 jar (24 oz) Morello cherries, drained
- 2 cups heavy whipping cream
- 1/4 cup powdered sugar
- Chocolate shavings for garnish
Instructions
- Preheat the oven to 350°F (175°C). Grease and flour two 9-inch round cake pans.
- In a large bowl, combine flour, sugar, cocoa powder, baking powder, baking soda, and salt.
- Add eggs, milk, oil, and vanilla to the dry ingredients and mix until well combined.
- Stir in boiling water until the batter is smooth.
- Pour the batter evenly into the prepared pans.
- Bake for 30-35 minutes or until a toothpick inserted in the center comes out clean.
- Let the cakes cool in the pans for 10 minutes, then remove from pans and cool completely on wire racks.
- Once cooled, slice each cake in half horizontally to create four layers.
- Whip the heavy cream with powdered sugar until stiff peaks form.
- Place one layer of cake on a serving plate, spread with whipped cream, and top with cherries.
- Repeat with the next two layers, then place the final layer on top.
- Frost the top and sides of the cake with the remaining whipped cream and garnish with chocolate shavings and additional cherries.
Notes
- For a more intense chocolate flavor, use dark cocoa powder.
- Chill the mixing bowl and beaters before whipping the cream for better results.
- Store leftovers in the refrigerator for up to 3 days.