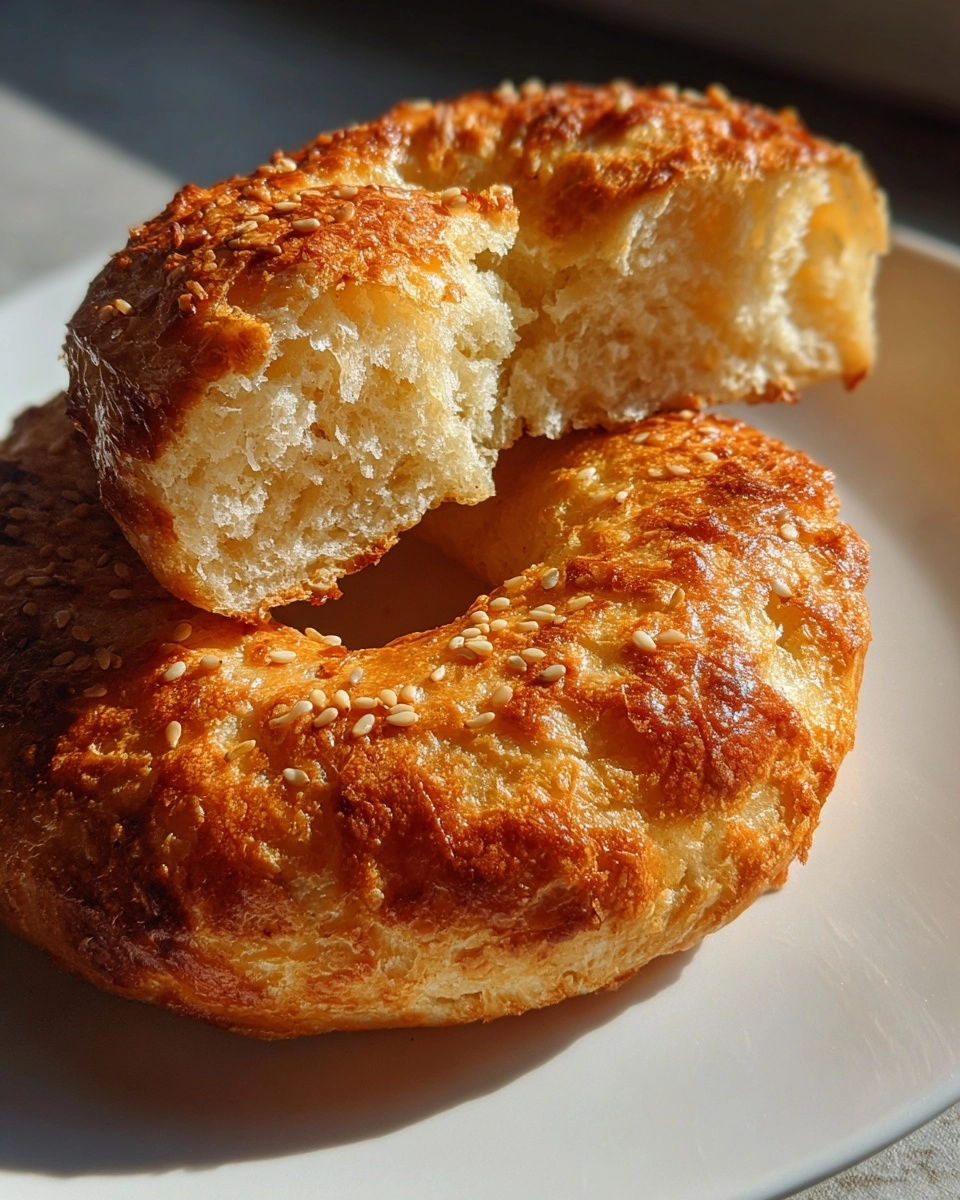
Gluten-Free Bagels
As a busy mom, I know how challenging it can be to whip up something delicious and satisfying in the morning. That’s why I’m excited to share my recipe for gluten-free bagels! These chewy, baked delights are not only easy to make but also perfect for breakfast or a quick snack. Imagine biting into a warm, fresh bagel, slathered with cream cheese or your favorite spread. It’s a simple pleasure that can brighten your day. Plus, they’re gluten-free, so everyone can enjoy them without worry!
Why You’ll Love This Gluten-Free Bagels
These gluten-free bagels are a game changer for busy mornings! They come together in just 45 minutes, making them a quick solution for breakfast or snacks. The chewy texture is simply irresistible, and you can customize them with your favorite toppings. Plus, they’re baked, not boiled, which means less mess and fuss in the kitchen. Trust me, once you try these, you’ll be hooked!
Ingredients for Gluten-Free Bagels
Let’s gather our ingredients for these delightful gluten-free bagels! Each component plays a vital role in creating that perfect chewy texture and flavor.
- Gluten-free all-purpose flour: This is the star of the show! It provides the structure and chewiness we crave in bagels. Look for a blend that includes xanthan gum for the best results.
- Baking powder: This helps our bagels rise, giving them that fluffy interior. Make sure it’s fresh for optimal leavening.
- Salt: A pinch of salt enhances the flavor, balancing the sweetness and making every bite delicious.
- Sugar: Just a touch of sugar adds a hint of sweetness and helps with browning during baking.
- Warm water: This activates the yeast and helps bring the dough together. It should be comfortably warm, not hot!
- Olive oil: This adds moisture and richness to the bagels, making them tender and flavorful.
- Apple cider vinegar: A splash of this tangy ingredient helps improve the dough’s texture and adds a subtle depth of flavor.
For those who want to get creative, consider adding toppings like sesame seeds or poppy seeds for extra flavor and crunch. You can find the exact measurements for each ingredient at the bottom of the article, ready for printing!
How to Make Gluten-Free Bagels
Now that we have our ingredients ready, let’s dive into the fun part—making these delicious gluten-free bagels! Follow these simple steps, and you’ll have a batch of chewy, baked bagels in no time.
Step 1: Preheat the Oven
First things first, preheat your oven to 375°F (190°C). Preheating is crucial because it ensures that your bagels bake evenly. A hot oven helps create that lovely golden crust we all adore. So, don’t skip this step!
Step 2: Mix Dry Ingredients
In a large bowl, combine the gluten-free all-purpose flour, baking powder, salt, and sugar. Whisk them together until they’re well blended. This step is essential for distributing the baking powder evenly, which helps our bagels rise beautifully. You want a smooth, dry mixture before moving on.
Step 3: Combine Wet Ingredients
In a separate bowl, mix the warm water, olive oil, and apple cider vinegar. Stir gently until everything is combined. The warm water activates the ingredients, making it easier for the dough to come together. Remember, it should feel warm, not hot, to the touch!
Step 4: Form the Dough
Now, gradually add the wet mixture to the dry ingredients. Stir with a spoon or spatula until a dough forms. It should be slightly sticky but manageable. If it feels too dry, add a splash more water. This dough is the heart of your gluten-free bagels!
Step 5: Shape the Bagels
Once your dough is ready, divide it into equal portions—about eight pieces. Roll each piece into a ball, then poke a hole in the center with your finger. Gently stretch the hole to form a bagel shape. Don’t worry if they aren’t perfect; they’ll still taste amazing!
Step 6: Prepare for Baking
Line a baking sheet with parchment paper. Place your shaped bagels on the sheet, leaving space between them. This allows for even baking and prevents them from sticking together. If you want, sprinkle some sesame or poppy seeds on top for added flavor!
Step 7: Bake the Bagels
Pop the baking sheet into your preheated oven and bake for 25-30 minutes. Keep an eye on them! You’ll know they’re done when they turn golden brown. A gentle tap on the bottom should sound hollow, indicating they’re perfectly baked.
Step 8: Cool and Serve
Once baked, remove the bagels from the oven and let them cool on a wire rack. Cooling is important because it helps set the texture. Serve them warm with your favorite spreads, or enjoy them plain. Trust me, they’re delightful either way!
Tips for Success
- Use a kitchen scale for precise measurements, especially with gluten-free flour.
- Let the dough rest for a few minutes before shaping; it makes it easier to handle.
- Experiment with different toppings to find your favorite flavor combination.
- For a chewier texture, bake a little longer, but watch closely to avoid burning.
- Store leftover bagels in an airtight container to keep them fresh.
Equipment Needed
- Mixing bowls: A large bowl for dry ingredients and a smaller one for wet ingredients. Any size will do!
- Whisk: Perfect for blending dry ingredients. A fork works in a pinch!
- Baking sheet: A standard baking sheet lined with parchment paper is ideal.
- Measuring cups: Essential for accurate ingredient measurements. Use a kitchen scale for precision.
- Wire rack: Great for cooling bagels. A plate can work too!
Variations
- Herb-Infused Bagels: Add dried herbs like rosemary or thyme to the dough for a savory twist.
- Cheesy Bagels: Mix in shredded cheese, such as cheddar or mozzarella, for a rich, cheesy flavor.
- Sweet Cinnamon Bagels: Incorporate cinnamon and a bit of brown sugar into the dough for a sweet breakfast treat.
- Nutty Bagels: Fold in chopped nuts like walnuts or pecans for added crunch and nutrition.
- Spicy Bagels: Add a pinch of cayenne pepper or red pepper flakes for a kick of heat.
Serving Suggestions
- Pair your gluten-free bagels with a spread of cream cheese or avocado for a delicious breakfast.
- Serve with fresh fruit or a side of yogurt for a balanced meal.
- Enjoy with a hot cup of coffee or herbal tea for a cozy afternoon snack.
- For a fun presentation, slice bagels and create a mini bagel bar with various toppings!
FAQs about Gluten-Free Bagels
As I’ve shared my recipe for gluten-free bagels, I know you might have some questions. Here are a few common ones that pop up, along with my answers to help you on your bagel-making journey!
Can I use regular flour instead of gluten-free flour?
No, this recipe is specifically designed for gluten-free bagels. Regular flour contains gluten, which is essential for traditional bagel texture. Stick with gluten-free all-purpose flour for the best results!
How do I store leftover gluten-free bagels?
Store your leftover bagels in an airtight container at room temperature for up to three days. If you want to keep them longer, freeze them! Just pop them in the toaster when you’re ready to enjoy.
Can I make these bagels ahead of time?
Absolutely! You can prepare the dough and shape the bagels, then refrigerate them for up to 24 hours before baking. Just let them come to room temperature before popping them in the oven.
What toppings can I use for my gluten-free bagels?
The sky’s the limit! You can sprinkle sesame seeds, poppy seeds, or even everything bagel seasoning on top. For a sweet twist, try cinnamon sugar or a drizzle of honey after baking.
Why are my bagels not chewy?
If your bagels aren’t chewy, it could be due to the flour blend you used. Make sure it contains xanthan gum, which helps mimic the elasticity of gluten. Also, ensure you’re not overbaking them, as that can dry them out.
Summarizing the Joy of Gluten-Free Bagels
Making gluten-free bagels is more than just a recipe; it’s a delightful experience that brings joy to your kitchen. The aroma of freshly baked bagels fills the air, creating a warm and inviting atmosphere. Each chewy bite is a reminder that gluten-free doesn’t mean sacrificing flavor or texture. Whether you enjoy them plain or dressed up with your favorite toppings, these bagels are sure to please everyone at the table. Plus, they’re a fantastic way to share love and creativity with your family. So roll up your sleeves and let the bagel-making adventure begin!
PrintGluten-Free Bagels: Discover the Perfect Chewy Treat!

Delicious and chewy gluten-free bagels that are perfect for breakfast or a snack.
- Prep Time: 15 minutes
- Cook Time: 30 minutes
- Total Time: 45 minutes
- Yield: 8 bagels
- Category: Breakfast
- Method: Baking
- Cuisine: American
- Diet: Gluten Free
Ingredients
- 2 cups gluten-free all-purpose flour
- 1 tablespoon baking powder
- 1 teaspoon salt
- 1 tablespoon sugar
- 1 cup warm water
- 1 tablespoon olive oil
- 1 teaspoon apple cider vinegar
Instructions
- Preheat the oven to 375°F (190°C).
- In a large bowl, mix the gluten-free flour, baking powder, salt, and sugar.
- In a separate bowl, combine warm water, olive oil, and apple cider vinegar.
- Gradually add the wet ingredients to the dry ingredients, mixing until a dough forms.
- Divide the dough into equal portions and shape each portion into a bagel.
- Place the bagels on a baking sheet lined with parchment paper.
- Bake for 25-30 minutes or until golden brown.
- Let cool before serving.
Notes
- For added flavor, consider adding toppings like sesame seeds or poppy seeds.
- Store leftover bagels in an airtight container for up to 3 days.
- These bagels can be frozen for longer storage.