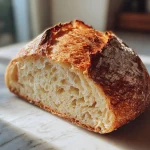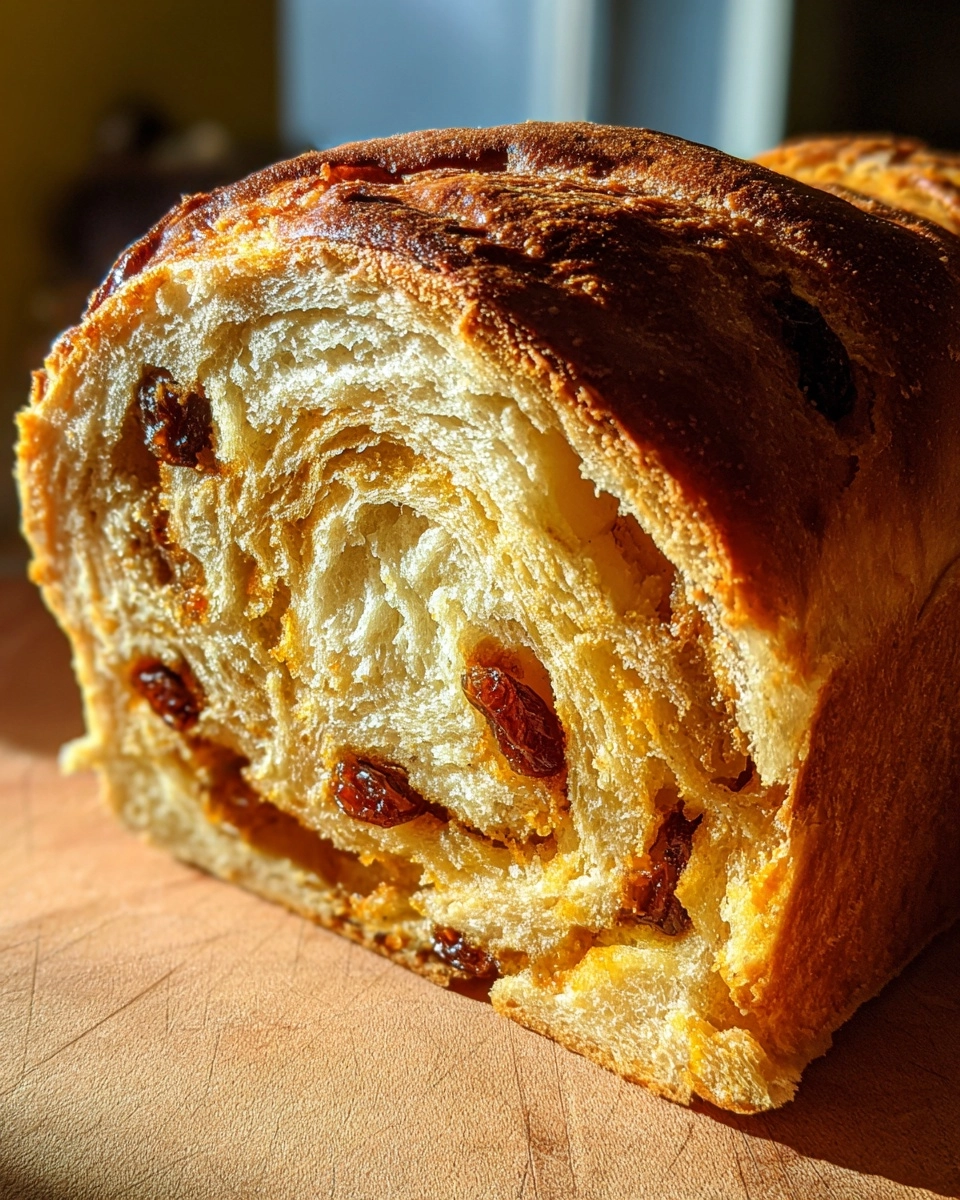
Dutch Oven Cinnamon Raisin Bread
There’s something magical about the aroma of freshly baked bread wafting through the house, isn’t there? This Dutch Oven Cinnamon Raisin Bread is not just a recipe; it’s a warm hug on a busy morning. Whether you’re rushing to get the kids ready or prepping for a long day at work, this delightful bread is your quick solution. With its sweet cinnamon notes and chewy raisins, it’s perfect for breakfast or a cozy snack. Trust me, your loved ones will be impressed, and you’ll feel like a kitchen superstar without spending hours in the kitchen!
Why You’ll Love This Dutch Oven Cinnamon Raisin Bread
This Dutch Oven Cinnamon Raisin Bread is a game-changer for busy moms and professionals alike. It’s incredibly easy to make, requiring minimal hands-on time. The taste? Oh, it’s like a warm embrace with every bite! Plus, the Dutch oven creates a perfectly crusty exterior while keeping the inside soft and fluffy. You’ll love how quickly it comes together, making it a delightful addition to your family’s breakfast table or afternoon snack time.
Ingredients for Dutch Oven Cinnamon Raisin Bread
Gathering the right ingredients is the first step to creating your Dutch Oven Cinnamon Raisin Bread masterpiece. Here’s what you’ll need:
- All-purpose flour: The backbone of your bread, providing structure and chewiness.
- Raisins: These little gems add sweetness and a chewy texture, making each bite delightful.
- Sugar: A touch of sweetness to balance the spices and enhance the flavor.
- Ground cinnamon: This spice brings warmth and a cozy aroma, making your kitchen smell heavenly.
- Salt: Essential for flavor, it enhances the overall taste of the bread.
- Active dry yeast: The magic ingredient that helps your bread rise and become fluffy.
- Warm water: Activates the yeast, creating that lovely rise in your dough.
- Olive oil: Adds moisture and richness, making the bread tender.
Feel free to get creative! You can swap out raisins for other dried fruits like cranberries or apricots. If you want a nuttier flavor, toss in some chopped walnuts or pecans. For those who prefer a sweeter loaf, consider increasing the sugar a bit. Remember, the exact quantities are at the bottom of the article for easy printing!
How to Make Dutch Oven Cinnamon Raisin Bread
Now that you have your ingredients ready, let’s dive into the fun part—making your Dutch Oven Cinnamon Raisin Bread! Follow these simple steps, and you’ll be on your way to enjoying a warm, homemade loaf in no time.
Step 1: Prepare the Yeast Mixture
Start by combining warm water, sugar, and active dry yeast in a large bowl. Stir gently and let it sit for about 5-10 minutes. You’ll know it’s ready when it becomes frothy and bubbly. This step is crucial; it activates the yeast, which is the magic behind your bread’s rise!
Step 2: Mix the Dough
Once your yeast mixture is frothy, add olive oil, all-purpose flour, salt, ground cinnamon, and raisins. Stir everything together until a dough begins to form. Don’t worry if it looks a bit shaggy at first; that’s perfectly normal. Just keep mixing until it all comes together!
Step 3: Knead the Dough
Now it’s time to knead! Lightly flour your work surface and turn the dough out onto it. Knead the dough for about 5-7 minutes until it’s smooth and elastic. You can think of this as giving your dough a little workout. It helps develop the gluten, which gives your bread that lovely chewy texture.
Step 4: Let the Dough Rise
Place your kneaded dough in a greased bowl, turning it to coat all sides. Cover it with a clean cloth and let it rise in a warm place for 1-2 hours. You want it to double in size. This is the perfect time to relax with a cup of tea or tackle that laundry pile!
Step 5: Preheat the Oven
While your dough is rising, preheat your oven to 450°F (232°C). Don’t forget to place your Dutch oven inside to heat up as well. This step is essential for achieving that perfect crust. A hot Dutch oven creates steam, which helps the bread rise beautifully while baking.
Step 6: Shape the Dough
Once your dough has risen, it’s time to shape it. Gently punch it down to release the air, then turn it out onto a floured surface. Shape it into a round loaf by tucking the edges under. This will help create a nice, round shape for your bread.
Step 7: Bake the Bread
Carefully remove the hot Dutch oven from the oven. Place your shaped dough inside, cover it with the lid, and bake for 30 minutes. After that, remove the lid and bake for an additional 15-20 minutes until the bread is golden brown. The aroma will be irresistible!
Step 8: Cool and Slice
Once baked, remove the bread from the Dutch oven and let it cool on a wire rack. This step is important; it allows the steam to escape, preventing a soggy loaf. After it’s cooled, slice it up and enjoy the fruits of your labor!
Tips for Success
- Always use warm water, not hot, to activate the yeast properly.
- For a fluffier loaf, knead the dough thoroughly to develop gluten.
- Let the dough rise in a warm, draft-free area for the best results.
- Experiment with different dried fruits or nuts for unique flavors.
- Don’t skip the cooling step; it enhances the texture of your bread.
Equipment Needed
- Large mixing bowl: Any bowl will do, but a glass or stainless steel one is ideal.
- Floured surface: A clean countertop or cutting board works perfectly.
- Dutch oven: If you don’t have one, a heavy pot with a lid can substitute.
- Wire rack: A cooling rack is best, but a plate can work in a pinch.
Variations of Dutch Oven Cinnamon Raisin Bread
- Nutty Delight: Add chopped walnuts or pecans for a crunchy texture and nutty flavor.
- Fruit Fusion: Swap raisins for dried cranberries, apricots, or even chopped apples for a fruity twist.
- Spiced Up: Incorporate a pinch of nutmeg or cardamom along with the cinnamon for an extra layer of warmth.
- Whole Wheat Option: Use whole wheat flour instead of all-purpose for a heartier, more nutritious loaf.
- Vegan Version: Replace olive oil with melted coconut oil and use maple syrup instead of sugar for a vegan-friendly treat.
Serving Suggestions for Dutch Oven Cinnamon Raisin Bread
- Spread it: Slather with butter or cream cheese for a rich, creamy contrast.
- Pair with coffee: Enjoy a warm slice with your morning coffee or tea.
- Top it off: Add a drizzle of honey or maple syrup for extra sweetness.
- Serve with fruit: Fresh fruit or a fruit compote complements the flavors beautifully.
FAQs about Dutch Oven Cinnamon Raisin Bread
Can I use instant yeast instead of active dry yeast?
Absolutely! You can substitute instant yeast for active dry yeast in this Dutch Oven Cinnamon Raisin Bread recipe. Just mix it directly with the dry ingredients, skipping the frothing step.
How do I store leftover bread?
To keep your Dutch Oven Cinnamon Raisin Bread fresh, store it in an airtight container at room temperature for up to three days. You can also freeze slices for longer storage.
Can I make this bread without a Dutch oven?
Yes, you can! If you don’t have a Dutch oven, use a heavy pot with a lid or a baking sheet. Just be sure to create steam by adding a pan of water in the oven.
What can I serve with this bread?
This bread pairs wonderfully with butter, cream cheese, or even a drizzle of honey. It’s also delicious alongside a warm cup of coffee or tea!
Can I add more spices to the recipe?
Summarizing the Joy of Dutch Oven Cinnamon Raisin Bread
There’s a special kind of joy that comes from baking your own bread, especially when it’s this Dutch Oven Cinnamon Raisin Bread. The process is simple yet rewarding, allowing you to create something delicious with your own hands. Each slice is a warm reminder of home, perfect for sharing with family or savoring alone with a cup of tea. The delightful aroma fills your kitchen, wrapping you in comfort. Whether it’s breakfast or a snack, this bread brings smiles and satisfaction, making every moment spent in the kitchen worthwhile. Enjoy the love baked into every bite!
PrintDutch Oven Cinnamon Raisin Bread: Effortless Delight Awaits!
A delightful and easy-to-make cinnamon raisin bread baked in a Dutch oven, perfect for breakfast or a snack.
- Prep Time: 15 minutes
- Cook Time: 45 minutes
- Total Time: 2 hours
- Yield: 1 loaf
- Category: Bread
- Method: Baking
- Cuisine: American
- Diet: Vegetarian
Ingredients
- 3 cups all-purpose flour
- 1 cup raisins
- 1/4 cup sugar
- 1 tablespoon ground cinnamon
- 1 teaspoon salt
- 1 packet (2 1/4 teaspoons) active dry yeast
- 1 cup warm water
- 2 tablespoons olive oil
Instructions
- In a large bowl, combine warm water, sugar, and yeast. Let it sit for 5-10 minutes until frothy.
- Add olive oil, flour, salt, cinnamon, and raisins to the yeast mixture. Stir until a dough forms.
- Knead the dough on a floured surface for about 5-7 minutes until smooth.
- Place the dough in a greased bowl, cover with a cloth, and let it rise in a warm place for 1-2 hours until doubled in size.
- Preheat the oven to 450°F (232°C) and place the Dutch oven inside to heat up.
- Once the dough has risen, punch it down and shape it into a round loaf.
- Carefully remove the hot Dutch oven, place the dough inside, cover, and bake for 30 minutes.
- Remove the lid and bake for an additional 15-20 minutes until golden brown.
- Let the bread cool on a wire rack before slicing.
Notes
- For a sweeter bread, increase the sugar to 1/2 cup.
- Feel free to add nuts or other dried fruits for variation.
- Store leftovers in an airtight container for up to 3 days.