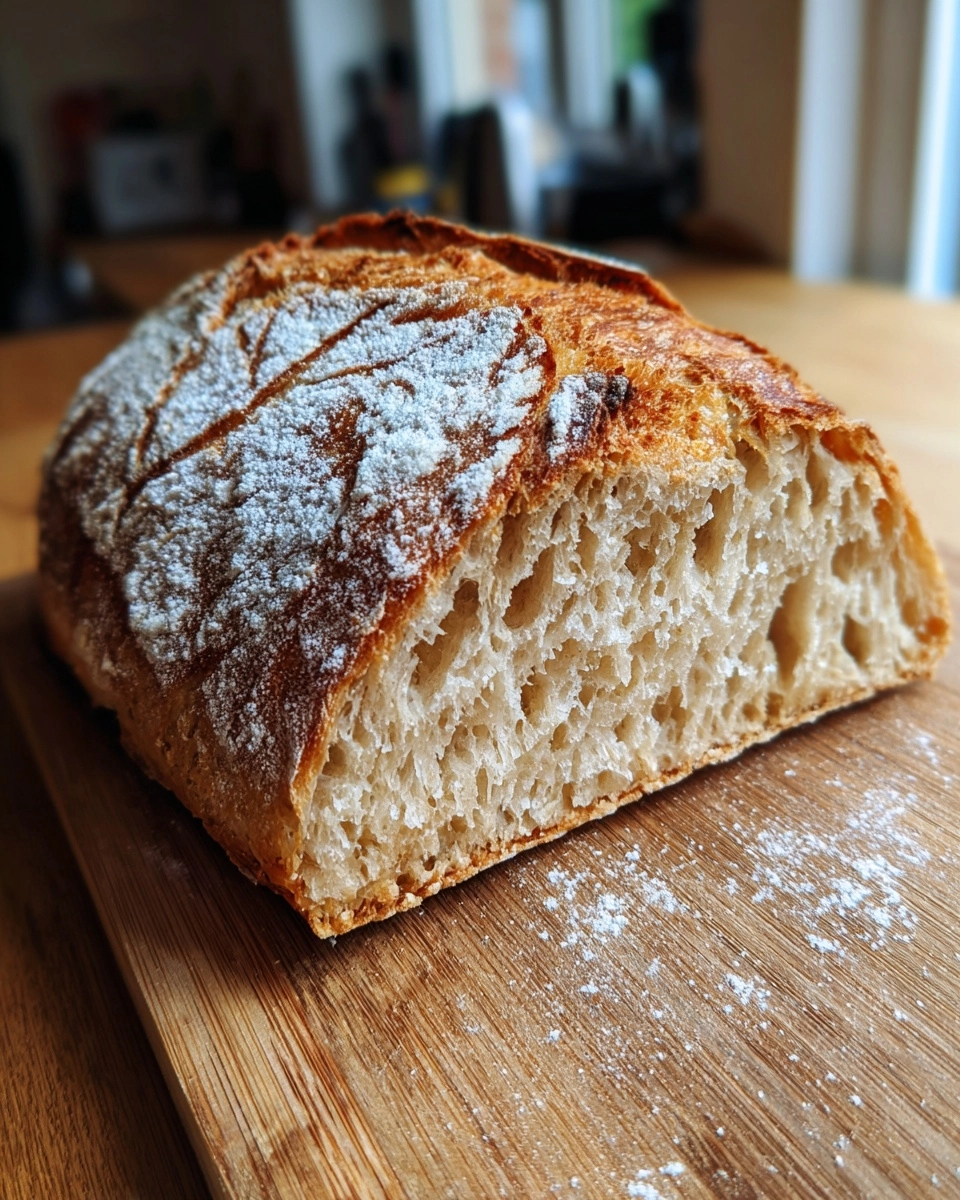
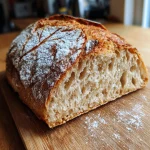
No-Knead Rye Bread
As a busy mom, I know how precious time can be, especially when it comes to cooking. That’s why I absolutely adore this No-Knead Rye Bread recipe! It’s like a warm hug on a chilly day, effortlessly bringing comfort and joy to my family’s table. With just a few simple ingredients and minimal hands-on time, you can create a delicious loaf that will impress your loved ones. Whether you’re looking for a quick solution for a busy day or a delightful addition to your weekend brunch, this bread is sure to become a favorite in your home.
Why You’ll Love This No-Knead Rye Bread
This No-Knead Rye Bread is a game-changer for anyone juggling a busy schedule. It requires minimal effort, allowing you to focus on other tasks while the dough does its magic. The taste? Oh, it’s simply divine! With a crusty exterior and a soft, flavorful interior, this bread elevates any meal. Plus, it’s a fantastic way to introduce whole grains into your family’s diet without the fuss. You’ll be amazed at how easy it is!
Ingredients for No-Knead Rye Bread
Gathering the right ingredients is the first step to creating your No-Knead Rye Bread masterpiece. Here’s what you’ll need:
- Rye Flour: This is the star of the show! It gives the bread its distinct flavor and hearty texture.
- All-Purpose Flour: A little bit of this helps balance the density of rye flour, making the bread lighter and fluffier.
- Warm Water: Essential for activating the yeast and bringing the dough together. Aim for a temperature that feels warm to the touch, but not hot.
- Salt: This enhances the flavor of the bread and helps control yeast activity, ensuring a perfect rise.
- Instant Yeast: A quick-acting yeast that makes the process easier. It doesn’t require proofing, so you can mix it right in!
For those who want to add a little extra flair, consider tossing in some caraway seeds. They add a lovely, aromatic flavor that pairs beautifully with rye. If you’re looking for a gluten-free option, you can experiment with gluten-free flour blends, but keep in mind the texture may vary.
All the exact measurements for these ingredients are at the bottom of the article, ready for you to print out and take to the kitchen!
How to Make No-Knead Rye Bread
Now that you have your ingredients ready, let’s dive into the simple steps to create your No-Knead Rye Bread. Trust me, it’s easier than you think!
Step 1: Mix the Dry Ingredients
Start by grabbing a large bowl. In it, combine the rye flour, all-purpose flour, salt, and instant yeast. Use a whisk or a fork to mix them well. This step is crucial as it ensures the yeast and salt are evenly distributed. The aroma of the rye flour will already start to fill your kitchen, and it’s just the beginning!
Step 2: Add Warm Water
Next, pour in the warm water. Stir the mixture with a wooden spoon or spatula until a shaggy dough forms. Don’t worry about making it perfect; it should look a bit messy. The warmth of the water helps activate the yeast, which is essential for that lovely rise. You’ll see the dough start to come together, and it’s a beautiful sight!
Step 3: Let the Dough Rest
Cover the bowl tightly with plastic wrap. Now, here comes the magic part! Let the dough rest at room temperature for 12 to 18 hours. Yes, you read that right! This long resting time allows the flavors to develop and the dough to rise. You can go about your day, and when you return, you’ll find a bubbly, risen dough waiting for you.
Step 4: Preheat the Oven
When you’re ready to bake, preheat your oven to 450°F (230°C). Place your Dutch oven inside to heat up as well. This step is key for achieving that perfect crust. The hot Dutch oven creates steam, which helps the bread rise beautifully. Just imagine the aroma wafting through your home as it heats up!
Step 5: Shape the Dough
Once the dough has rested and risen, carefully transfer it onto a floured surface. With floured hands, shape it into a ball. Don’t overwork it; just a gentle touch is all it needs. If you’re using parchment paper, place the dough on it for easier transfer to the Dutch oven. This little trick saves you from a sticky situation!
Step 6: Bake the Bread
Now, it’s time for the grand finale! Carefully remove the hot Dutch oven from the oven. Place the dough inside, cover it, and bake for 30 minutes. After that, remove the lid and bake for an additional 15 to 20 minutes until it’s golden brown. The sound of the crust crackling as it bakes is music to my ears. Once it’s done, let it cool on a wire rack before slicing. Your No-Knead Rye Bread is ready to be enjoyed!
Tips for Success
- Use a kitchen scale for precise measurements, especially with flour.
- Let the dough rest in a warm spot to encourage rising.
- Don’t skip the preheating step; it’s crucial for a crispy crust.
- Experiment with add-ins like seeds or herbs for unique flavors.
- Store leftover bread in a paper bag to keep the crust crunchy.
Equipment Needed
- Large Bowl: Any mixing bowl will do, but a glass or stainless steel one is ideal.
- Wooden Spoon or Spatula: Use any sturdy utensil for mixing; a silicone spatula works great too.
- Plastic Wrap: A clean kitchen towel can substitute for covering the bowl.
- Dutch Oven: If you don’t have one, a heavy oven-safe pot with a lid will work.
- Wire Rack: A cooling rack is best, but a plate can serve in a pinch.
Variations
- Herbed Rye Bread: Add dried herbs like rosemary or thyme for a fragrant twist.
- Seeded Rye Bread: Mix in sunflower seeds, flaxseeds, or sesame seeds for added texture and nutrition.
- Sweet Rye Bread: Incorporate a tablespoon of honey or molasses for a hint of sweetness.
- Gluten-Free Option: Use a gluten-free flour blend, but be prepared for a different texture.
- Cheesy Rye Bread: Fold in shredded cheese like cheddar or feta for a savory delight.
Serving Suggestions
- Pair your No-Knead Rye Bread with a hearty soup, like split pea or minestrone, for a comforting meal.
- Spread a layer of creamy butter or herbed cream cheese for a delightful snack.
- Serve alongside a fresh salad topped with vinaigrette for a light lunch.
- Toast slices for breakfast and top with avocado or poached eggs.
- Present the bread on a rustic wooden board for a charming touch at gatherings.
FAQs about No-Knead Rye Bread
As you embark on your No-Knead Rye Bread journey, you might have a few questions. Here are some common queries I’ve encountered, along with helpful answers to guide you along the way!
Can I use regular yeast instead of instant yeast?
Absolutely! You can use regular active dry yeast, but you’ll need to proof it first. Just mix it with warm water and a pinch of sugar, letting it sit for about 5-10 minutes until it’s bubbly before adding it to your dry ingredients.
How do I know when the bread is done baking?
The bread is done when it’s golden brown and sounds hollow when tapped on the bottom. You can also use a thermometer; the internal temperature should reach around 200°F (93°C).
Can I add other flours to the recipe?
Yes! You can experiment with different flours, but keep in mind that the texture and flavor may change. Just remember to adjust the water content as needed, since different flours absorb moisture differently.
How should I store my No-Knead Rye Bread?
To keep your bread fresh, store it in a paper bag at room temperature. This helps maintain the crust. If you want to keep it longer, slice it and freeze it in an airtight container.
Can I make this bread in advance?
Definitely! You can prepare the dough the night before and bake it the next day. Just remember to let it rest for the full 12-18 hours for the best flavor and texture.
Summarizing the Joy of No-Knead Rye Bread
There’s something truly magical about baking your own No-Knead Rye Bread. The aroma that fills your kitchen, the anticipation as it rises, and the satisfaction of slicing into a warm loaf are experiences that bring joy to any home. This recipe not only saves you time but also creates a delicious centerpiece for family meals. Each bite is a reminder of the love and care you put into it. So, roll up your sleeves, embrace the simplicity, and let this bread become a cherished part of your culinary adventures. Your family will thank you for it!
PrintNo-Knead Rye Bread: Effortless Recipe for Delicious Results!
A simple and effortless recipe for making delicious no-knead rye bread at home.
- Prep Time: 15 minutes
- Cook Time: 45 minutes
- Total Time: 12-18 hours (including resting time)
- Yield: 1 loaf
- Category: Bread
- Method: Baking
- Cuisine: European
- Diet: Vegetarian
Ingredients
- 3 cups rye flour
- 1 cup all-purpose flour
- 1 ½ cups warm water
- 1 teaspoon salt
- ½ teaspoon instant yeast
Instructions
- In a large bowl, mix the rye flour, all-purpose flour, salt, and instant yeast.
- Add warm water and stir until a shaggy dough forms.
- Cover the bowl with plastic wrap and let it rest at room temperature for 12-18 hours.
- After resting, the dough should be bubbly and have risen significantly.
- Preheat your oven to 450°F (230°C) and place a Dutch oven inside to heat up.
- Carefully transfer the dough onto a floured surface and shape it into a ball.
- Once the Dutch oven is hot, place the dough inside (you can use parchment paper for easier transfer).
- Cover and bake for 30 minutes, then remove the lid and bake for an additional 15-20 minutes until golden brown.
- Let the bread cool on a wire rack before slicing.
Notes
- For a more intense flavor, consider adding caraway seeds.
- Store the bread in a paper bag to maintain its crust.
- This bread is best enjoyed fresh but can be frozen for later use.