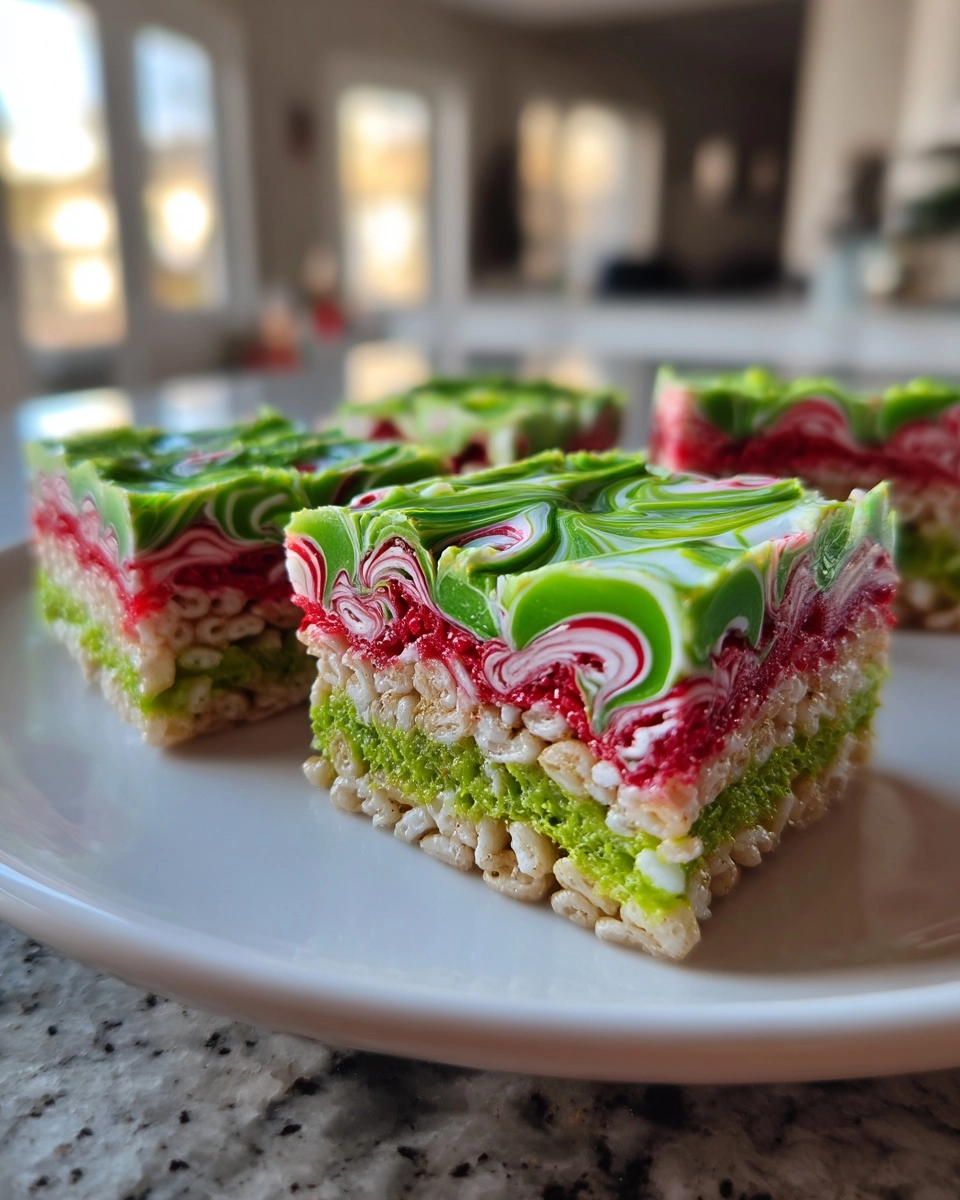
Grinch Candy Bar
As the holiday season approaches, I find myself searching for quick and delightful treats that bring joy to my family. The Grinch Candy Bar is just that—a festive, no-bake dessert that’s as fun to make as it is to eat! With its vibrant green color and sweet toppings, it’s sure to impress your loved ones. Plus, it’s a fantastic solution for busy days when you want to whip up something special without spending hours in the kitchen. Let’s unwrap the holiday cheer together with this easy and delicious recipe!
Why You’ll Love This Grinch Candy Bar
This Grinch Candy Bar is a holiday miracle wrapped in vibrant green! It’s incredibly easy to make, taking just 25 minutes from start to finish. The delightful combination of sweet chocolate, crunchy peppermint, and fluffy marshmallows creates a taste sensation that will have everyone coming back for more. Plus, it’s a no-bake treat, so you can spend less time in the kitchen and more time enjoying the festivities with your loved ones!
Ingredients for Grinch Candy Bar
Gathering the right ingredients is half the fun! Here’s what you’ll need to create your festive Grinch Candy Bar:
- Green candy melts: These are the star of the show, giving your candy bar that signature Grinchy hue.
- White chocolate chips: They add a creamy sweetness that balances the flavors beautifully.
- Crushed peppermint candies: These little gems bring a refreshing crunch and a burst of holiday spirit.
- Mini marshmallows: Soft and fluffy, they add a delightful texture and sweetness.
- Red candy melts: Perfect for creating festive decorations, like hearts, to top off your treat.
- Chopped nuts (optional): If you love a bit of crunch, nuts can add a lovely contrast to the sweetness.
Feel free to customize your Grinch Candy Bar with your favorite toppings! You can even swap out the peppermint for other candies if you prefer. For exact measurements, check the bottom of the article where you can find everything available for printing.
How to Make Grinch Candy Bar
Now, let’s dive into the fun part—making your Grinch Candy Bar! This process is simple and quick, perfect for busy days. Follow these steps, and you’ll have a festive treat ready in no time!
Step 1: Melt the Green Candy Melts
Start by placing the green candy melts in a microwave-safe bowl. Microwave them in 30-second intervals, stirring in between. This helps prevent burning. Keep going until the melts are smooth and glossy. It’s like watching a little green magic happen!
Step 2: Spread the Melted Candy
Once your green candy is melted, pour it onto a parchment-lined baking sheet. Use a spatula to spread it evenly. Aim for a thickness of about half an inch. This will give you a nice, sturdy candy bar that’s easy to break apart later.
Step 3: Add Toppings
Now comes the fun part! Sprinkle the crushed peppermint candies and mini marshmallows over the melted green candy. Be generous! The peppermint adds a delightful crunch, while the marshmallows bring a fluffy sweetness. It’s a festive explosion of flavor!
Step 4: Drizzle White Chocolate
Next, melt the white chocolate chips in the microwave, just like you did with the green melts. Once melted, drizzle the white chocolate over the top of your candy bar. This adds a creamy layer that beautifully complements the other flavors.
Step 5: Decorate with Red Candy Melts
For a finishing touch, melt the red candy melts. Use a piping bag to create small hearts or other decorations on top. This step is where you can let your creativity shine! It’s like giving your Grinch Candy Bar a festive outfit.
Step 6: Cool and Break
Finally, let your candy bar cool completely. This usually takes about 30 minutes at room temperature. Once it’s set, break it into pieces. You’ll have a colorful, delicious treat that’s perfect for sharing—or keeping all to yourself!
Tips for Success
- Make sure to stir the candy melts frequently to avoid burning.
- Use a spatula to spread the melted candy evenly for a uniform thickness.
- Customize toppings based on your family’s favorites for a personal touch.
- Let the candy bar cool completely before breaking it to avoid a melty mess.
- Store leftovers in an airtight container to keep them fresh and tasty.
Equipment Needed
- Microwave-safe bowl: Any heat-resistant bowl will do, even a glass one.
- Parchment paper: If you don’t have this, wax paper works as a substitute.
- Spatula: A silicone spatula is great for spreading, but any spatula will work.
- Piping bag: You can use a plastic sandwich bag with a corner snipped off.
Variations
- Nut-Free Option: Omit the chopped nuts to make this treat safe for those with nut allergies.
- Dark Chocolate Drizzle: Swap white chocolate for dark chocolate for a richer flavor.
- Vegan Version: Use dairy-free chocolate chips and ensure your candy melts are vegan-friendly.
- Flavor Infusions: Add a splash of peppermint extract to the melted green candy for an extra minty kick.
- Fruit Toppings: Try adding dried cranberries or chopped dried apricots for a fruity twist.
Serving Suggestions
- Pair your Grinch Candy Bar with a warm cup of hot cocoa for a cozy treat.
- Serve it alongside festive cookies for a delightful dessert platter.
- Wrap pieces in colorful cellophane for a charming holiday gift.
- Display on a festive platter with holiday-themed decorations for a cheerful presentation.
FAQs about Grinch Candy Bar
Can I make the Grinch Candy Bar ahead of time?
Absolutely! This festive treat can be made a few days in advance. Just store it in an airtight container to keep it fresh. It’s perfect for holiday gatherings!
What can I use instead of candy melts?
If you can’t find candy melts, you can use chocolate chips or even white chocolate. Just remember to melt them carefully to avoid burning.
How do I store leftover Grinch Candy Bar?
Store any leftovers in an airtight container at room temperature. They should stay fresh for up to a week, but I doubt they’ll last that long!
Can I customize the toppings?
Definitely! Feel free to get creative with your toppings. You can use sprinkles, nuts, or even dried fruits to make it your own.
Is the Grinch Candy Bar suitable for kids?
Yes! This treat is kid-friendly and perfect for holiday parties. Just keep an eye on the little ones with the crushed peppermint, as it can be a bit crunchy!
Summarizing the Joy of Grinch Candy Bar
Creating the Grinch Candy Bar is more than just making a treat; it’s about sharing joy and laughter with family and friends. The vibrant colors and delightful flavors bring a festive spirit to any gathering. Each bite is a reminder of the magic of the holidays, evoking smiles and warm memories. Whether you’re enjoying it with a cozy cup of cocoa or gifting it to loved ones, this candy bar is sure to spread cheer. So, roll up your sleeves, gather your ingredients, and let the holiday fun begin with this delightful creation!
PrintGrinch Candy Bar: Unwrap Holiday Cheer in Every Bite!
A festive and delightful treat inspired by the Grinch, perfect for holiday celebrations.
- Prep Time: 15 minutes
- Cook Time: 10 minutes
- Total Time: 25 minutes
- Yield: 12 servings
- Category: Dessert
- Method: No-Bake
- Cuisine: American
- Diet: Vegetarian
Ingredients
- 1 cup of green candy melts
- 1 cup of white chocolate chips
- 1/2 cup of crushed peppermint candies
- 1/2 cup of mini marshmallows
- 1/4 cup of red candy melts
- 1/4 cup of chopped nuts (optional)
Instructions
- Melt the green candy melts in a microwave-safe bowl, stirring every 30 seconds until smooth.
- Pour the melted green candy onto a parchment-lined baking sheet and spread it evenly.
- Sprinkle crushed peppermint candies and mini marshmallows over the melted green candy.
- Melt the white chocolate chips and drizzle over the top.
- Melt the red candy melts and use a piping bag to create small hearts or decorations on top.
- Let the candy bar cool completely before breaking it into pieces.
Notes
- Store in an airtight container for up to a week.
- Feel free to customize with your favorite toppings.
- For a more festive look, add edible glitter or sprinkles.