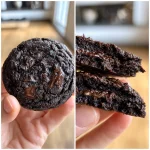
Witch Finger Cookies
As Halloween approaches, I find myself searching for fun and spooky treats to delight my family and friends. That’s where these Witch Finger Cookies come in! They’re not just delicious almond-flavored cookies; they’re a playful way to celebrate the season. Perfect for busy moms like us, this recipe is quick and easy, making it a fantastic solution for last-minute gatherings or school parties. Plus, who wouldn’t want to impress their loved ones with cookies that look like creepy fingers? Let’s dive into this delightful baking adventure together!
Why You’ll Love This Witch Finger Cookies
These Witch Finger Cookies are a breeze to whip up, making them perfect for busy days. With just a handful of ingredients, you can create a spooky treat that’s sure to be a hit. The almond flavor adds a delightful twist, while their eerie appearance sparks joy and laughter. Plus, they’re a fantastic way to get the kids involved in the kitchen, turning baking into a fun Halloween tradition!
Ingredients for Witch Finger Cookies
To create these delightful Witch Finger Cookies, you’ll need a few simple ingredients that come together to form a spooky treat. Here’s what you’ll need:
- Unsalted butter: This is the base of your cookies, providing richness and flavor. Make sure it’s softened for easy mixing.
- Powdered sugar: This sweetener gives the cookies a light, melt-in-your-mouth texture. It’s perfect for achieving that delicate sweetness.
- Egg: The egg acts as a binder, helping to hold everything together while adding moisture and richness.
- Vanilla extract: A splash of vanilla enhances the flavor, making your cookies taste even more delicious.
- All-purpose flour: This is the main structure of your cookies. It gives them that classic cookie texture.
- Baking powder: This leavening agent helps the cookies rise slightly, giving them a nice, soft bite.
- Salt: Just a pinch of salt balances the sweetness and enhances the overall flavor.
- Whole almonds: These serve as the creepy “fingernails” on your cookies, adding a fun and spooky touch.
- Red food coloring: This is optional, but it adds a gory, bloody effect that makes your cookies even more festive for Halloween.
For exact measurements, check the bottom of the article where you can find everything listed for easy printing. Happy baking!
How to Make Witch Finger Cookies
Step 1: Preheat the Oven
Preheating your oven to 350°F (175°C) is crucial for baking cookies. It ensures that the cookies bake evenly and achieve that perfect golden color. If you skip this step, your cookies might spread too much or not rise properly, leading to a less-than-ideal texture.
Step 2: Cream the Butter and Sugar
In a large bowl, cream together the softened unsalted butter and powdered sugar until the mixture is light and fluffy. This process incorporates air, giving your cookies a tender texture. Aim for a smooth consistency, as this will help your cookies rise beautifully. Don’t rush this step; it’s key to achieving that melt-in-your-mouth quality!
Step 3: Add Egg and Vanilla
Next, beat in the egg and vanilla extract. The egg acts as a binder, holding everything together, while the vanilla adds a delightful flavor. This combination enhances the overall taste of your Witch Finger Cookies, making them irresistible!
Step 4: Combine Dry Ingredients
In a separate bowl, whisk together the all-purpose flour, baking powder, and salt. Mixing these dry ingredients ensures that the baking powder is evenly distributed, which is essential for the cookies to rise properly. This step helps create a uniform texture throughout your spooky treats.
Step 5: Mix Wet and Dry Ingredients
Gradually add the dry mixture to the wet ingredients, stirring gently until just combined. Be careful not to overwork the dough, as this can lead to tough cookies. You want a soft, pliable dough that’s easy to shape into those creepy fingers!
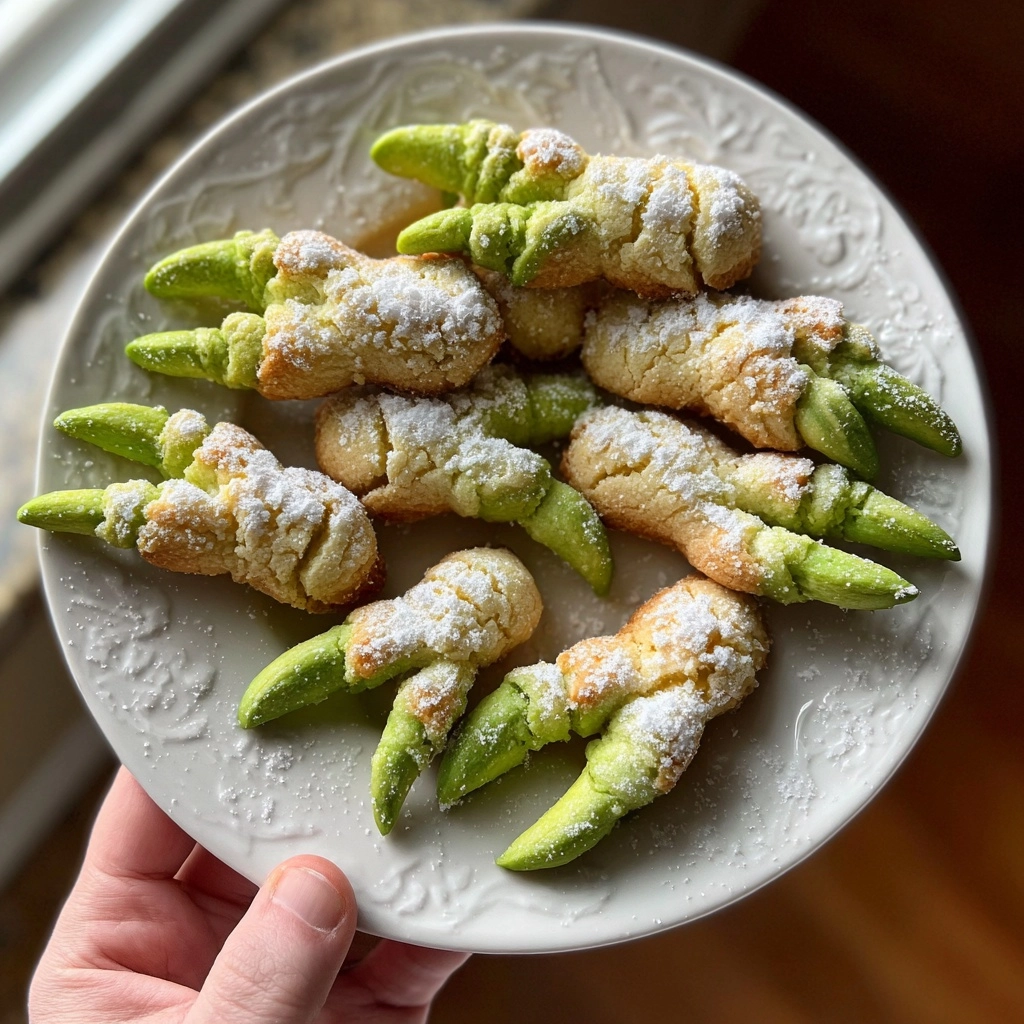
Step 6: Shape the Cookies
Now comes the fun part! Take small portions of dough and roll them into finger-like shapes, about 3 inches long. Make sure they’re uniform in size for even baking. You can use your hands to create the curves and bends, giving them that authentic finger look. It’s a great way to get creative!
Step 7: Add Almonds and Create Knuckles
Press a whole almond into one end of each cookie to resemble a fingernail. Then, use a knife to create knuckle indentations along the length of the cookie. This adds to the spooky effect and makes your Witch Finger Cookies look even more realistic!
Step 8: Brush with Red Food Coloring
For that gory touch, brush the cookies with red food coloring. You can use a small brush or even a cotton swab for precision. This step is optional, but it definitely enhances the Halloween vibe, making your cookies look delightfully creepy!
Step 9: Bake the Cookies
Place your cookies on a baking sheet lined with parchment paper and bake for 15-20 minutes. Keep an eye on them; they should be lightly golden around the edges. To check for doneness, gently press the top of a cookie; it should spring back slightly.
Step 10: Cool and Serve
Once baked, let the cookies cool on the baking sheet for a few minutes before transferring them to a wire rack. Cooling is essential, as it allows the cookies to firm up. Store any leftovers in an airtight container for up to a week, if they last that long!
Tips for Success
- Make sure your butter is at room temperature for easy creaming.
- Chill the dough for 15 minutes if it feels too soft to shape.
- Use a toothpick to create more detailed knuckle lines for added spookiness.
- Experiment with different nut toppings for a unique twist.
- Don’t skip the cooling step; it helps maintain the cookie’s shape.
Equipment Needed
- Mixing bowls: A large bowl for mixing and a smaller one for dry ingredients. Any size will do!
- Electric mixer: A hand mixer works great, but a whisk can do the job too if you’re feeling strong!
- Baking sheet: Use a standard baking sheet lined with parchment paper for easy cleanup.
- Cookie scoop: Optional, but it helps with uniform cookie sizes. A tablespoon works just as well!
Variations
- Chocolate Witch Finger Cookies: Add cocoa powder to the dough for a chocolatey twist. It pairs wonderfully with the almond flavor!
- Gluten-Free Option: Substitute all-purpose flour with a gluten-free flour blend to make these cookies suitable for gluten-sensitive friends.
- Nut-Free Version: Replace almonds with sunflower seeds or omit them entirely for a nut-free treat that’s still spooky!
- Spiced Witch Fingers: Add a pinch of cinnamon or nutmeg to the dough for a warm, autumnal flavor that complements the almond.
- Decorative Icing: Use royal icing to pipe additional spooky designs on the cookies for a fun decorating activity with kids!
Serving Suggestions
- Pair your Witch Finger Cookies with a spooky punch or apple cider for a festive drink.
- Serve them on a black platter or a Halloween-themed tablecloth for an eye-catching presentation.
- For added fun, place the cookies in a cauldron or witch’s hat for a whimsical touch.
- Consider adding gummy worms or candy eyeballs around the cookies for extra Halloween flair!
FAQs about Witch Finger Cookies
Can I make Witch Finger Cookies ahead of time?
Absolutely! You can prepare the dough in advance and store it in the fridge for up to 3 days. Just shape the cookies and bake them when you’re ready to serve. This makes it a great option for busy days leading up to Halloween!
How do I store leftover Witch Finger Cookies?
Store your cookies in an airtight container at room temperature for up to a week. If you want to keep them longer, you can freeze them for up to a month. Just make sure to separate layers with parchment paper to prevent sticking!
Can I use different nuts for the fingernails?
Yes! While almonds give that classic look, you can use pecans or hazelnuts for a different flavor and appearance. Just make sure they’re similar in size to maintain the spooky effect!
What if I don’t have red food coloring?
No worries! You can use raspberry or strawberry jam to create a bloody effect. Just brush it on after baking for a delicious twist that adds flavor and fun!
Are Witch Finger Cookies suitable for kids?
Definitely! These cookies are a hit with kids, both for their taste and their spooky appearance. Just keep an eye on the almonds if you have little ones with nut allergies!
Summarizing the Joy of Witch Finger Cookies
Making Witch Finger Cookies is more than just baking; it’s about creating memories with your loved ones. The laughter shared while shaping the dough and the excitement of decorating with red food coloring brings everyone together. These cookies not only taste delicious but also add a playful touch to your Halloween festivities. Whether you’re hosting a spooky gathering or simply enjoying a cozy night in, these cookies are sure to spark joy and delight. So, roll up your sleeves, gather your family, and let the magic of Halloween fill your kitchen with fun and creativity!
PrintWitch Finger Cookies: Spook Up Your Halloween Treats!

Witch Finger Cookies are spooky, almond-flavored cookies shaped like fingers, perfect for Halloween festivities.
- Prep Time: 20 minutes
- Cook Time: 20 minutes
- Total Time: 40 minutes
- Yield: 24 cookies
- Category: Dessert
- Method: Baking
- Cuisine: American
- Diet: Vegetarian
Ingredients
- 1 cup unsalted butter, softened
- 1 cup powdered sugar
- 1 egg
- 1 teaspoon vanilla extract
- 2 1/4 cups all-purpose flour
- 1 teaspoon baking powder
- 1/2 teaspoon salt
- 1 cup whole almonds
- Red food coloring
Instructions
- Preheat the oven to 350°F (175°C).
- In a large bowl, cream together the butter and powdered sugar until smooth.
- Beat in the egg and vanilla extract.
- In another bowl, whisk together the flour, baking powder, and salt.
- Gradually add the dry ingredients to the wet mixture, mixing until combined.
- Shape the dough into finger-like shapes, about 3 inches long.
- Press an almond into one end of each cookie to resemble a fingernail.
- Use a knife to create knuckle indentations on the cookies.
- Brush the cookies with red food coloring to give them a bloody appearance.
- Bake for 15-20 minutes or until lightly golden.
- Let cool before serving.
Notes
- For a more intense flavor, add almond extract.
- Store in an airtight container for up to a week.
- These cookies can be made ahead of time and frozen.