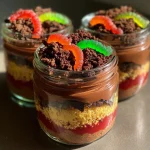
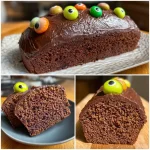
Gluten-Free Halloween Cupcakes
As the leaves turn and the air gets crisp, I can’t help but get excited about Halloween. It’s that magical time of year when creativity runs wild, and treats take center stage. These Gluten-Free Halloween Cupcakes are not just a delicious dessert; they’re a quick solution for busy moms like us who want to impress our loved ones without spending hours in the kitchen. With a simple recipe and festive sprinkles, you can whip up a batch that will have everyone raving. Trust me, these cupcakes will make your Halloween celebrations even sweeter!
Why You’ll Love This Gluten-Free Halloween Cupcakes
These Gluten-Free Halloween Cupcakes are a dream come true for busy moms and professionals. They’re quick to make, taking just 35 minutes from start to finish. The rich chocolate flavor paired with festive sprinkles makes them a hit with kids and adults alike. Plus, they’re gluten-free, so everyone can enjoy them without worry. You’ll love how easy they are to whip up, leaving you more time for Halloween fun!
Ingredients for Gluten-Free Halloween Cupcakes
Gathering the right ingredients is the first step to creating these delightful Gluten-Free Halloween Cupcakes. Here’s what you’ll need:
- Gluten-free all-purpose flour: This is the base of our cupcakes, providing structure without the gluten.
- Granulated sugar: Sweetness is key! It helps balance the rich cocoa flavor.
- Unsweetened cocoa powder: This adds a deep chocolate flavor that makes these cupcakes irresistible.
- Baking powder: A leavening agent that helps the cupcakes rise and become fluffy.
- Baking soda: Works alongside baking powder for that perfect lift.
- Salt: Just a pinch enhances all the flavors and balances the sweetness.
- Large eggs: They bind the ingredients together and add moisture.
- Vegetable oil: This keeps the cupcakes moist and tender.
- Vanilla extract: A splash of vanilla adds warmth and depth to the flavor.
- Milk (or dairy-free alternative): This adds moisture; feel free to use almond or oat milk for a dairy-free option.
- Halloween-themed sprinkles: These are the fun part! They add a festive touch and make the cupcakes visually appealing.
For exact measurements, check the bottom of the article where you can find everything listed for easy printing. Happy baking!
How to Make Gluten-Free Halloween Cupcakes
Step 1: Preheat the Oven
First things first, preheat your oven to 350°F (175°C). This step is crucial because it ensures even baking. While the oven heats up, line your cupcake pan with festive liners. This not only makes cleanup easier but also adds a fun touch to your Gluten-Free Halloween Cupcakes.
Step 2: Mix Dry Ingredients
In a large bowl, whisk together the gluten-free flour, sugar, cocoa powder, baking powder, baking soda, and salt. This step is vital as it evenly distributes the leavening agents and flavors. A well-mixed dry blend helps your cupcakes rise beautifully, giving them that light and fluffy texture we all love. Plus, it’s a great way to get your kids involved!
Step 3: Combine Wet Ingredients
In another bowl, mix the eggs, vegetable oil, vanilla extract, and milk until well combined. This step is important because it creates a smooth batter. The wet ingredients add moisture and richness to your cupcakes. Don’t rush this part; take your time to ensure everything is blended perfectly. It makes a world of difference!
Step 4: Combine Wet and Dry Mixtures
Now, pour the wet ingredients into the dry mixture. Gently mix until just combined. Be careful not to overmix, as this can lead to dense cupcakes. A few lumps are perfectly fine! This step is where the magic happens, transforming your ingredients into a delicious batter ready for baking.
Step 5: Add Sprinkles
Here comes the fun part! Fold in the Halloween-themed sprinkles. Not only do they add a pop of color, but they also bring a festive spirit to your Gluten-Free Halloween Cupcakes. Plus, who doesn’t love a little extra crunch and sweetness? It’s like a party in every bite!
Step 6: Fill Cupcake Liners
Carefully divide the batter evenly among the cupcake liners. A handy tip is to use an ice cream scoop for even distribution. This ensures that all your cupcakes bake uniformly, giving you that perfect rise and shape. Plus, it makes the process quick and easy!
Step 7: Bake the Cupcakes
Pop the cupcake pan into the preheated oven and bake for 18-20 minutes. To check for doneness, insert a toothpick into the center of a cupcake. If it comes out clean, they’re ready! This step is crucial for achieving that perfect moist texture without being undercooked.
Step 8: Cool and Decorate
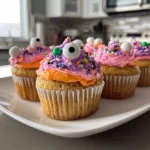
Once baked, let the cupcakes cool in the pan for about 5 minutes before transferring them to a wire rack. This cooling process is essential for preventing sogginess. Once completely cool, unleash your creativity! Decorate with frosting, more sprinkles, or even spooky decorations. Your Gluten-Free Halloween Cupcakes are now ready to impress!
Tips for Success
- Always measure your gluten-free flour accurately for the best results.
- Use room temperature ingredients for a smoother batter.
- Don’t skip the cooling step; it helps maintain the cupcakes’ texture.
- Experiment with different sprinkles for various occasions.
- Store any leftovers in an airtight container to keep them fresh.
Equipment Needed
- Cupcake pan: A standard 12-cup pan works perfectly; silicone pans are a fun alternative.
- Mixing bowls: Use at least two—one for dry and one for wet ingredients.
- Whisk: A simple whisk is great, but an electric mixer can save time.
- Measuring cups and spoons: Essential for accuracy in baking.
- Cooling rack: Helps cool cupcakes evenly; a plate can work in a pinch.
Variations for Gluten-Free Halloween Cupcakes
- Chocolate Chip Delight: Add a cup of gluten-free chocolate chips to the batter for an extra chocolatey treat.
- Spooky Pumpkin Spice: Substitute half of the cocoa powder with pumpkin puree and add a teaspoon of pumpkin spice for a seasonal twist.
- Nutty Flavor: Incorporate finely chopped nuts like walnuts or pecans for added texture and flavor.
- Fruity Fun: Mix in a cup of mashed bananas or applesauce for a moist, fruity cupcake.
- Dairy-Free Option: Use coconut oil instead of vegetable oil and a dairy-free milk alternative to keep it completely dairy-free.
- Vegan Version: Replace eggs with flaxseed meal (1 tablespoon flaxseed meal + 2.5 tablespoons water = 1 egg) and use a dairy-free milk alternative.
Serving Suggestions for Gluten-Free Halloween Cupcakes
- Spooky Drinks: Pair with pumpkin spice lattes or apple cider for a festive touch.
- Creative Presentation: Arrange cupcakes on a Halloween-themed platter for a fun display.
- Ice Cream Delight: Serve with a scoop of vanilla or chocolate ice cream for an indulgent treat.
- Festive Toppings: Top with whipped cream and additional sprinkles for extra flair.
FAQs about Gluten-Free Halloween Cupcakes
Can I use regular flour instead of gluten-free flour?
While you can use regular flour, this recipe is specifically designed for gluten-free baking. If you’re not gluten-sensitive, feel free to experiment, but the texture and taste may differ.
How can I make these cupcakes dairy-free?
To make these Gluten-Free Halloween Cupcakes dairy-free, simply substitute regular milk with a dairy-free alternative like almond or oat milk. You can also use coconut oil instead of vegetable oil for added richness.
What can I use instead of eggs for a vegan version?
You can replace each egg with 1 tablespoon of flaxseed meal mixed with 2.5 tablespoons of water. Let it sit for a few minutes until it thickens. This will help bind your ingredients just like eggs do!
How should I store leftover cupcakes?
Store any leftover cupcakes in an airtight container at room temperature for up to three days. If you want to keep them longer, consider freezing them. Just make sure to wrap them well!
Can I make these cupcakes ahead of time?
Absolutely! You can bake the cupcakes a day in advance. Just wait until they cool completely before storing them. Decorate them on the day of your Halloween celebration for the best presentation!
Summarizing the Joy of Gluten-Free Halloween Cupcakes
There’s something truly magical about baking these Gluten-Free Halloween Cupcakes. The aroma of chocolate fills the air, and the vibrant sprinkles bring smiles to faces young and old. Each bite is a celebration of flavor and creativity, making them perfect for gatherings or cozy family nights. Plus, knowing that everyone can indulge without worry adds to the joy. Whether you’re a busy mom or a professional, these cupcakes are a delightful way to embrace the spirit of Halloween. So, roll up your sleeves, gather your loved ones, and let the baking fun begin!
PrintGluten-Free Halloween Cupcakes That Wow Your Guests!
Delicious and festive gluten-free cupcakes perfect for Halloween celebrations.
- Prep Time: 15 minutes
- Cook Time: 20 minutes
- Total Time: 35 minutes
- Yield: 12 cupcakes
- Category: Dessert
- Method: Baking
- Cuisine: American
- Diet: Gluten Free
Ingredients
- 1 ½ cups gluten-free all-purpose flour
- 1 cup granulated sugar
- ½ cup unsweetened cocoa powder
- 1 tsp baking powder
- ½ tsp baking soda
- ¼ tsp salt
- 2 large eggs
- ½ cup vegetable oil
- 1 tsp vanilla extract
- 1 cup milk (or dairy-free alternative)
- 1 cup Halloween-themed sprinkles
Instructions
- Preheat the oven to 350°F (175°C) and line a cupcake pan with liners.
- In a large bowl, whisk together the gluten-free flour, sugar, cocoa powder, baking powder, baking soda, and salt.
- In another bowl, mix the eggs, vegetable oil, vanilla extract, and milk until well combined.
- Pour the wet ingredients into the dry ingredients and mix until just combined.
- Fold in the Halloween-themed sprinkles.
- Divide the batter evenly among the cupcake liners.
- Bake for 18-20 minutes or until a toothpick inserted in the center comes out clean.
- Let the cupcakes cool completely before decorating.
Notes
- For a dairy-free version, use a dairy-free milk alternative.
- Feel free to use different themed sprinkles for other occasions.
- Store leftovers in an airtight container for up to 3 days.